Install Instructions For ComfortBilt Pellet Stove Aftermarket Convection Blower
1. Unplug stove
2. Remove rear and side access panels to get to the blower mounting bracket
3. Remove blower from stove by removing the 2 or 4 (depending upon model) 10mm hex bolts that secure the mounting from into the stove.
4. Flip the frame and motor on it’s side to reveal the 6 rivets binding the blower and frame together, there are 6 rivets. Using the 7/32” drill bit provided, drill off the head of the rivet from the bottom of the mounting frame.
5. After all 6 rivets have been broken free, place something long and rigid under the motor and gently pry the motor away from the frame.
6. Save the gasket as it will be reused.
7. Pre-drill all of the mounting holes in the frame by screwing in a screw. Do all 6 and then back out the screws about ½ way and then hang your gasket from the protruding screw ends.
8. Starting in the center, align the top hole of the blower frame with the top center hole on the blower and send in the screw until the screw grabs the metal of the blower and starts to pull it down flat. Do this with the remaining screws until each screw is about 80% tight, then fasten all of the screws down tight until the blower is flush against the frame. NOTE: TIGHTENING ANY 1 SCREW PRIOR TO SETTING ALL OF THE SCREWS INTO THE BLOWER WILL SKEW THE BLOWER AND HOLES WILL NOT ALIGN, THIS SI WHY WE DO THE PARTIALLY UNTIL THEY ARE ALL SEATED.
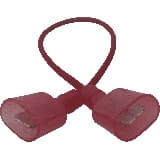
9. The red wire that is pre-attached to the blower frame is a ground wire extension. Use this wire to connect your green ground wire which should already be attached somewhere to the stove frame.


