Skip to main content
Product title:

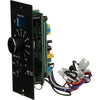
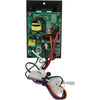
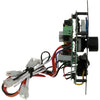
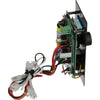
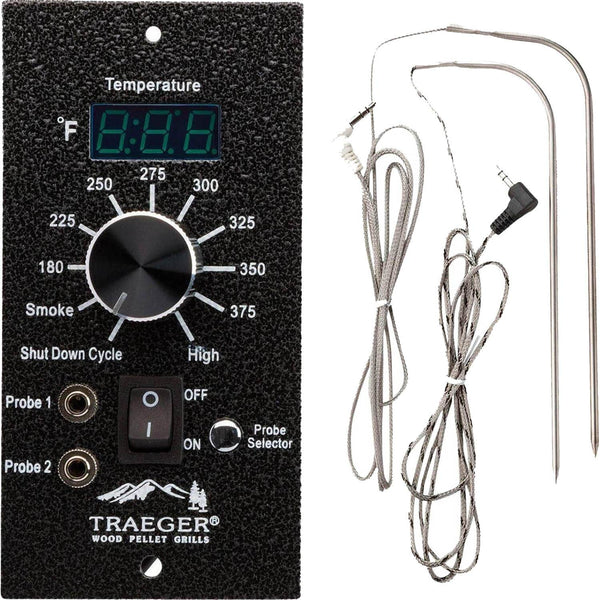
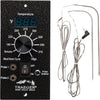
Traeger Digital Pro Controller with Meat Probes: BAC365

Product rating:
Product price:
$189.99
Product SKU ! BAC365-OEM
Product MPN ! BAC365
Product availability: In Stock
Bullet point features

Frequently Bought Together

Total Price: $220.97

Description

Take Your Traeger To The Next Level With A Pro Series Digital Controller.

Key Features:

  • Control temperature to within +/-15 degrees F
  • Simple install- Has 4 quick connect wires and 1 RTD probe to connect.
  • Advanced algorithm helps maintain and hold temperature using AGL (Advanced Grilling Logic)
  • Temp Ranges 180-375 + Smoke and High settings
  • Features shut down setting for safe shutdowns. (Fan keeps running, auger and igniter shut off)
  • Dual meat probes so you do not lose your heat checking your meat’s internal temperatures.
  • Easy button to switch from meat probes to grill temp.
  • Power coated gunmetal finish.

Includes:

  • 1 x Digital Pro Controller with AGL (BAC365)
  • 1 x Meat Probe with White Tip (BAC329)
  • 1 x Meat Probe with Black Tip (BAC289)

Note: Some older discontinued Traeger grills made before 2014 had different wire connections on their controllers. Those controls are now obsolete. You can still use this controller as an upgrade by converting your existing wiring of your components to this Molex Wiring Connection or, by upgrading/ replacing all of the electrical components which will have the correct and most current Molex wire connections already attached.


Replacement For Part Numbers:

  • BAC365
  • KIT0746
  • KIT0747
  • KIT0166
  • BAC288
  • KIT0330

View Compatible Models

UPC: 634868920554

Compatible Models

    Tacklife

  • TKGRILL01

    Traeger

  • Bronson 20
  • Century 22
  • Century 34
  • Century
  • Deluxe Elite 300
  • Double Commercial
  • Eastwood 22
  • Eastwood 34
  • Executive
  • Heartland
  • Homestead 520
  • Junior Elite 20
  • Lil Tex Limited Edition
  • Lil Pig
  • Lil Tex Elite 22
  • Lonestar 20
  • Lonestar
  • Longhorn Steer
  • Pro 20
  • Pro Series 22
  • Pro Series 34
  • Renegade Elite 20
  • Renegade Pro
  • Ridgeland 572
  • Select Elite
  • Select Pro
  • Silverton
  • Tailgater 20
  • Texas Elite 34
  • Texas Limited Edition
  • Texas Pro
  • XL

Technical Specs

Meat Probe Jack TRSRS Stereo

Videos

Instructions

Install Instructions For Traeger Digital Pro Controller with Meat Probes: BAC365

IMPORTANT: Before attempting to remove or install the Control, ensure the Switch/Dial is in the OFF position and the Power Cord is disconnected from the electrical outlet. Even with the Switch/Dial off, electricity is still present at the Control. Failure to disconnect the Power Cord could result in personal injury from electrical shock and/or irreparable damage to the Control.

Removing the Existing Smoker Control:

  1. Switch Off: Ensure the Switch/Dial is in the OFF position. Disconnect the Power Cord from the electrical outlet.
  2. Wiring Diagram: Review the Digital Control Wiring Diagram to familiarize yourself with the color coding of the wiring connections. Disconnect the wiring from the Smoker Control by separating the 4 Molex Connectors found on the underside of the Pellet hopper.
  3. Remove Screws: Remove the two screws securing the Smoker Control to the Pellet Hopper. Save these screws for later use with the Digital Control.
  4. Remove Control: Carefully remove the Smoker Control through the opening in the front of the Pellet Hopper, adjusting the angle if necessary. Save the Smoker Control in case it needs to be reinstalled temporarily.

Installing the RTD:

  1. Prepare Grill: Open the Door and remove the Porcelain Grill and Grease Drain Pan to provide access to the left side of the Grill.
  2. Remove Cable Tie: Carefully cut the cable tie securing the RTD Wires to the RTD. Remove the Screw and Lock Nut from the RTD mounting bracket if attached.
  3. Thread Wires: Thread the RTD Wires through the center hole of the RTD Grill Filler and then through the small hole in the left end of the Grill. Continue until the lower end of the RTD can be inserted into the RTD Grill Filler.
  4. Mount RTD: Mount the RTD to the RTD Grill Filler using the 1/2” long Screw and the Lock Nut. Tighten to secure the RTD.
  5. Route Wires: Run the RTD Wires through the space between the end of the Grill and the Pellet Hopper, then feed the Wires up through the opening for the Control.

Wiring and Mounting the Digital Control:

  1. Terminal Block: Locate the Green Terminal Block on the back of the Digital Control. Using a small screwdriver, loosen the screws to open the clamping jaws.
  2. Connect Wires: Insert a bare wire end of one RTD Wire into the clamping jaws of the Terminal Block. Tighten the screw to secure the wire. Repeat for the other wire.
  3. Feed Wiring: Feed the wiring from the Digital Control into the opening in the Pellet Hopper.
  4. Insert Control: Carefully insert the Digital Control into the opening in the Pellet Hopper, adjusting the angle as needed.
  5. Secure Control: Using the saved screws, attach the Digital Control to the Pellet Hopper without over-tightening.
  6. Connect Connectors: Connect the Molex Connectors according to the color coding on the Digital Control Wiring Diagram. Coil any excess RTD Wire and secure it with a cable tie or twist tie, ensuring no wires interfere with the fan blades on the Draft Inducer Fan or the Auger Drive Motor.
  7. Reassemble Grill: Replace the Grease Drain Pan and the Porcelain Grill. Connect the Power Cord to an appropriate, grounded electrical outlet.

Replacement on Older Model Grills:

  1. Terminal Block: Loosen the screws on the green terminal block connector on the back upper right corner of the controller.
  2. Connect RTD Wire: Insert the RTD wire through the cutout for the control and connect it to the green terminal block, tightening the screws.
  3. Insert Wires: Insert the wires for the control into the cutout, angling the control to clear the fuse holder. Slide the control to the left until the fuse holder clears the cutout.
  4. Secure Control: Insert the retaining screws into the holes on the faceplate of the control and tighten.
  5. Connect Connectors: Connect the Molex connectors according to the wiring diagram.

Initial Firing Instructions:

  1. Prepare Grill: Open the Door and remove the Porcelain Grill, Grease Drain Pan, and Heat Baffle.
  2. Power Connection: Ensure the Switch is OFF and the Dial Knob is in the OFF/SHUT DOWN CYCLE position. Plug the Power Cord into an appropriate, grounded electrical outlet.
  3. Auger Check: Open the Pellet Hopper Lid, check for foreign objects, turn the Switch to ON, and set the Dial Knob to Smoke. Confirm the Auger is turning and feel air movement from the Draft Inducer Fan.
  4. Fill Hopper: Fill the Pellet Hopper with TRAEGER BBQ PELLETS. Turn the Switch to ON, set the Dial Knob to HIGH, and allow Pellets to travel from the Pellet Hopper to the Firepot. Turn the Switch OFF and set the Dial Knob to OFF/SHUT DOWN CYCLE when Pellets begin to fall into the Firepot.
  5. Smoke Setting: Turn the Switch to ON and set the Dial Knob to SMOKE. Let the Pellets come to full flame. Turn the Switch OFF and set the Dial Knob to OFF/SHUT DOWN CYCLE. Let the Grill cool down.
  6. Line Grease Pan: Line the Grease Drain Pan with heavy-duty aluminum foil, ensuring the edges and ends of the foil are tight against the bottom of the Grease Drain Pan. Reposition the Heat Baffle, Grease Drain Pan, and Porcelain Grill.
  7. Preheat Grill: With the Door open, turn the Switch to ON and set the Dial Knob to SMOKE. Close the Door and preheat for approximately 10 minutes before placing food in the Grill.
  8. Season Grill: Turn the Temperature Dial to HIGH and run for 45 minutes with the Door closed before cooking any food.

Thermostat Control Functions:

  • P Settings Adjustment: Contact customer service before adjusting.
  • Access Function: Locate the small hole on the faceplate of the digital controller next to the red digital display. Turn the controller knob to the 225 setting. Use a small screwdriver or pointed object to depress the micro switch inside the hole.
  • P Setting Range: The factory default is P-2. The range is P-0 to P-5 (do not exceed P-5). Each setting change adjusts the Auger motor off time.
  • Monitor Temperature: Ensure the temperature remains above 160 degrees F while “Smoking” to avoid fire loss in the firepot. If the fire goes out, turn the controller OFF and follow the recovery process before restarting the Grill.


Troubleshooting

Warranty

Unfortunately, sometimes products do not work like they are supposed to. We offer a 90 day warranty on manufacturer defects. Some manufacturers make this a very simple and easy process unfortunately others do not. Items must be used in accordance with the manufacturers guidelines to qualify for warranty replacement. Please be advised that warranty claims for these parts may take up to 4 weeks for processing, and customers must cover shipping.

Shipping Information

This Item Qualifies For Free Shipping With Orders Over $99!

When Will My Order Ship?

All orders are typically processed within 24 hours of receiving payment and are shipped from us same day if placed before our shipping cutoff time (Monday - Friday: 12PM, Saturday: 10AM, Sunday: No Shipping), orders placed after our cutoff time are shipped the next morning.

Do You Offer Express Shipping?

Yes! Please note the shipping times are based on business days, weekends and holidays do not count to the delivery date. Please see our expedited ship time schedules here.

How Does Free Shipping Work?

Most orders over $99 qualify for free shipping! Orders which ship for free are shipped with either USPS or UPS based on our discretion. If you are using a PO box, free shipping orders will always go USPS.

Do You Ship To Canada?

We ship to Canada! We estimate USPS to take 4-10 days once receiving your package from us. We do not offer expedited shipping of any kind to Canada. Please allow an extra 2-5 days for all shipments to Canada. Free shipping is not available to Canada.

Do You Ship To Alaska Or Hawaii?

We ship to both Alaska and Hawaii! We do not offer next day or two day shipping to Alaska or Hawaii. Free shipping is not available to Alaska or Hawaii.

Do You Ship Outside The US Or Canada?

Unfortunately, at this time we do not offer international shipping other than to Canada.

Shipping Time Estimations

For information on shipping time estimations, see the Shipping Information & Transit Times on the shipping page.

Learn More About Our Shipping Information
Jump back to product information tab navigation

Description

Take Your Traeger To The Next Level With A Pro Series Digital Controller.

Key Features:

  • Control temperature to within +/-15 degrees F
  • Simple install- Has 4 quick connect wires and 1 RTD probe to connect.
  • Advanced algorithm helps maintain and hold temperature using AGL (Advanced Grilling Logic)
  • Temp Ranges 180-375 + Smoke and High settings
  • Features shut down setting for safe shutdowns. (Fan keeps running, auger and igniter shut off)
  • Dual meat probes so you do not lose your heat checking your meat’s internal temperatures.
  • Easy button to switch from meat probes to grill temp.
  • Power coated gunmetal finish.

Includes:

  • 1 x Digital Pro Controller with AGL (BAC365)
  • 1 x Meat Probe with White Tip (BAC329)
  • 1 x Meat Probe with Black Tip (BAC289)

Note: Some older discontinued Traeger grills made before 2014 had different wire connections on their controllers. Those controls are now obsolete. You can still use this controller as an upgrade by converting your existing wiring of your components to this Molex Wiring Connection or, by upgrading/ replacing all of the electrical components which will have the correct and most current Molex wire connections already attached.


Replacement For Part Numbers:

  • BAC365
  • KIT0746
  • KIT0747
  • KIT0166
  • BAC288
  • KIT0330

View Compatible Models

UPC: 634868920554

Compatible Models

    Tacklife

  • TKGRILL01

    Traeger

  • Bronson 20
  • Century 22
  • Century 34
  • Century
  • Deluxe Elite 300
  • Double Commercial
  • Eastwood 22
  • Eastwood 34
  • Executive
  • Heartland
  • Homestead 520
  • Junior Elite 20
  • Lil Tex Limited Edition
  • Lil Pig
  • Lil Tex Elite 22
  • Lonestar 20
  • Lonestar
  • Longhorn Steer
  • Pro 20
  • Pro Series 22
  • Pro Series 34
  • Renegade Elite 20
  • Renegade Pro
  • Ridgeland 572
  • Select Elite
  • Select Pro
  • Silverton
  • Tailgater 20
  • Texas Elite 34
  • Texas Limited Edition
  • Texas Pro
  • XL

Technical Specs

Meat Probe Jack TRSRS Stereo

Video

Instructions

Assembly Instructions For Traeger Digital Pro Controller with Meat Probes: BAC365

IMPORTANT: Before attempting to remove or install the Control, ensure the Switch/Dial is in the OFF position and the Power Cord is disconnected from the electrical outlet. Even with the Switch/Dial off, electricity is still present at the Control. Failure to disconnect the Power Cord could result in personal injury from electrical shock and/or irreparable damage to the Control.

Removing the Existing Smoker Control:

  1. Switch Off: Ensure the Switch/Dial is in the OFF position. Disconnect the Power Cord from the electrical outlet.
  2. Wiring Diagram: Review the Digital Control Wiring Diagram to familiarize yourself with the color coding of the wiring connections. Disconnect the wiring from the Smoker Control by separating the 4 Molex Connectors found on the underside of the Pellet hopper.
  3. Remove Screws: Remove the two screws securing the Smoker Control to the Pellet Hopper. Save these screws for later use with the Digital Control.
  4. Remove Control: Carefully remove the Smoker Control through the opening in the front of the Pellet Hopper, adjusting the angle if necessary. Save the Smoker Control in case it needs to be reinstalled temporarily.

Installing the RTD:

  1. Prepare Grill: Open the Door and remove the Porcelain Grill and Grease Drain Pan to provide access to the left side of the Grill.
  2. Remove Cable Tie: Carefully cut the cable tie securing the RTD Wires to the RTD. Remove the Screw and Lock Nut from the RTD mounting bracket if attached.
  3. Thread Wires: Thread the RTD Wires through the center hole of the RTD Grill Filler and then through the small hole in the left end of the Grill. Continue until the lower end of the RTD can be inserted into the RTD Grill Filler.
  4. Mount RTD: Mount the RTD to the RTD Grill Filler using the 1/2” long Screw and the Lock Nut. Tighten to secure the RTD.
  5. Route Wires: Run the RTD Wires through the space between the end of the Grill and the Pellet Hopper, then feed the Wires up through the opening for the Control.

Wiring and Mounting the Digital Control:

  1. Terminal Block: Locate the Green Terminal Block on the back of the Digital Control. Using a small screwdriver, loosen the screws to open the clamping jaws.
  2. Connect Wires: Insert a bare wire end of one RTD Wire into the clamping jaws of the Terminal Block. Tighten the screw to secure the wire. Repeat for the other wire.
  3. Feed Wiring: Feed the wiring from the Digital Control into the opening in the Pellet Hopper.
  4. Insert Control: Carefully insert the Digital Control into the opening in the Pellet Hopper, adjusting the angle as needed.
  5. Secure Control: Using the saved screws, attach the Digital Control to the Pellet Hopper without over-tightening.
  6. Connect Connectors: Connect the Molex Connectors according to the color coding on the Digital Control Wiring Diagram. Coil any excess RTD Wire and secure it with a cable tie or twist tie, ensuring no wires interfere with the fan blades on the Draft Inducer Fan or the Auger Drive Motor.
  7. Reassemble Grill: Replace the Grease Drain Pan and the Porcelain Grill. Connect the Power Cord to an appropriate, grounded electrical outlet.

Replacement on Older Model Grills:

  1. Terminal Block: Loosen the screws on the green terminal block connector on the back upper right corner of the controller.
  2. Connect RTD Wire: Insert the RTD wire through the cutout for the control and connect it to the green terminal block, tightening the screws.
  3. Insert Wires: Insert the wires for the control into the cutout, angling the control to clear the fuse holder. Slide the control to the left until the fuse holder clears the cutout.
  4. Secure Control: Insert the retaining screws into the holes on the faceplate of the control and tighten.
  5. Connect Connectors: Connect the Molex connectors according to the wiring diagram.

Initial Firing Instructions:

  1. Prepare Grill: Open the Door and remove the Porcelain Grill, Grease Drain Pan, and Heat Baffle.
  2. Power Connection: Ensure the Switch is OFF and the Dial Knob is in the OFF/SHUT DOWN CYCLE position. Plug the Power Cord into an appropriate, grounded electrical outlet.
  3. Auger Check: Open the Pellet Hopper Lid, check for foreign objects, turn the Switch to ON, and set the Dial Knob to Smoke. Confirm the Auger is turning and feel air movement from the Draft Inducer Fan.
  4. Fill Hopper: Fill the Pellet Hopper with TRAEGER BBQ PELLETS. Turn the Switch to ON, set the Dial Knob to HIGH, and allow Pellets to travel from the Pellet Hopper to the Firepot. Turn the Switch OFF and set the Dial Knob to OFF/SHUT DOWN CYCLE when Pellets begin to fall into the Firepot.
  5. Smoke Setting: Turn the Switch to ON and set the Dial Knob to SMOKE. Let the Pellets come to full flame. Turn the Switch OFF and set the Dial Knob to OFF/SHUT DOWN CYCLE. Let the Grill cool down.
  6. Line Grease Pan: Line the Grease Drain Pan with heavy-duty aluminum foil, ensuring the edges and ends of the foil are tight against the bottom of the Grease Drain Pan. Reposition the Heat Baffle, Grease Drain Pan, and Porcelain Grill.
  7. Preheat Grill: With the Door open, turn the Switch to ON and set the Dial Knob to SMOKE. Close the Door and preheat for approximately 10 minutes before placing food in the Grill.
  8. Season Grill: Turn the Temperature Dial to HIGH and run for 45 minutes with the Door closed before cooking any food.

Thermostat Control Functions:

  • P Settings Adjustment: Contact customer service before adjusting.
  • Access Function: Locate the small hole on the faceplate of the digital controller next to the red digital display. Turn the controller knob to the 225 setting. Use a small screwdriver or pointed object to depress the micro switch inside the hole.
  • P Setting Range: The factory default is P-2. The range is P-0 to P-5 (do not exceed P-5). Each setting change adjusts the Auger motor off time.
  • Monitor Temperature: Ensure the temperature remains above 160 degrees F while “Smoking” to avoid fire loss in the firepot. If the fire goes out, turn the controller OFF and follow the recovery process before restarting the Grill.


Warranty

Unfortunately, sometimes products do not work like they are supposed to. We offer a 90 day warranty on manufacturer defects. Some manufacturers make this a very simple and easy process unfortunately others do not. Items must be used in accordance with the manufacturers guidelines to qualify for warranty replacement. Please be advised that warranty claims for these parts may take up to 4 weeks for processing, and customers must cover shipping.

Shipping Info

This Item Qualifies For Free Shipping With Orders Over $99!

When Will My Order Ship?

All orders are typically processed within 24 hours of receiving payment and are shipped from us same day if placed before our shipping cutoff time (Monday - Friday: 12PM, Saturday: 10AM, Sunday: No Shipping), orders placed after our cutoff time are shipped the next morning.

Do You Offer Express Shipping?

Yes! Please note the shipping times are based on business days, weekends and holidays do not count to the delivery date. Please see our expedited ship time schedules here.

How Does Free Shipping Work?

Most orders over $99 qualify for free shipping! Orders which ship for free are shipped with either USPS or UPS based on our discretion. If you are using a PO box, free shipping orders will always go USPS.

Do You Ship To Canada?

We ship to Canada! We estimate USPS to take 4-10 days once receiving your package from us. We do not offer expedited shipping of any kind to Canada. Please allow an extra 2-5 days for all shipments to Canada. Free shipping is not available to Canada.

Do You Ship To Alaska Or Hawaii?

We ship to both Alaska and Hawaii! We do not offer next day or two day shipping to Alaska or Hawaii. Free shipping is not available to Alaska or Hawaii.

Do You Ship Outside The US Or Canada?

Unfortunately, at this time we do not offer international shipping other than to Canada.

Shipping Time Estimations

For information on shipping time estimations, see the Shipping Information & Transit Times on the shipping page.

Learn More About Our Shipping Information
Customer Reviews

Based on 1 review
100%
(1)
0%
(0)
0%
(0)
0%
(0)
0%
(0)
W
Ward R.I.

Traeger Digital Pro Controller, BAC365

QUESTIONS & ANSWERS

If your question does not concern this specific product, use our contact form

Have a Question?

Be the first to ask a question about this.

Ask a Question

Customer Reviews

Based on 1 review
100%
(1)
0%
(0)
0%
(0)
0%
(0)
0%
(0)
W
Ward R.I.

Traeger Digital Pro Controller, BAC365