Skip to main content
Product title:

Lennox / Country Winslow PI/PS40 Ignitor with Clamp: H6005-AMP

Product rating:
Product price:
$34.99

A $115.00 Savings over the OEM

Product SKU ! H6005-AMP
Product MPN ! H6005
Product availability: In Stock
Bullet point features

Frequently Bought Together

Total Price: $64.98

Description

Lennox Ignitor and Hose Clamp: PI & PS40

We sell the Lennox replacement ignitor with an included hose clamp for Country Pellet Stoves. The Lennox ignitor is designed to provide the most durable construction and consistently reliable starts for your stove. This ignitor comes in its tube fully assembled and installs in seconds. The ignitor is rated at 400 watts and is compatible with all Country Pellet Stoves that require an ignitor including all Winslow models. Our ignitor is extremely durable and mounts using a hose clamp that secures the ignitor in place.

We offer the best prices on the highest quality replacement parts for Country Pellet Stoves and have the knowledge to help you make the right decision before you place an order. We have everything you need to keep your Country Pellet Stove in top working conditions in order for you to save money and time during the cold winter months.


Replacement For Part Number:

  • H6005

View Compatible Models

Compatible Models

    Lennox

  • Winslow PI40
  • Winslow PS40

Technical Specs

Igniter Length 5 1/2"
Tube Length 6 1/2"
Igniter Diameter 5/16"
Tube Diameter 7/8"
Watts 400
Volts 120

Instructions

Install Instructions For Lennox / Country Winslow PI/PS40 Ignitor with Clamp: H6005-AMP

Replacing the igniter in your Winslow PS40 Pellet Stove or PI40 Pellet Insert is not a difficult task. In fact, depending upon the installation, the hardest part of the job may just be getting access to the components. For those of you who have a pellet insert, the surround will need to be removed and the unit will need to be pulled forward slightly. For those with a freestanding stove, everything can be accessed through the side doors, however; provided you have enough room on the hearth, taking the back of the stove off will make things much easier. 


There is one notable difference between the insert and the freestanding models that must be observed when replacing the igniter. To access the igniter, which is located in the center of the unit directly under the hopper, the convection blower needs to be removed from its mount. On freestanding units, the convection blower is located on the right side of the stove, facing the front. On insert models this blower in on the left side. The position of the mounting screws for the blower is also slightly different; one is in a vertical position the other is horizontal. Everything else is the same.


Watch the Video


Tools Required


  • Medium size flat-heat screwdriver
  • ⅛” Allen Key


Replacement Parts


OEM Repalcement igniter H6005

Aftermarket Replacement Igniter H6005-AMP


Instructions


  1. UNPLUG THE UNIT FROM ITS POWER SOURCE
  2. Locate which side of the unit your convection blower (room blower) is located and remove the panels to gain access.
  3. On freestanding units, you will need to disconnect the wiring harness from the controller. The panels are removed by lifting them and then tilting them out from the bottom. The rear panel can be removed by loosening the ⅛” Allan key screws from around the rear access panel and lifting the panel slightly. The screws do not need to be removed, just loosened.
  4. On insert models, removed the outer decorative trim from the surround. Use the flat-head screwdriver to loosen the two screws that hold the left side panel to the unit and remove the panel. The unit may need to be pulled forward on the hearth about a foot to gain visual access to the components. 
  5. Loosen, but do not remove the two Allen key screws that hold the blower on the mount and then remove the blower. You may need to cut the zip-ties that secure the black wires to the wiring harness. Once the wires are free, remove the blower wires from the fan switch and the terminal block to separate the blower from the unit.
  6. Locate the igniter. Loosen the worm clip that secures the igniter to the mounting bracket and then remove the igniter by pulling it out. Traces the white wires from the igniter, cutting all zip-ties that may fasten it to the wiring harness. Unplug one end from the terminal block and the other from the purple wire going back to the controller.
  7. Before installing your new igniter, make sure that your burn pot is on the stove and aligned properly. As you slide the new igniter into the stove, the burn pot will act as a guide. The igniter tube MUST seat against the burnpot. Once it is seated, tighten the igniter tube in place with the worm clip.
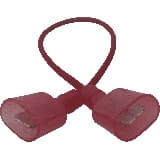
  8. Plug-in your igniter wires. The bulleted end goes to the purple wire. The ¼” female goes anywhere on the terminal block. Secure any loose wires with zip-ties.
  9. Connect wires BEFORE reinstalling the blower. Make sure that one black wire is connected to the fan switch (fan switch is the one with the yellow wire). Connect the other black wire for the blower anywhere on the terminal block under the auger motor. Reinstall your blower with the gasket. Fasten any loose wires with zip-ties.
  10. You’re done!


Troubleshooting

It is advisable to ALWAYS replace your door gasket when you are replacing an igniter. A leaking door gasket is often a contributing factor to igniter failure.


Troubleshooting Igniters:


Igniter failure can be verified on one of three ways. The easiest and most common way to see if the igniter is working is to start your stove and visually look for the orange glow; however, some appliances do not have a visual way to do this, so you may have to physically feel around in the burn pot after the stove has been on for a few minutes to “feel” for heat being generated. If you can see the glow or can feel the heat from the igniter, chances are that the igniter is actually working. If this is the case, retry the startup process. Make sure your burn pot is seated correctly if it is removable. Make sure that your ash pan, door or hopper lid is closed as this will provide an airtight seal on the stove, which most igniters will require for proper ignition. If you still do not have any luck, give the stove a good cleaning, including the vent, and try again. If these attempts fail, further troubleshooting will be required, which leads us to the third method.


For this method, you will need a DMM (Digital Multi-Meter). Gain access to the igniter and remove it from the stove or insert. While you are taking the igniter out, verify that it is installed correctly with the correct mounting equipment, screws, etc.. With the igniter removed from the stove, you will need to look over the part to find the rated watts, it’s usually stamped on the metal somewhere. If you cannot find it, look on our website for the correct igniter; the information you are looking for will be under “technical specs”


If your Ohms reading is within 10%, more or less than the rating (46Ω +/- 10%), it’s good. If the igniter has a “contained short” or a short within itself and not grounding out, your Ohms reading will be very low...usually in the single digits. Generally, you cannot have a faulty igniter with too high of a resistance reading unless an igniter is installed that is way out of spec. An example of this would be your stove requires a 300W igniter but the stove has a 250W igniter installed. The reading in this scenario would be 52Ω. The reading would be correct to the igniter but would be the wrong value for the specified 300W igniter. That’s why it’s usually good to look at the part itself for the watts rating.


It is advisable to ALWAYS replace your door gasket when you are replacing an igniter. A leaking door gasket is often a contributing factor to igniter failure.

Troubleshooting Igniters:

Igniter failure can be verified on one of three ways. The easiest and most common way to see if the igniter is working is to start your stove or grill and visually look for the orange glow; however, some appliances do not have a visual way to do this, so you may have to physically feel around in the burn pot after the stove has been on for a few minutes to “feel” for heat being generated. If you can see the glow or can feel the heat from the igniter, chances are that the igniter is actually working. If this is the case, retry the startup process. Make sure your burn pot is seated correctly if it is removable. Make sure that your ash pan, door or hopper lid is closed as this will provide an airtight seal on the stove, which most igniters will require for proper ignition. If you still do not have any luck, give the stove a good cleaning, including the vent, and try again. If these attempts fail, further troubleshooting will be required, which leads us to the third method.

For this method, you will need a DMM (Digital Multi-Meter). Gain access to the igniter and remove it from the stove or insert. While you are taking the igniter out, verify that it is installed correctly with the correct mounting equipment, screws, etc.. With the igniter removed from the stove, you will need to look over the part to find the rated watts, it’s usually stamped on the metal somewhere. If you cannot find it, look on our website for the correct igniter; the information you are looking for will be under “technical specs”

If your Ohms reading is within 10%, more or less than the rating (46Ω +/- 10%), it’s good. If the igniter has a “contained short” or a short within itself and not grounding out, your Ohms reading will be very low...usually in the single digits. Generally, you cannot have a faulty igniter with too high of a resistance reading unless an igniter is installed that is way out of spec. An example of this would be your stove requires a 300W igniter but the stove has a 250W igniter installed. The reading in this scenario would be 52Ω. The reading would be correct to the igniter but would be the wrong value for the specified 300W igniter. That’s why it’s usually good to look at the part itself for the watts rating.

Warranty

Unfortunately, sometimes products do not work like they are supposed to. We offer a 90 day warranty on manufacturer defects. Some manufacturers make this a very simple and easy process unfortunately others do not. Items must be used in accordance with the manufacturers guidelines to qualify for warranty replacement. Please be advised that warranty claims for these parts may take up to 4 weeks for processing, and customers must cover shipping.

Shipping Information

This Item Qualifies For Free Shipping With Orders Over $49!

When Will My Order Ship?

All orders are typically processed within 24 hours of receiving payment and are shipped from us same day if placed before our shipping cutoff time (Monday - Friday: 12PM, Saturday: 10AM, Sunday: No Shipping), orders placed after our cutoff time are shipped the next morning.

Do You Offer Express Shipping?

Yes! Please note the shipping times are based on business days, weekends and holidays do not count to the delivery date. Please see our expedited ship time schedules here.

How Does Free Shipping Work?

Most orders over $49 qualify for free shipping! Orders which ship for free are shipped with either USPS or UPS based on our discretion. If you are using a PO box, free shipping orders will always go USPS.

Do You Ship To Canada?

We ship to Canada! We estimate USPS to take 4-10 days once receiving your package from us. We do not offer expedited shipping of any kind to Canada. Please allow an extra 2-5 days for all shipments to Canada. Free shipping is not available to Canada.

Do You Ship To Alaska Or Hawaii?

We ship to both Alaska and Hawaii! We do not offer next day or two day shipping to Alaska or Hawaii. Free shipping is not available to Alaska or Hawaii.

Do You Ship Outside The US Or Canada?

Unfortunately, at this time we do not offer international shipping other than to Canada.

Shipping Time Estimations

For information on shipping time estimations, see the Shipping Information & Transit Times on the shipping page.

Learn More About Our Shipping Information
Jump back to product information tab navigation

Description

Lennox Ignitor and Hose Clamp: PI & PS40

We sell the Lennox replacement ignitor with an included hose clamp for Country Pellet Stoves. The Lennox ignitor is designed to provide the most durable construction and consistently reliable starts for your stove. This ignitor comes in its tube fully assembled and installs in seconds. The ignitor is rated at 400 watts and is compatible with all Country Pellet Stoves that require an ignitor including all Winslow models. Our ignitor is extremely durable and mounts using a hose clamp that secures the ignitor in place.

We offer the best prices on the highest quality replacement parts for Country Pellet Stoves and have the knowledge to help you make the right decision before you place an order. We have everything you need to keep your Country Pellet Stove in top working conditions in order for you to save money and time during the cold winter months.


Replacement For Part Number:

  • H6005

View Compatible Models

Technical Specs

Igniter Length 5 1/2"
Tube Length 6 1/2"
Igniter Diameter 5/16"
Tube Diameter 7/8"
Watts 400
Volts 120

Instructions

Install Instructions For Lennox / Country Winslow PI/PS40 Ignitor with Clamp: H6005-AMP

Replacing the igniter in your Winslow PS40 Pellet Stove or PI40 Pellet Insert is not a difficult task. In fact, depending upon the installation, the hardest part of the job may just be getting access to the components. For those of you who have a pellet insert, the surround will need to be removed and the unit will need to be pulled forward slightly. For those with a freestanding stove, everything can be accessed through the side doors, however; provided you have enough room on the hearth, taking the back of the stove off will make things much easier. 


There is one notable difference between the insert and the freestanding models that must be observed when replacing the igniter. To access the igniter, which is located in the center of the unit directly under the hopper, the convection blower needs to be removed from its mount. On freestanding units, the convection blower is located on the right side of the stove, facing the front. On insert models this blower in on the left side. The position of the mounting screws for the blower is also slightly different; one is in a vertical position the other is horizontal. Everything else is the same.


Watch the Video


Tools Required


  • Medium size flat-heat screwdriver
  • ⅛” Allen Key


Replacement Parts


OEM Repalcement igniter H6005

Aftermarket Replacement Igniter H6005-AMP


Instructions


  1. UNPLUG THE UNIT FROM ITS POWER SOURCE
  2. Locate which side of the unit your convection blower (room blower) is located and remove the panels to gain access.
  3. On freestanding units, you will need to disconnect the wiring harness from the controller. The panels are removed by lifting them and then tilting them out from the bottom. The rear panel can be removed by loosening the ⅛” Allan key screws from around the rear access panel and lifting the panel slightly. The screws do not need to be removed, just loosened.
  4. On insert models, removed the outer decorative trim from the surround. Use the flat-head screwdriver to loosen the two screws that hold the left side panel to the unit and remove the panel. The unit may need to be pulled forward on the hearth about a foot to gain visual access to the components. 
  5. Loosen, but do not remove the two Allen key screws that hold the blower on the mount and then remove the blower. You may need to cut the zip-ties that secure the black wires to the wiring harness. Once the wires are free, remove the blower wires from the fan switch and the terminal block to separate the blower from the unit.
  6. Locate the igniter. Loosen the worm clip that secures the igniter to the mounting bracket and then remove the igniter by pulling it out. Traces the white wires from the igniter, cutting all zip-ties that may fasten it to the wiring harness. Unplug one end from the terminal block and the other from the purple wire going back to the controller.
  7. Before installing your new igniter, make sure that your burn pot is on the stove and aligned properly. As you slide the new igniter into the stove, the burn pot will act as a guide. The igniter tube MUST seat against the burnpot. Once it is seated, tighten the igniter tube in place with the worm clip.
  8. Plug-in your igniter wires. The bulleted end goes to the purple wire. The ¼” female goes anywhere on the terminal block. Secure any loose wires with zip-ties.
  9. Connect wires BEFORE reinstalling the blower. Make sure that one black wire is connected to the fan switch (fan switch is the one with the yellow wire). Connect the other black wire for the blower anywhere on the terminal block under the auger motor. Reinstall your blower with the gasket. Fasten any loose wires with zip-ties.
  10. You’re done!


Troubleshooting

It is advisable to ALWAYS replace your door gasket when you are replacing an igniter. A leaking door gasket is often a contributing factor to igniter failure.


Troubleshooting Igniters:


Igniter failure can be verified on one of three ways. The easiest and most common way to see if the igniter is working is to start your stove and visually look for the orange glow; however, some appliances do not have a visual way to do this, so you may have to physically feel around in the burn pot after the stove has been on for a few minutes to “feel” for heat being generated. If you can see the glow or can feel the heat from the igniter, chances are that the igniter is actually working. If this is the case, retry the startup process. Make sure your burn pot is seated correctly if it is removable. Make sure that your ash pan, door or hopper lid is closed as this will provide an airtight seal on the stove, which most igniters will require for proper ignition. If you still do not have any luck, give the stove a good cleaning, including the vent, and try again. If these attempts fail, further troubleshooting will be required, which leads us to the third method.


For this method, you will need a DMM (Digital Multi-Meter). Gain access to the igniter and remove it from the stove or insert. While you are taking the igniter out, verify that it is installed correctly with the correct mounting equipment, screws, etc.. With the igniter removed from the stove, you will need to look over the part to find the rated watts, it’s usually stamped on the metal somewhere. If you cannot find it, look on our website for the correct igniter; the information you are looking for will be under “technical specs”


If your Ohms reading is within 10%, more or less than the rating (46Ω +/- 10%), it’s good. If the igniter has a “contained short” or a short within itself and not grounding out, your Ohms reading will be very low...usually in the single digits. Generally, you cannot have a faulty igniter with too high of a resistance reading unless an igniter is installed that is way out of spec. An example of this would be your stove requires a 300W igniter but the stove has a 250W igniter installed. The reading in this scenario would be 52Ω. The reading would be correct to the igniter but would be the wrong value for the specified 300W igniter. That’s why it’s usually good to look at the part itself for the watts rating.


It is advisable to ALWAYS replace your door gasket when you are replacing an igniter. A leaking door gasket is often a contributing factor to igniter failure.

Troubleshooting Igniters:

Igniter failure can be verified on one of three ways. The easiest and most common way to see if the igniter is working is to start your stove or grill and visually look for the orange glow; however, some appliances do not have a visual way to do this, so you may have to physically feel around in the burn pot after the stove has been on for a few minutes to “feel” for heat being generated. If you can see the glow or can feel the heat from the igniter, chances are that the igniter is actually working. If this is the case, retry the startup process. Make sure your burn pot is seated correctly if it is removable. Make sure that your ash pan, door or hopper lid is closed as this will provide an airtight seal on the stove, which most igniters will require for proper ignition. If you still do not have any luck, give the stove a good cleaning, including the vent, and try again. If these attempts fail, further troubleshooting will be required, which leads us to the third method.

For this method, you will need a DMM (Digital Multi-Meter). Gain access to the igniter and remove it from the stove or insert. While you are taking the igniter out, verify that it is installed correctly with the correct mounting equipment, screws, etc.. With the igniter removed from the stove, you will need to look over the part to find the rated watts, it’s usually stamped on the metal somewhere. If you cannot find it, look on our website for the correct igniter; the information you are looking for will be under “technical specs”

If your Ohms reading is within 10%, more or less than the rating (46Ω +/- 10%), it’s good. If the igniter has a “contained short” or a short within itself and not grounding out, your Ohms reading will be very low...usually in the single digits. Generally, you cannot have a faulty igniter with too high of a resistance reading unless an igniter is installed that is way out of spec. An example of this would be your stove requires a 300W igniter but the stove has a 250W igniter installed. The reading in this scenario would be 52Ω. The reading would be correct to the igniter but would be the wrong value for the specified 300W igniter. That’s why it’s usually good to look at the part itself for the watts rating.

Warranty

Unfortunately, sometimes products do not work like they are supposed to. We offer a 90 day warranty on manufacturer defects. Some manufacturers make this a very simple and easy process unfortunately others do not. Items must be used in accordance with the manufacturers guidelines to qualify for warranty replacement. Please be advised that warranty claims for these parts may take up to 4 weeks for processing, and customers must cover shipping.

Shipping Info

This Item Qualifies For Free Shipping With Orders Over $49!

When Will My Order Ship?

All orders are typically processed within 24 hours of receiving payment and are shipped from us same day if placed before our shipping cutoff time (Monday - Friday: 12PM, Saturday: 10AM, Sunday: No Shipping), orders placed after our cutoff time are shipped the next morning.

Do You Offer Express Shipping?

Yes! Please note the shipping times are based on business days, weekends and holidays do not count to the delivery date. Please see our expedited ship time schedules here.

How Does Free Shipping Work?

Most orders over $49 qualify for free shipping! Orders which ship for free are shipped with either USPS or UPS based on our discretion. If you are using a PO box, free shipping orders will always go USPS.

Do You Ship To Canada?

We ship to Canada! We estimate USPS to take 4-10 days once receiving your package from us. We do not offer expedited shipping of any kind to Canada. Please allow an extra 2-5 days for all shipments to Canada. Free shipping is not available to Canada.

Do You Ship To Alaska Or Hawaii?

We ship to both Alaska and Hawaii! We do not offer next day or two day shipping to Alaska or Hawaii. Free shipping is not available to Alaska or Hawaii.

Do You Ship Outside The US Or Canada?

Unfortunately, at this time we do not offer international shipping other than to Canada.

Shipping Time Estimations

For information on shipping time estimations, see the Shipping Information & Transit Times on the shipping page.

Learn More About Our Shipping Information

Customer Reviews

Based on 29 reviews
97%
(28)
3%
(1)
0%
(0)
0%
(0)
0%
(0)
M
Martin G.
Spare ignitor

This part was ordered as a spare. The one operating in my stove is 3 years and 12 tons of pellets old. It came from you at that time. Very happy with service life.

J
Jeff I.
Works Good

I had to replace the igniter on my pellet stove. I chose to go with an after market igniter. Installed easy. Worked right away.

T
Tim H.
Great service

I received timely email responses and quick answers when I called. I couldn't be happier, and my stove works like new!

D
Derick B.
Best place for parts

Iv bought quite a few parts for my pellet stove and they always fit and so far no problems with the non oem

D
Dale H.

Pellet stove ignitor arrived faster than promised. Aftermarket price for identical to factory part was great. Installation instructions were right on. Getting cold here so Renter is happy.

Dale

QUESTIONS & ANSWERS

If your question does not concern this specific product, use our contact form

Have a Question?

Be the first to ask a question about this.

Ask a Question

Customer Reviews

Based on 29 reviews
97%
(28)
3%
(1)
0%
(0)
0%
(0)
0%
(0)
M
Martin G.
Spare ignitor

This part was ordered as a spare. The one operating in my stove is 3 years and 12 tons of pellets old. It came from you at that time. Very happy with service life.

J
Jeff I.
Works Good

I had to replace the igniter on my pellet stove. I chose to go with an after market igniter. Installed easy. Worked right away.

T
Tim H.
Great service

I received timely email responses and quick answers when I called. I couldn't be happier, and my stove works like new!

D
Derick B.
Best place for parts

Iv bought quite a few parts for my pellet stove and they always fit and so far no problems with the non oem

D
Dale H.

Pellet stove ignitor arrived faster than promised. Aftermarket price for identical to factory part was great. Installation instructions were right on. Getting cold here so Renter is happy.

Dale

Liquid error (layout/theme line 255): Could not find asset snippets/iStock-notify-me.liquid