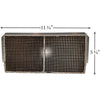
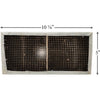
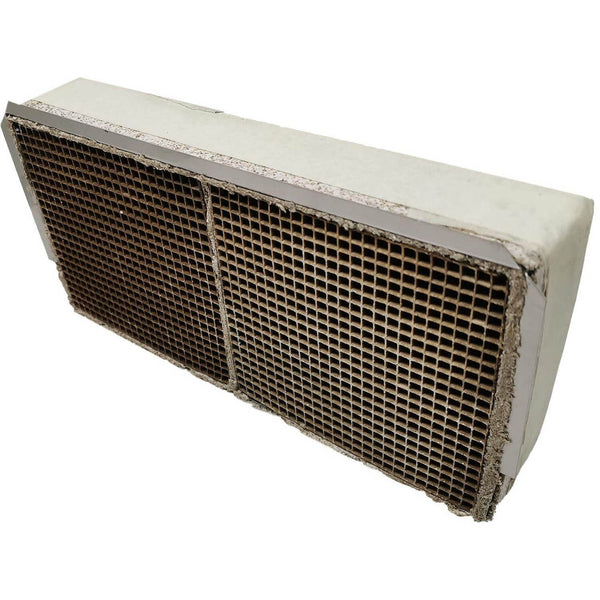
Blaze King Wood Stove Catalytic Combustor (KE40): S.CAT40
Product price:- 10- 7/8 '' x 5''
- Ships FREE with orders over $49
- 30-Day Hassle Free Returns
- 90 Day Warranty Included
- Same Day Shipping On Most Items!*
- See Complete Description
Blaze King Wood Stove Catalytic Combustor (KE40). It is important to periodically monitor the operation of the catalytic combustor to ensure that it is functioning properly. If the combustor is not operating correctly it will result in a loss of heat and efficiency. It will also increase creosote buildup in the venting and produce excess emissions.
Replacement For Part Numbers:
If the combustor needs replacing, discontinue use of the appliance until the new combustor has been installed!
1.) First, remove the flame shield by simply lifting the shield off of the two tabs (Pay particular attention to orientation as there is a top and bottom edge to the flame shield) Note: The stove's fire must be out for at least 12 hours prior to the removal process. A combustor can reach 1400°F and hold high temperatures for several hours even after the fire is out.
2.) Once you remove the flame shield, you’ll find the combustor.
3.) The combustor has a metal tab across the bottom and on each side. Using a flat blade screwdriver or pocketknife blade, slide the blade behind the metal tab and the heavy steel dome of the stove (The dome is the housing that surrounds the combustor).
4.) Apply slight pressure until the combustor begins to move forward, about 1/4”. Repeat the process on the opposite tab (Continue working back and forth until the combustor is worked free of the dome housing). It is normal for the gasket surrounding the metal band to fall apart during this process. It will need to be replaced).
5.) Now that the combustor has been removed, you’ll be able to see one stainless bypass retainer on each side (These can remain in place and do not need to be removed. The clips are not fixed in position and can fall into the firebox. Make sure they are in position before replacing the combustor).
6.) Using the same screwdriver or pocketknife, scrape any old gasket from the surface areas of the dome (It is a good idea to have a spare combustor gasket on hand prior to performing any maintenance).
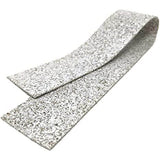
7.) Some combustors will ship with the gasket preinstalled. On others, the gasket will need to be attached (Note: If you’re installing a gasket it must wrap around the combustor as shown in the picture. Also, use 1” masking tape around the perimeter front and rear. During the first fire the masking tape will burn off and the combustor gasket will swell providing a tight seal).
8.) Slowly push the combustor into place. Apply even pressure to the left and right corners (Rember to position the tab across the bottom edge of the combustor. Do not force the combustor into the dome. Take your time and work it into place slowly).
9.) Once the combustor is installed completely so that all three tabs at touching the face of the dome reinstall the flame shield (Note: The brackets welded to the back flame shield are shaped like a triangle. The point of the triangle should face down when installed correctly. Never operate your stove without the flame shield in place).
10.) The flame shield will rest on the two tabs located on the dome guard and lean slightly forward.
11.) Now that your combustor has been installed you can relight your stove!
Click here to view: Blaze King's Catalytic Combustor Replacement Guide
PROBLEM - CREOSOTE PLUGGING:
Possible Cause: Burning materials that produce a lot of char and fly ash. Solution: Do not burn materials such as garbage, gift wrap, or cardboard. Possible Cause: Burning wet, pitchy woods or burning large loads of small-diameter wood with the combustor in the operating position without the thermostat needle in the active zone. Solution: Burn dry, seasoned wood, don’t engage the bypass until the temperatures are high enough to initiate light-off (indicated by the thermostat needle in the active zone). Possible Cause: Combustor not functioning. If proper burning procedures have been followed to no avail, the combustor is not functioning. Solution: Replace the combustor.
PROBLEM - CATALYST PEELING:
Possible Cause: Extreme temperatures (above 1800°F, or 1000°C.) at the combustor surface can cause the catalysts to peel. Overfiring and flame impingement on the combustor are primary causes. Minor peeling is normal and does not affect function. Severe peeling shows that are closed or plugged. Solution: Avoid extreme temperatures and flame impingement. If peeling is severe, remove and replace the combustor.
PROBLEM - CATALYST DEACTIVATION:
Possible Cause: Burning large quantities of trash, pressure-treated lumber, or painted wood. Solution: Burn quality woods available in your area. If you decide the catalyst has been deactivated, replace the combustor.
PROBLEM - CATALYST MASKING:
(The catalyst is coated with a layer of fly-ash or soot which prevents catalytic activity) Possible Cause: Accumulation of fly-ash Solution: Brush the cooled combustor with a soft-bristled brush or vacuum lightly at least once per burning season.
PROBLEM - THERMAL CRACKING:
Possible Cause: Normal operation, as long as the combustor remains intact. Solution: If cracking causes large pieces to fall out, replace the combustor.
PROBLEM - MECHANICAL CRACKING:
Possible Cause: Mishandling, abuse, or operating without a properly gasket-sealed combustor. Solution: Handle with care Possible Cause: Distortion of the holding collar. Solution: Combustor should be held firmly in its can. It should slide easily into and out of the holding collar of the stove. If severe cracking has resulted in the loss of large chunks of the combustor, replace the combustor. Also, replace any warped stove parts.
PROBLEM - CRUMBLING:
Possible Cause: Air leaks Solution: Inspect door gasket, see “MAINTENANCE” in the stove's manual. Possible Cause: High draft Solution: Maintain draft to manufactured specifications.
This Item Qualifies For Free Shipping!
When Will My Order Ship?
All orders are typically processed within 24 hours of receiving payment and are shipped from us same day if placed before our shipping cutoff time (Monday - Friday: 12PM, Saturday: 10AM, Sunday: No Shipping), orders placed after our cutoff time are shipped the next morning.
Do You Offer Express Shipping?
Yes! Please note the shipping times are based on business days, weekends and holidays do not count to the delivery date. Please see our expedited ship time schedules here.
How Does Free Shipping Work?
Most orders over $49 qualify for free shipping! Orders which ship for free are shipped with either USPS or UPS based on our discretion. If you are using a PO box, free shipping orders will always go USPS.
Do You Ship To Canada?
We ship to Canada! We estimate USPS to take 4-10 days once receiving your package from us. We do not offer expedited shipping of any kind to Canada. Please allow an extra 2-5 days for all shipments to Canada. Free shipping is not available to Canada.
Do You Ship To Alaska Or Hawaii?
We ship to both Alaska and Hawaii! We do not offer next day or two day shipping to Alaska or Hawaii. Free shipping is not available to Alaska or Hawaii.
Do You Ship Outside The US Or Canada?
Unfortunately, at this time we do not offer international shipping other than to Canada.
Shipping Time Estimations
For information on shipping time estimations, see the Shipping Information & Transit Times on the shipping page.
Replacement For Part Numbers:
If the combustor needs replacing, discontinue use of the appliance until the new combustor has been installed!
1.) First, remove the flame shield by simply lifting the shield off of the two tabs (Pay particular attention to orientation as there is a top and bottom edge to the flame shield) Note: The stove's fire must be out for at least 12 hours prior to the removal process. A combustor can reach 1400°F and hold high temperatures for several hours even after the fire is out.
2.) Once you remove the flame shield, you’ll find the combustor.
3.) The combustor has a metal tab across the bottom and on each side. Using a flat blade screwdriver or pocketknife blade, slide the blade behind the metal tab and the heavy steel dome of the stove (The dome is the housing that surrounds the combustor).
4.) Apply slight pressure until the combustor begins to move forward, about 1/4”. Repeat the process on the opposite tab (Continue working back and forth until the combustor is worked free of the dome housing). It is normal for the gasket surrounding the metal band to fall apart during this process. It will need to be replaced).
5.) Now that the combustor has been removed, you’ll be able to see one stainless bypass retainer on each side (These can remain in place and do not need to be removed. The clips are not fixed in position and can fall into the firebox. Make sure they are in position before replacing the combustor).
6.) Using the same screwdriver or pocketknife, scrape any old gasket from the surface areas of the dome (It is a good idea to have a spare combustor gasket on hand prior to performing any maintenance).
7.) Some combustors will ship with the gasket preinstalled. On others, the gasket will need to be attached (Note: If you’re installing a gasket it must wrap around the combustor as shown in the picture. Also, use 1” masking tape around the perimeter front and rear. During the first fire the masking tape will burn off and the combustor gasket will swell providing a tight seal).
8.) Slowly push the combustor into place. Apply even pressure to the left and right corners (Rember to position the tab across the bottom edge of the combustor. Do not force the combustor into the dome. Take your time and work it into place slowly).
9.) Once the combustor is installed completely so that all three tabs at touching the face of the dome reinstall the flame shield (Note: The brackets welded to the back flame shield are shaped like a triangle. The point of the triangle should face down when installed correctly. Never operate your stove without the flame shield in place).
10.) The flame shield will rest on the two tabs located on the dome guard and lean slightly forward.
11.) Now that your combustor has been installed you can relight your stove!
Click here to view: Blaze King's Catalytic Combustor Replacement Guide
PROBLEM - CREOSOTE PLUGGING:
Possible Cause: Burning materials that produce a lot of char and fly ash. Solution: Do not burn materials such as garbage, gift wrap, or cardboard. Possible Cause: Burning wet, pitchy woods or burning large loads of small-diameter wood with the combustor in the operating position without the thermostat needle in the active zone. Solution: Burn dry, seasoned wood, don’t engage the bypass until the temperatures are high enough to initiate light-off (indicated by the thermostat needle in the active zone). Possible Cause: Combustor not functioning. If proper burning procedures have been followed to no avail, the combustor is not functioning. Solution: Replace the combustor.
PROBLEM - CATALYST PEELING:
Possible Cause: Extreme temperatures (above 1800°F, or 1000°C.) at the combustor surface can cause the catalysts to peel. Overfiring and flame impingement on the combustor are primary causes. Minor peeling is normal and does not affect function. Severe peeling shows that are closed or plugged. Solution: Avoid extreme temperatures and flame impingement. If peeling is severe, remove and replace the combustor.
PROBLEM - CATALYST DEACTIVATION:
Possible Cause: Burning large quantities of trash, pressure-treated lumber, or painted wood. Solution: Burn quality woods available in your area. If you decide the catalyst has been deactivated, replace the combustor.
PROBLEM - CATALYST MASKING:
(The catalyst is coated with a layer of fly-ash or soot which prevents catalytic activity) Possible Cause: Accumulation of fly-ash Solution: Brush the cooled combustor with a soft-bristled brush or vacuum lightly at least once per burning season.
PROBLEM - THERMAL CRACKING:
Possible Cause: Normal operation, as long as the combustor remains intact. Solution: If cracking causes large pieces to fall out, replace the combustor.
PROBLEM - MECHANICAL CRACKING:
Possible Cause: Mishandling, abuse, or operating without a properly gasket-sealed combustor. Solution: Handle with care Possible Cause: Distortion of the holding collar. Solution: Combustor should be held firmly in its can. It should slide easily into and out of the holding collar of the stove. If severe cracking has resulted in the loss of large chunks of the combustor, replace the combustor. Also, replace any warped stove parts.
PROBLEM - CRUMBLING:
Possible Cause: Air leaks Solution: Inspect door gasket, see “MAINTENANCE” in the stove's manual. Possible Cause: High draft Solution: Maintain draft to manufactured specifications.
This Item Qualifies For Free Shipping!
When Will My Order Ship?
All orders are typically processed within 24 hours of receiving payment and are shipped from us same day if placed before our shipping cutoff time (Monday - Friday: 12PM, Saturday: 10AM, Sunday: No Shipping), orders placed after our cutoff time are shipped the next morning.
Do You Offer Express Shipping?
Yes! Please note the shipping times are based on business days, weekends and holidays do not count to the delivery date. Please see our expedited ship time schedules here.
How Does Free Shipping Work?
Most orders over $49 qualify for free shipping! Orders which ship for free are shipped with either USPS or UPS based on our discretion. If you are using a PO box, free shipping orders will always go USPS.
Do You Ship To Canada?
We ship to Canada! We estimate USPS to take 4-10 days once receiving your package from us. We do not offer expedited shipping of any kind to Canada. Please allow an extra 2-5 days for all shipments to Canada. Free shipping is not available to Canada.
Do You Ship To Alaska Or Hawaii?
We ship to both Alaska and Hawaii! We do not offer next day or two day shipping to Alaska or Hawaii. Free shipping is not available to Alaska or Hawaii.
Do You Ship Outside The US Or Canada?
Unfortunately, at this time we do not offer international shipping other than to Canada.
Shipping Time Estimations
For information on shipping time estimations, see the Shipping Information & Transit Times on the shipping page.
Be the first to ask a question about this.