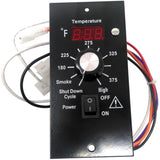
This is the upgraded version that no longer has the P-setting adjustment feature. It is now manufactured with Advanced Grilling Logic.
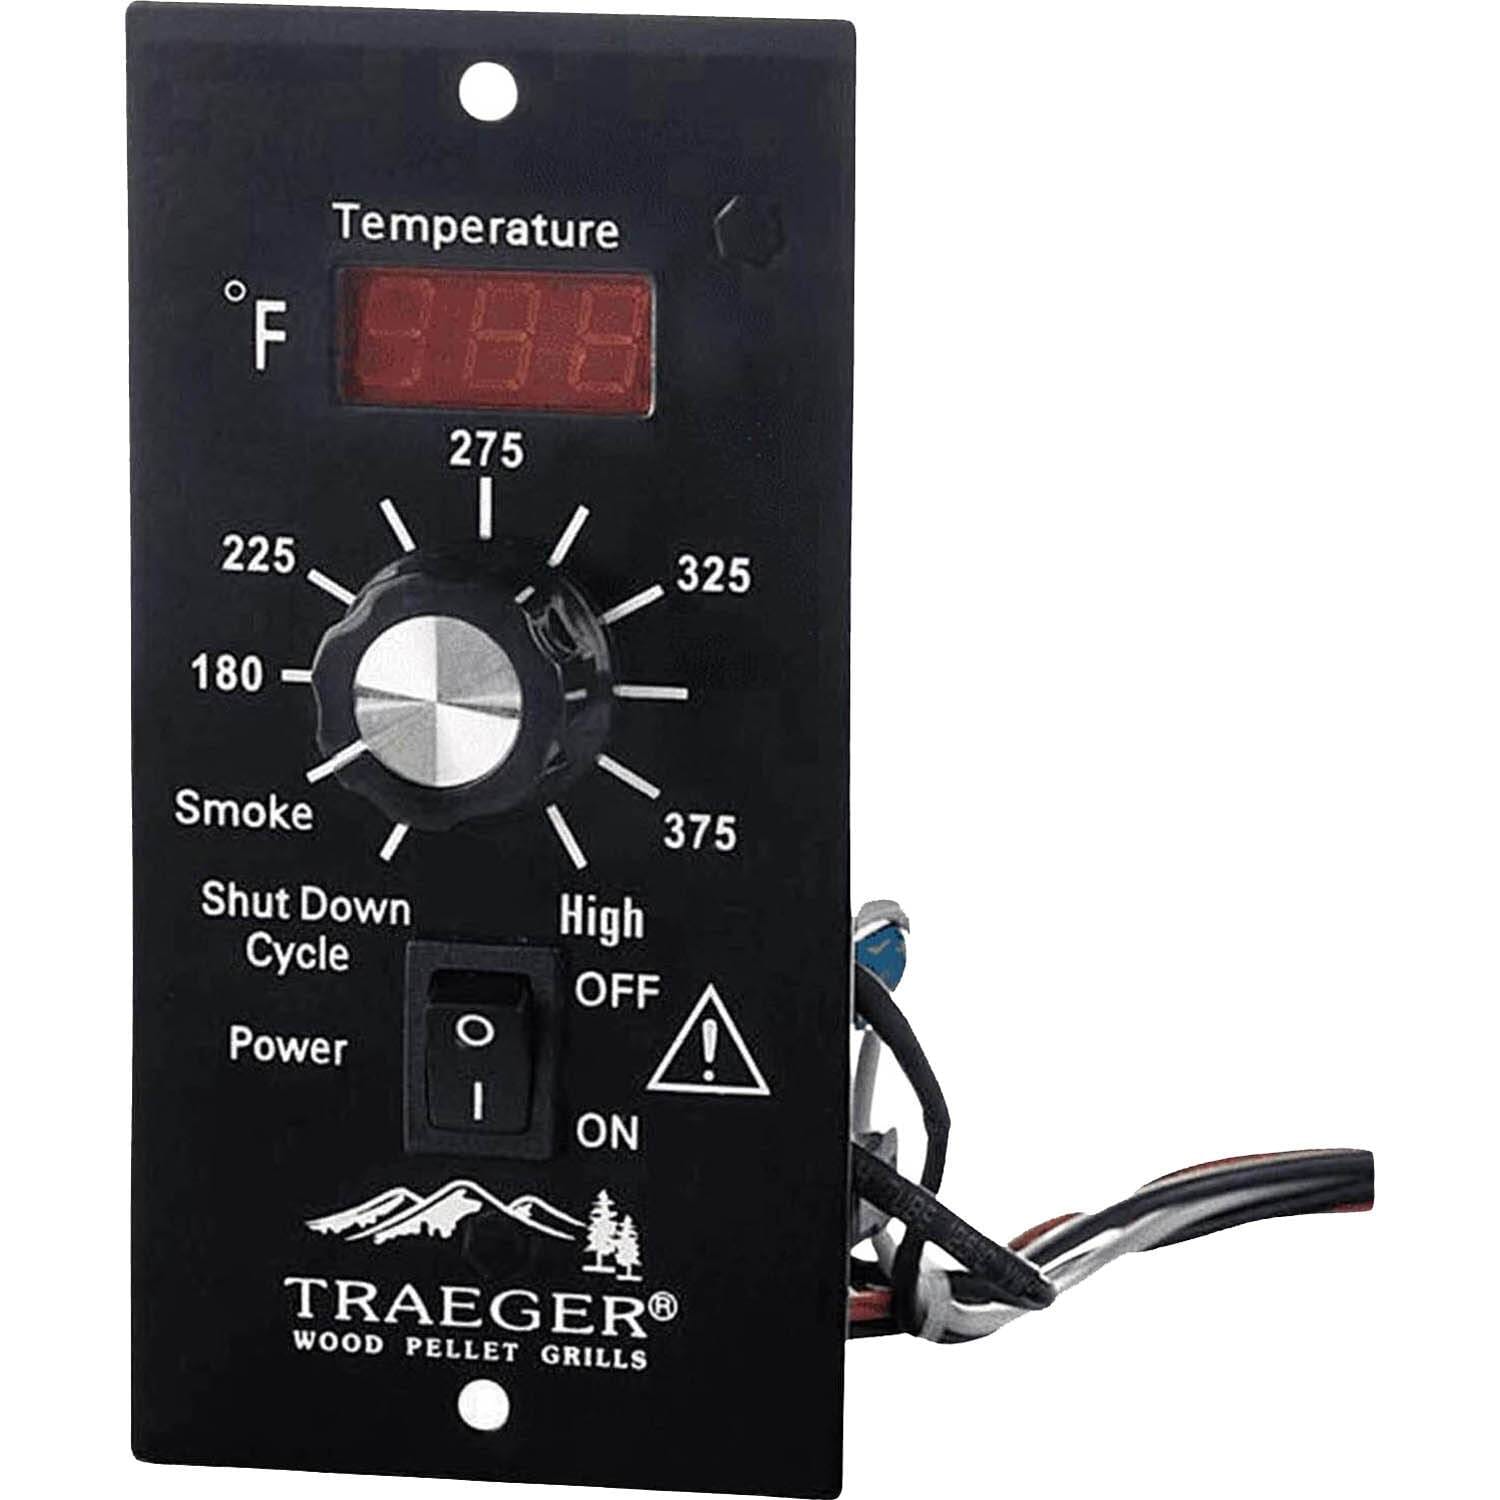
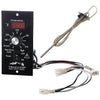
Take total control of your Traeger grill with this 11-stage digital thermostat upgrade kit. This thermostat gives you total control over temperature with settings from 180 to 375 degrees and also features a high mode for fast cooking and a smoke mode for low-temperature smoking. These controllers connect and work easily with all Traeger grills made up until 2019 (excludes Scout and PTG+).
Replacement is quick and easy.
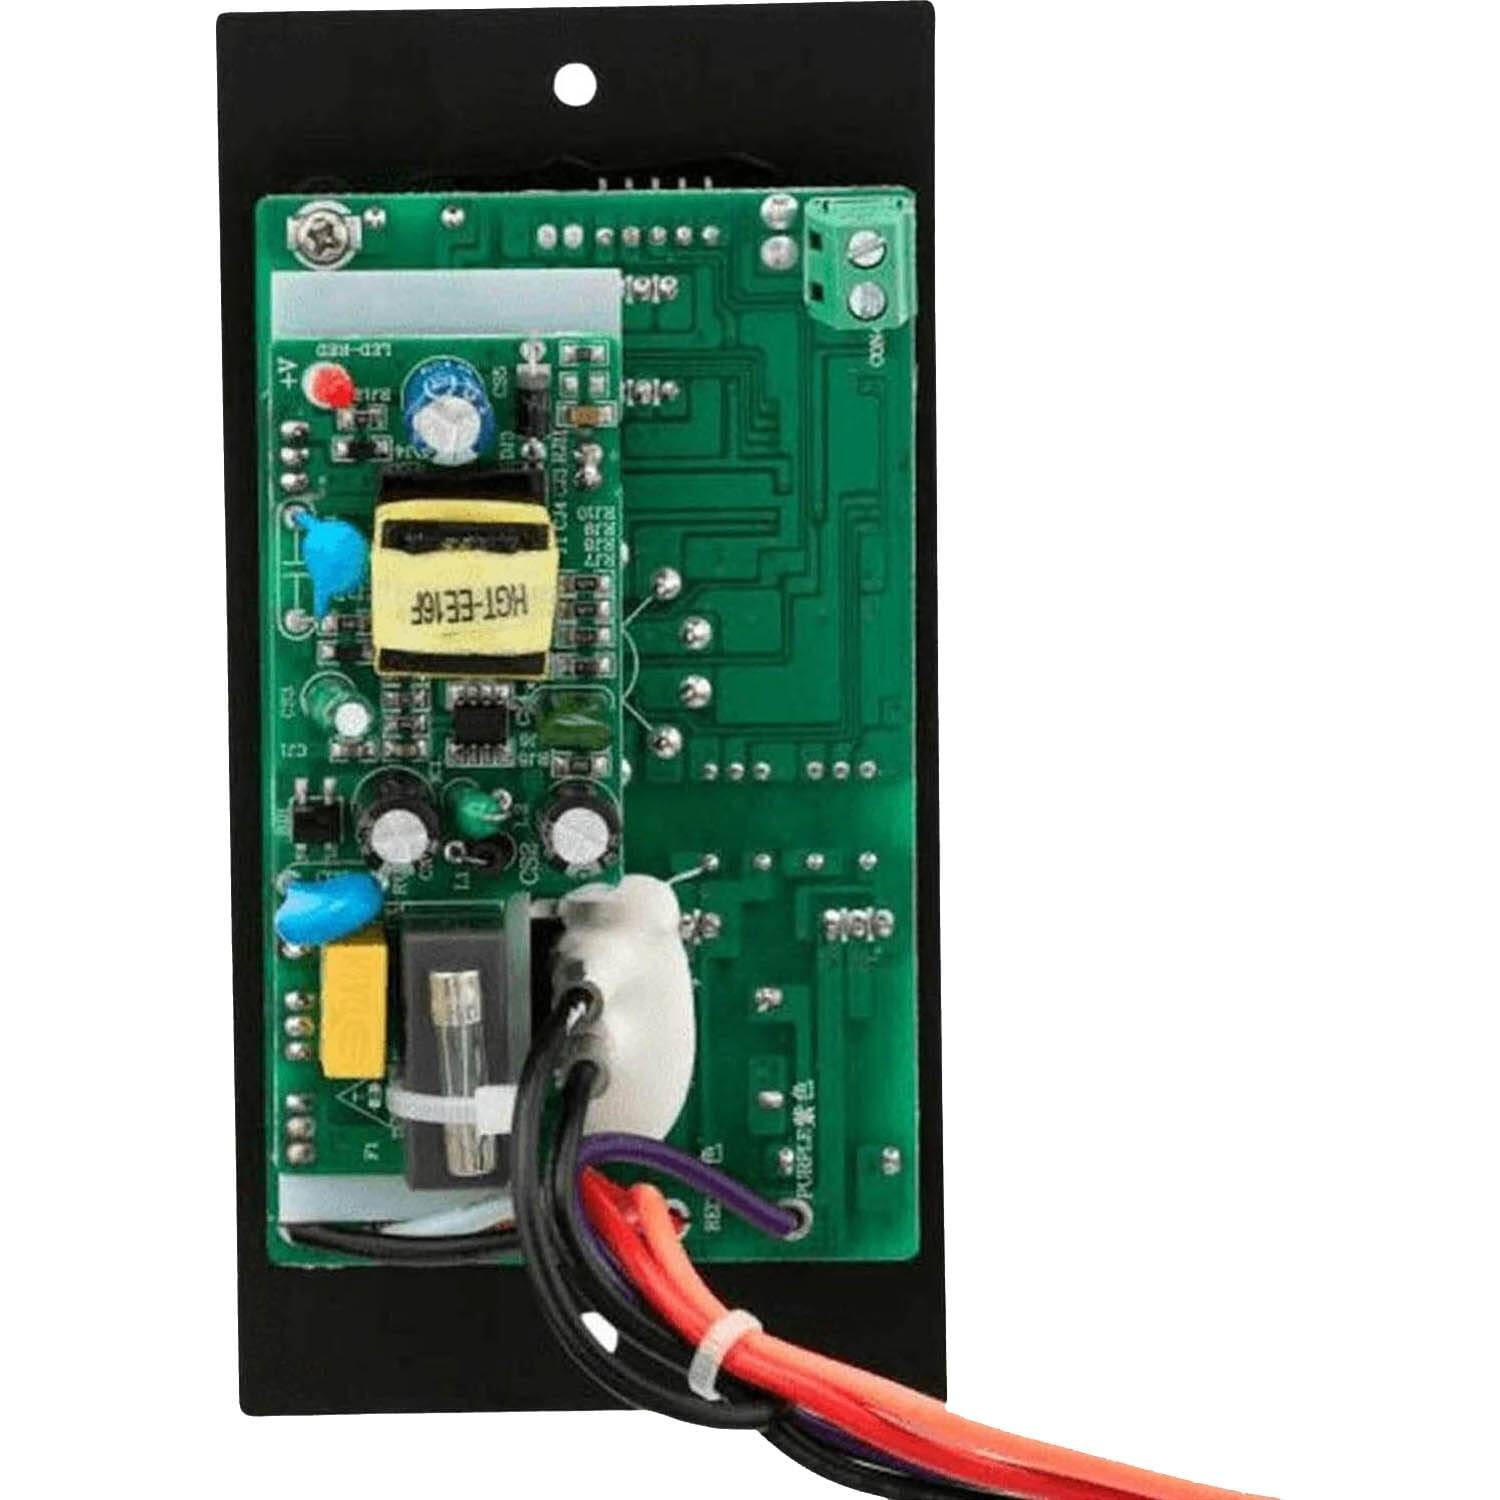
Note:This fits most Traegers with no modifications but some OLDER Traegers may need the control board hole expanded to fit the larger circuit board on the back of all digital thermostat upgrades.
Note: Some older discontinued Traeger grills made before 2014 had different wire connections on their controllers. Those controls are now obsolete. You can still use this controller as an upgrade by converting your existing wiring of your components to this Molex Wiring Connection or, by upgrading/ replacing all of the electrical components which will have the correct and most current Molex wire connections already attached.
NOTE: Before attempting to remove or install the Control for any reason, it is important that the Switch/Dial is in the OFF position and the Power Cord is disconnected from the electrical outlet. Although the Switch/Dial is off, electricity is still present at the Control. Failure to disconnect the Power Cord from the electrical outlet could result in personal injury from electrical shock and/or irreparable damage to the Control.
REMOVING THE EXISTING SMOKER CONTROL:
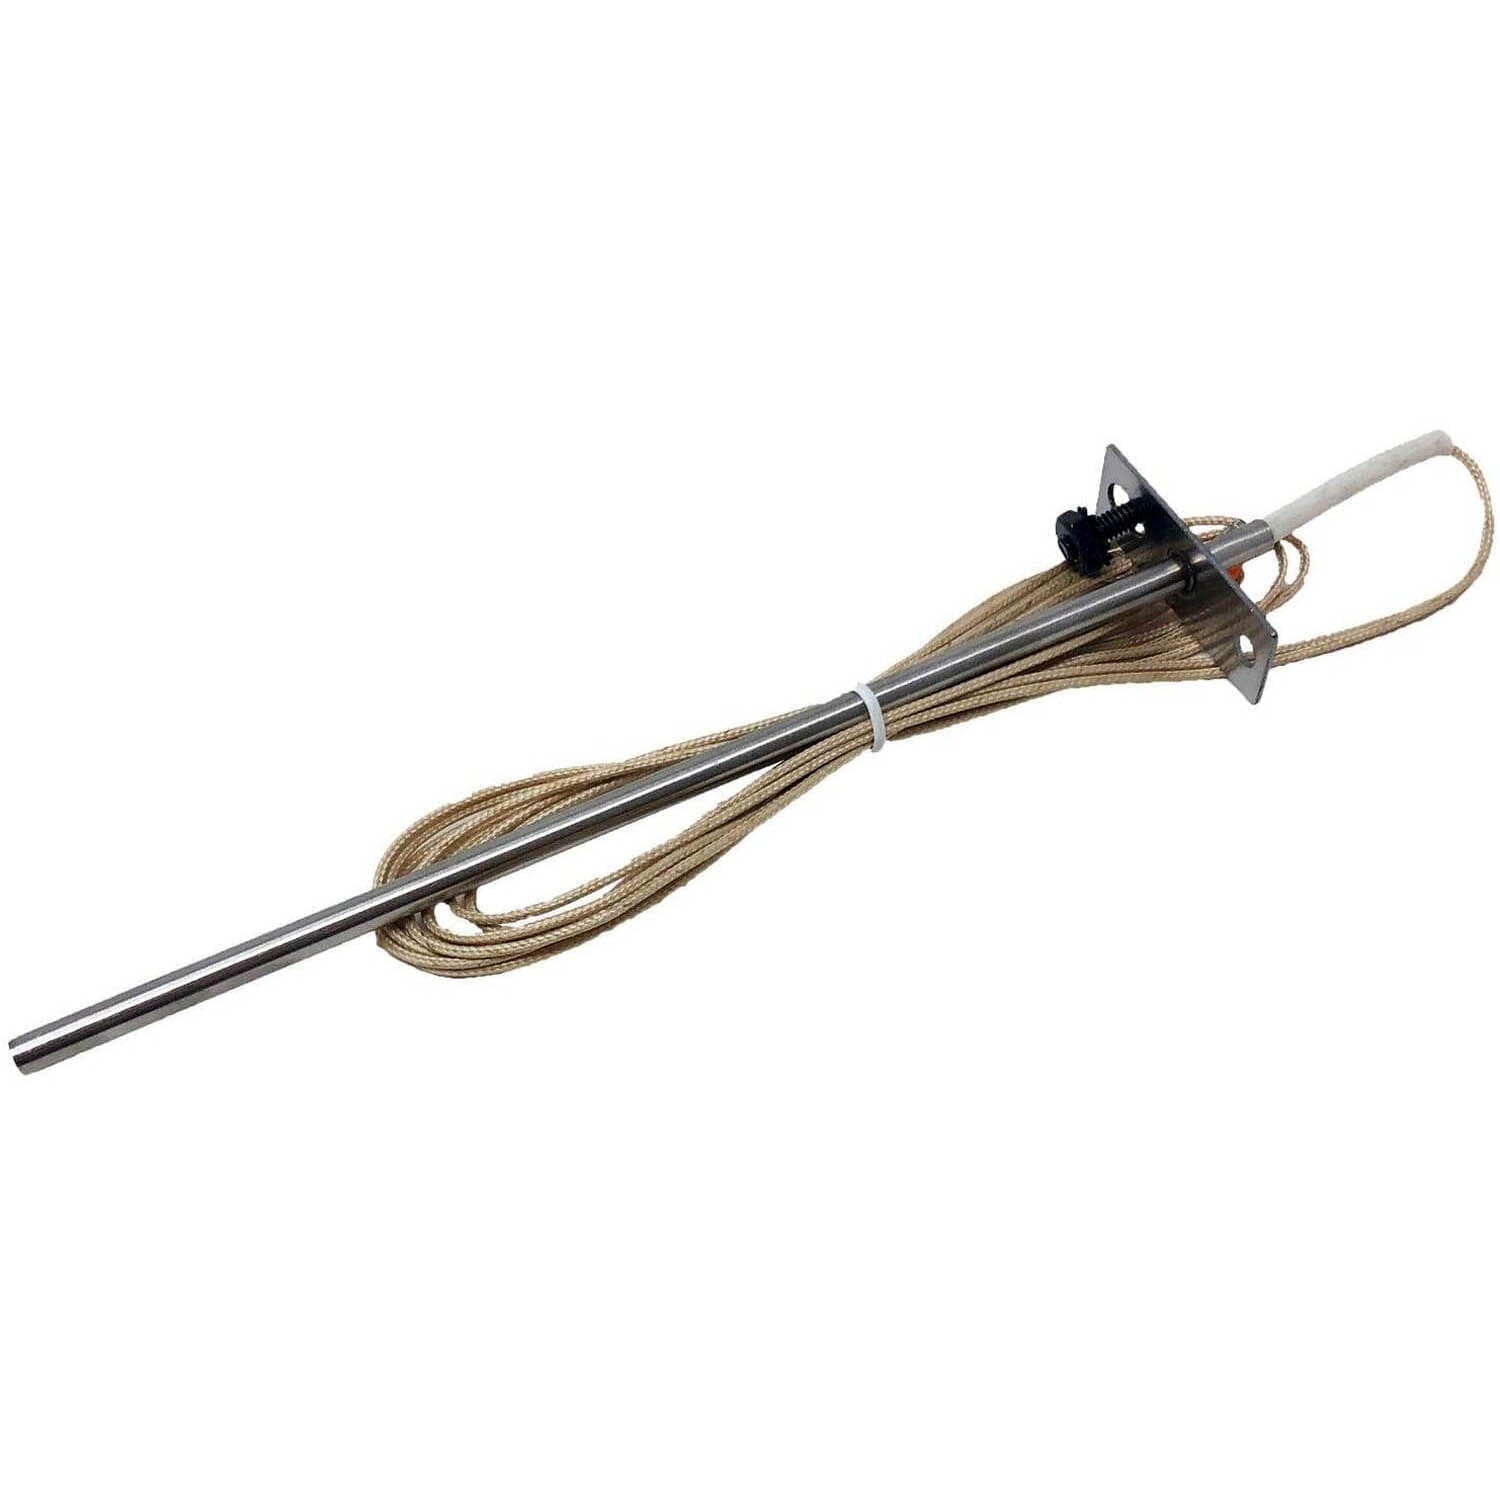
1) Make sure the Switch/Dial is in the OFF position. Disconnect the Power Cord from the electrical outlet. 2) Review the Digital Control Wiring Diagram to familiarize yourself with the color coding of the wiring connections. Disconnect the wiring from the Smoker Control by separating the 4 Molex Connectors found on the underside of the Pellet hopper. 3) Remove the two screws securing the Smoker Control to the Pellet Hopper. Save these screws as they will be used to mount the Digital Control later. 4) Carefully remove the Smoker Control through the opening in the front of the Pellet Hopper. You may need to adjust the angle of the Smoker Control to allow the circuit board to pass through the opening. Save the Smoker Control in case you should have a problem with your Digital Control. It can be reinstalled until the problem with the Digital Control is resolved. INSTALLING THE RTD: 1) Open the Door and remove the Porcelain Grill and Grease Drain Pan to provide access to the left side of the Grill. 2) Carefully cut the cable tie securing the RTD Wires to the RTD. Remove the Screw and Lock Nut from the RTD mounting bracket if they are attached. 3) Thread the RTD Wires through the center hole of the RTD Grill Filler and then through the small hole in the left end of the Grill. Continue to feed the RTD wires through the Grill until the lower end of the RTD can be inserted into RTD Grill Filler. On new Grills there will be a “Digital Thermostat RTD Mounting Hole” label pointing to the holes in the RTD Grill Filler. Refer to the RTD Installation Diagram for additional information. 4) Mount the RTD to the RTD Grill Filler using the 1/2” long Screw and the Lock Nut as shown in the RTD installation Diagram. Tighten to secure the RTD. 5) Run the RTD Wires down through the space between the end of the Grill and the Pellet Hopper. Then feed the Wires up through the opening for the Control. WIRING AND MOUNTING THE DIGITAL CONTROL: 1) Locate the Green Terminal Block on the back of the Digital Control in the upper right corner. Using a small screwdriver, loosen the two screws to open the clamping jaws enough to insert the RTD Wire ends. 2) Insert a bare wire end on one of the RTD Wires into the clamping jaws on one post of the Terminal Block. Tighten the screw to securely attach the wire. Do not over tighten. Repeat this process on the remaining wire. The RTD Wires may be connected to the Terminal Block in any combination. 3) Along with the RTD Wires, feed the wiring from the Digital Control into the opening in the Pellet Hopper. 4) Carefully insert the Digital Control into the opening in the Pellet Hopper. Again, you may need to adjust the angle of the Digital Control to allow the circuit board to pass through the opening. 5) Using the two screws that mounted the Smoker Control, attach the Digital Control to the Pellet Hopper. Do not over tighten the screws. 6) Connect the Molex Connectors according to the color coding shown on the Digital Control Wiring Diagram. You may have some excess length for the RTD Wires. This additional wiring can be coiled and secured to the Digital Control Wiring with a cable tie or a twist tie. Make sure that none of the wires interfere with the fan blades on the Draft Inducer Fan or the Auger Drive Motor. Replace the Grease Drain Pan and the Porcelain Grill, connect the Power Cord to an appropriate, grounded electrical outlet and you are ready to go.
REPLACEMENT ON OLDER MODEL GRILLS
Some of the later model grills had a smaller cutout originally used for our controls. These are the instruction for replacement for those models. After the original control has been removed by following instructions and the RTD has been installed per instruction above before you can begin. 1) Loosen the two screws on the green terminal block connector located on the back upper right corner of the controller using a small screwdriver. 2) Insert the RTD wire out through the cutout for the control and connect to the green connector located on the back of the new control into the green terminal block and tighten down the screws. 3) Insert the wires for the control into the cutout. Then when inserting the control into the cutout angle the control from the side away from the fuse and insert this side first. You will need to slide the control all the way to the left at an angle until the fuse holder clears the cutout. 4) Insert the two retaining screws into the holes provided on the face plate of the control and tighten with a screw driver. 5) Connect the Molex connectors to the correct components per the wiring diagram and then the grill is ready for use.
INITIAL FIRING INSTRUCTIONS (To be used on initial firing or anytime the Grill runs out of Pellets) In order to ensure proper operation of the Grill, you must first allow the Auger Tube to be “charged” with Pellets.
1) Open the Door and remove the Porcelain Grill, Grease Drain Pan and Heat Baffle from inside the Grill. 2) Make sure the Switch is OFF and the Dial Knob is in the OFF/ SHUT DOWN CYCLE position. Plug the Power Cord into an appropriate, grounded electrical outlet. 3) Open the Pellet Hopper Lid and locate the Auger. Make sure there are no foreign objects in the Auger. Turn the Switch to ON and the Dial Knob to the Smoke setting look into the Pellet Hopper to confirm the Auger is turning. At the same time, place your fingers over the Firepot and feel the air movement from the Draft Inducer Fan. Look to see if the Hot Rod is getting hot. DO NOT TOUCH IT! Turn the Switch to off and the Dial Knob to OFF/SHUT DOWN CYCLE. 4) Fill the Pellet Hopper with TRAEGER BBQ PELLETS. WARNING! USE ONLY TRAEGER BRAND BBQ PELLETS, which are specifically made to work in our Grills. NEVER use heating fuel pellets in the Grill. Turn the Switch to ON, set the Dial Knob to HIGH. Note: During the initial charging of the Auger, it will take time for the Pellets to travel from the Pellet Hopper to the Firepot. When the Pellets begin to fall into the Firepot, turn the Switch to OFF and the Dial Knob to OFF/SHUT DOWN CYCLE. 5) Turn the Switch to ON, set the Dial Knob to SMOKE. Let the Pellets come to full flame. Once you see flames come out of the Firepot, turn the Switch to OFF and the Dial Knob to OFF/SHUT DOWN CYCLE, and let the Grill cool down. RECOMMENDATION for ease of clean-up: Line the Grease Drain Pan with heavy-duty aluminum foil. Be sure the edges and ends of the foil are tight against the bottom of the Grease Drain Pan. Position the Heat Baffle, the foil lined Grease Drain Pan and Porcelain Grill in their proper locations. 6) With the Door open, turn the Switch to On and the Dial Knob to SMOKE. In approximately 2 minutes you will notice whitish-gray smoke coming out of the Grill as the Pellets ignite. After assuring the Pellets have ignited, close the Door and set the Temperature Dial to any cooking setting desired. 7) Note: Before cooking the first batch of food in your new Grill, you will need to season the Grill. Turn the Temperature Dial to HIGH and run for 45 minutes at this setting with the Door closed. This must be done before cooking any food on the Grill. 8) The Grill should be allowed to pre-heat for approximately 10 minutes with the Door closed before placing food in the Grill.
THERMOSTAT CONTROL FUNCTIONS
Adjustment of the “P”(Smoke) settings:- call customer service before adjusting. Due to the widely varying temperature swings and operating environments experienced by our customers, the digital controllers contain a function that will allow the grill to better function in extreme temperature conditions for the smoke function. These changes should only be performed when the conditions are expected to be present for extended periods. In order to access this functionality, locate the small hole on the face plate of the digital controller just to the right of the red digital display. Turn the controller knob to the 225 setting. Using a very small screwdriver or other pointed object (a bent paper clip works well), insert into the hole and use it to depress the micro switch located inside. Each time you depress the switch, the digital readout will change from a temperature display to a “P” setting followed by a number. The factory default setting is P-2. The setting range available is from P-0 to P-5 (however it is not recommended that a setting above 5 ever be used). The “P” readout will change each time you depress the micro switch. With all “P” settings, the Auger motor on time remains constant at 15 seconds while the Auger motor time off is influenced by the “P” setting. P-2 Setting (factory): Auger motor on time of 15 seconds, off time: 65 seconds. P-3 Setting: Auger motor on 15 seconds, off time: 75 seconds P-4 Setting: Auger motor on 15 seconds, off time: 85 seconds P-5 Setting: Auger motor on 15 seconds, off time: 95 seconds Increasing the number decreases the Smoking Temperature. Decreasing the number increases the Smoking Temperature. Note: The Traeger Service Department recommends a setting no higher than P-5! Also, once a Smoke Adjustment is made, the temperature on the digital readout should be monitored. If the temperature is consistently below 160 degrees F while “Smoking”, there is a risk of losing the fire in the firepot. If your fire should go out while “Smoking”, turn the controller to the OFF POSITION. DO NOT attempt to restart the Grill until you complete the recovery process (below). Failure to do so could result in an “over firing” condition and can cause serious damage to your Grill.
Troubleshooting
Warranty
Unfortunately, sometimes products do not work like they are supposed to. We offer a 90 day warranty on manufacturer defects. Some manufacturers
make this a very simple and easy process unfortunately others do not. Items must be used in accordance with the manufacturers guidelines to qualify for warranty replacement. Please
be advised that warranty claims for these parts may take up to 4 weeks for processing, and customers must cover shipping.
Shipping Information
This Item Qualifies For Free Shipping With Orders Over $99!
When Will My Order Ship?
All orders are typically processed within 24 hours of receiving payment and are shipped from us same day if placed before our shipping cutoff time (Monday - Friday: 12PM, Saturday: 10AM, Sunday: No Shipping), orders placed after our cutoff time are shipped the next morning.
Do You Offer Express Shipping?
Yes! Please note the shipping times are based on business days, weekends and holidays do not count to the delivery date. Please see our expedited ship time schedules here.
How Does Free Shipping Work?
Most orders over $99 qualify for free shipping! Orders which ship for free are shipped with either USPS or UPS based on our discretion. If you are using a PO box, free shipping orders will always go USPS.
Do You Ship To Canada?
We ship to Canada! We estimate USPS to take 4-10 days once receiving your package from us. We do not offer expedited shipping of any kind to Canada. Please allow an extra 2-5 days for all shipments to Canada. Free shipping is not available to Canada.
Do You Ship To Alaska Or Hawaii?
We ship to both Alaska and Hawaii! We do not offer next day or two day shipping to Alaska or Hawaii. Free shipping is not available to Alaska or Hawaii.
Do You Ship Outside The US Or Canada?
Unfortunately, at this time we do not offer international shipping other than to Canada.
Shipping Time Estimations
For information on shipping time estimations, see the Shipping Information & Transit Times on the shipping page.
This is the upgraded version that no longer has the P-setting adjustment feature. It is now manufactured with Advanced Grilling Logic.
Take total control of your Traeger grill with this 11-stage digital thermostat upgrade kit. This thermostat gives you total control over temperature with settings from 180 to 375 degrees and also features a high mode for fast cooking and a smoke mode for low-temperature smoking. These controllers connect and work easily with all Traeger grills made up until 2019 (excludes Scout and PTG+).
Replacement is quick and easy.
Note:This fits most Traegers with no modifications but some OLDER Traegers may need the control board hole expanded to fit the larger circuit board on the back of all digital thermostat upgrades.
Note: Some older discontinued Traeger grills made before 2014 had different wire connections on their controllers. Those controls are now obsolete. You can still use this controller as an upgrade by converting your existing wiring of your components to this Molex Wiring Connection or, by upgrading/ replacing all of the electrical components which will have the correct and most current Molex wire connections already attached.
NOTE: Before attempting to remove or install the Control for any reason, it is important that the Switch/Dial is in the OFF position and the Power Cord is disconnected from the electrical outlet. Although the Switch/Dial is off, electricity is still present at the Control. Failure to disconnect the Power Cord from the electrical outlet could result in personal injury from electrical shock and/or irreparable damage to the Control.
REMOVING THE EXISTING SMOKER CONTROL:
1) Make sure the Switch/Dial is in the OFF position. Disconnect the Power Cord from the electrical outlet. 2) Review the Digital Control Wiring Diagram to familiarize yourself with the color coding of the wiring connections. Disconnect the wiring from the Smoker Control by separating the 4 Molex Connectors found on the underside of the Pellet hopper. 3) Remove the two screws securing the Smoker Control to the Pellet Hopper. Save these screws as they will be used to mount the Digital Control later. 4) Carefully remove the Smoker Control through the opening in the front of the Pellet Hopper. You may need to adjust the angle of the Smoker Control to allow the circuit board to pass through the opening. Save the Smoker Control in case you should have a problem with your Digital Control. It can be reinstalled until the problem with the Digital Control is resolved. INSTALLING THE RTD: 1) Open the Door and remove the Porcelain Grill and Grease Drain Pan to provide access to the left side of the Grill. 2) Carefully cut the cable tie securing the RTD Wires to the RTD. Remove the Screw and Lock Nut from the RTD mounting bracket if they are attached. 3) Thread the RTD Wires through the center hole of the RTD Grill Filler and then through the small hole in the left end of the Grill. Continue to feed the RTD wires through the Grill until the lower end of the RTD can be inserted into RTD Grill Filler. On new Grills there will be a “Digital Thermostat RTD Mounting Hole” label pointing to the holes in the RTD Grill Filler. Refer to the RTD Installation Diagram for additional information. 4) Mount the RTD to the RTD Grill Filler using the 1/2” long Screw and the Lock Nut as shown in the RTD installation Diagram. Tighten to secure the RTD. 5) Run the RTD Wires down through the space between the end of the Grill and the Pellet Hopper. Then feed the Wires up through the opening for the Control. WIRING AND MOUNTING THE DIGITAL CONTROL: 1) Locate the Green Terminal Block on the back of the Digital Control in the upper right corner. Using a small screwdriver, loosen the two screws to open the clamping jaws enough to insert the RTD Wire ends. 2) Insert a bare wire end on one of the RTD Wires into the clamping jaws on one post of the Terminal Block. Tighten the screw to securely attach the wire. Do not over tighten. Repeat this process on the remaining wire. The RTD Wires may be connected to the Terminal Block in any combination. 3) Along with the RTD Wires, feed the wiring from the Digital Control into the opening in the Pellet Hopper. 4) Carefully insert the Digital Control into the opening in the Pellet Hopper. Again, you may need to adjust the angle of the Digital Control to allow the circuit board to pass through the opening. 5) Using the two screws that mounted the Smoker Control, attach the Digital Control to the Pellet Hopper. Do not over tighten the screws. 6) Connect the Molex Connectors according to the color coding shown on the Digital Control Wiring Diagram. You may have some excess length for the RTD Wires. This additional wiring can be coiled and secured to the Digital Control Wiring with a cable tie or a twist tie. Make sure that none of the wires interfere with the fan blades on the Draft Inducer Fan or the Auger Drive Motor. Replace the Grease Drain Pan and the Porcelain Grill, connect the Power Cord to an appropriate, grounded electrical outlet and you are ready to go.
REPLACEMENT ON OLDER MODEL GRILLS
Some of the later model grills had a smaller cutout originally used for our controls. These are the instruction for replacement for those models. After the original control has been removed by following instructions and the RTD has been installed per instruction above before you can begin. 1) Loosen the two screws on the green terminal block connector located on the back upper right corner of the controller using a small screwdriver. 2) Insert the RTD wire out through the cutout for the control and connect to the green connector located on the back of the new control into the green terminal block and tighten down the screws. 3) Insert the wires for the control into the cutout. Then when inserting the control into the cutout angle the control from the side away from the fuse and insert this side first. You will need to slide the control all the way to the left at an angle until the fuse holder clears the cutout. 4) Insert the two retaining screws into the holes provided on the face plate of the control and tighten with a screw driver. 5) Connect the Molex connectors to the correct components per the wiring diagram and then the grill is ready for use.
INITIAL FIRING INSTRUCTIONS (To be used on initial firing or anytime the Grill runs out of Pellets) In order to ensure proper operation of the Grill, you must first allow the Auger Tube to be “charged” with Pellets.
1) Open the Door and remove the Porcelain Grill, Grease Drain Pan and Heat Baffle from inside the Grill. 2) Make sure the Switch is OFF and the Dial Knob is in the OFF/ SHUT DOWN CYCLE position. Plug the Power Cord into an appropriate, grounded electrical outlet. 3) Open the Pellet Hopper Lid and locate the Auger. Make sure there are no foreign objects in the Auger. Turn the Switch to ON and the Dial Knob to the Smoke setting look into the Pellet Hopper to confirm the Auger is turning. At the same time, place your fingers over the Firepot and feel the air movement from the Draft Inducer Fan. Look to see if the Hot Rod is getting hot. DO NOT TOUCH IT! Turn the Switch to off and the Dial Knob to OFF/SHUT DOWN CYCLE. 4) Fill the Pellet Hopper with TRAEGER BBQ PELLETS. WARNING! USE ONLY TRAEGER BRAND BBQ PELLETS, which are specifically made to work in our Grills. NEVER use heating fuel pellets in the Grill. Turn the Switch to ON, set the Dial Knob to HIGH. Note: During the initial charging of the Auger, it will take time for the Pellets to travel from the Pellet Hopper to the Firepot. When the Pellets begin to fall into the Firepot, turn the Switch to OFF and the Dial Knob to OFF/SHUT DOWN CYCLE. 5) Turn the Switch to ON, set the Dial Knob to SMOKE. Let the Pellets come to full flame. Once you see flames come out of the Firepot, turn the Switch to OFF and the Dial Knob to OFF/SHUT DOWN CYCLE, and let the Grill cool down. RECOMMENDATION for ease of clean-up: Line the Grease Drain Pan with heavy-duty aluminum foil. Be sure the edges and ends of the foil are tight against the bottom of the Grease Drain Pan. Position the Heat Baffle, the foil lined Grease Drain Pan and Porcelain Grill in their proper locations. 6) With the Door open, turn the Switch to On and the Dial Knob to SMOKE. In approximately 2 minutes you will notice whitish-gray smoke coming out of the Grill as the Pellets ignite. After assuring the Pellets have ignited, close the Door and set the Temperature Dial to any cooking setting desired. 7) Note: Before cooking the first batch of food in your new Grill, you will need to season the Grill. Turn the Temperature Dial to HIGH and run for 45 minutes at this setting with the Door closed. This must be done before cooking any food on the Grill. 8) The Grill should be allowed to pre-heat for approximately 10 minutes with the Door closed before placing food in the Grill.
THERMOSTAT CONTROL FUNCTIONS
Adjustment of the “P”(Smoke) settings:- call customer service before adjusting. Due to the widely varying temperature swings and operating environments experienced by our customers, the digital controllers contain a function that will allow the grill to better function in extreme temperature conditions for the smoke function. These changes should only be performed when the conditions are expected to be present for extended periods. In order to access this functionality, locate the small hole on the face plate of the digital controller just to the right of the red digital display. Turn the controller knob to the 225 setting. Using a very small screwdriver or other pointed object (a bent paper clip works well), insert into the hole and use it to depress the micro switch located inside. Each time you depress the switch, the digital readout will change from a temperature display to a “P” setting followed by a number. The factory default setting is P-2. The setting range available is from P-0 to P-5 (however it is not recommended that a setting above 5 ever be used). The “P” readout will change each time you depress the micro switch. With all “P” settings, the Auger motor on time remains constant at 15 seconds while the Auger motor time off is influenced by the “P” setting. P-2 Setting (factory): Auger motor on time of 15 seconds, off time: 65 seconds. P-3 Setting: Auger motor on 15 seconds, off time: 75 seconds P-4 Setting: Auger motor on 15 seconds, off time: 85 seconds P-5 Setting: Auger motor on 15 seconds, off time: 95 seconds Increasing the number decreases the Smoking Temperature. Decreasing the number increases the Smoking Temperature. Note: The Traeger Service Department recommends a setting no higher than P-5! Also, once a Smoke Adjustment is made, the temperature on the digital readout should be monitored. If the temperature is consistently below 160 degrees F while “Smoking”, there is a risk of losing the fire in the firepot. If your fire should go out while “Smoking”, turn the controller to the OFF POSITION. DO NOT attempt to restart the Grill until you complete the recovery process (below). Failure to do so could result in an “over firing” condition and can cause serious damage to your Grill.
Troubleshooting
Warranty
Unfortunately, sometimes products do not work like they are supposed to. We offer a 90 day warranty on manufacturer defects. Some manufacturers
make this a very simple and easy process unfortunately others do not. Items must be used in accordance with the manufacturers guidelines to qualify for warranty replacement. Please
be advised that warranty claims for these parts may take up to 4 weeks for processing, and customers must cover shipping.
Shipping Info
This Item Qualifies For Free Shipping With Orders Over $99!
When Will My Order Ship?
All orders are typically processed within 24 hours of receiving payment and are shipped from us same day if placed before our shipping cutoff time (Monday - Friday: 12PM, Saturday: 10AM, Sunday: No Shipping), orders placed after our cutoff time are shipped the next morning.
Do You Offer Express Shipping?
Yes! Please note the shipping times are based on business days, weekends and holidays do not count to the delivery date. Please see our expedited ship time schedules here.
How Does Free Shipping Work?
Most orders over $99 qualify for free shipping! Orders which ship for free are shipped with either USPS or UPS based on our discretion. If you are using a PO box, free shipping orders will always go USPS.
Do You Ship To Canada?
We ship to Canada! We estimate USPS to take 4-10 days once receiving your package from us. We do not offer expedited shipping of any kind to Canada. Please allow an extra 2-5 days for all shipments to Canada. Free shipping is not available to Canada.
Do You Ship To Alaska Or Hawaii?
We ship to both Alaska and Hawaii! We do not offer next day or two day shipping to Alaska or Hawaii. Free shipping is not available to Alaska or Hawaii.
Do You Ship Outside The US Or Canada?
Unfortunately, at this time we do not offer international shipping other than to Canada.
Shipping Time Estimations
For information on shipping time estimations, see the Shipping Information & Transit Times on the shipping page.