Install Instructions For Hearthstone Clydesdale 8491 & 8492 Gasket Kit: 94-58912
Instructional Documents:
GLASS & GLASS GASKET REPLACEMENT
1. Remove the door by opening it about 90° and lifting it straight up off the hinges with the hinge pins remaining in the door.
2. Place the door face down on a flat, smooth surface, other than the floor, with the handle hanging over an edge.
3. Apply penetrating oil to the screws in the glass retainer clips. Remove the screws to separate the glass from the door.
4. Carefully lift the damaged glass and/or old gasket from the doorframe and discard it (Pay special attention to how the gasket is installed on the glass or door frame).
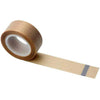
5. Peel the paper backing from the tape gasket. Apply the new gasket to the glass or doorframe.
6. Place the glass into the door frame. Place the clips and gasket squares (Gasket squares go under the clips) around the glass, and over the screw holes in the clip.
7. Screw the glass retainer clips back on the door.
8. Install the door.
DOOR GASKET REPLACEMENT:
1. Start by removing the door from the stove.
2. Place the door face down on a soft, flat, and even surface.
3. Remove the old gasket (After the gasket is removed make sure you clean or scrape away an old adhesive. It is imperative that the channel is cleaned before applying the new cement or silicone).
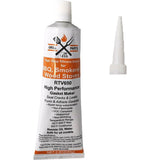
4. Apply a generous bead of gasket cement or silicone into the channel where the new gasket will sit.
5. Starting on one end of the channel gently position the gasket in place (The gasket will fill the entire channel and butt together on one end. It is better to have more gasket than you need. You can trim any excess gasket at the end if necessary).
6. Let the gasket set (Read the instructions on the back of the cement/silicone. Some gasket cement/silicone needs to sit for a predetermined amount of time before the door is reattached to the unit).
7. Reinstall the door (Some adhesives will require the stove to be burned at a certain temperature for a period of time to cure the gasket. Check the instructions on the adhesive you're using to confirm).