Skip to main content
Product title:

Drip Tray Liner 5 Pack for Treager 22 Series and Pro 575 BAC409-AMP

Product rating:
Product price:
$29.99
Product SKU ! BAC409-AMP
Product MPN ! BAC507
Product availability: In Stock
Bullet point features

Frequently Bought Together

Total Price: $62.97

Description

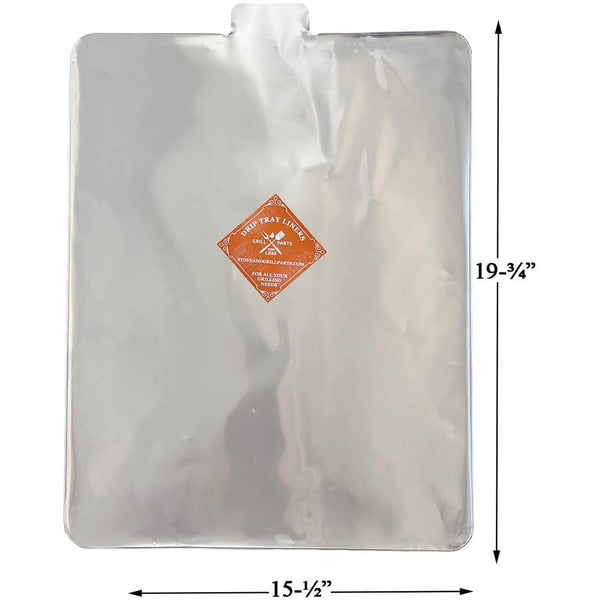
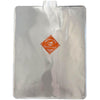
Make grill maintenance a breeze with our Drip Tray Liners. Made of heat-proof aluminum, they’re lightweight and disposable so you can clean up quickly and Traeger on. Liners should rest flat on the drip tray pan and not obstruct the airflow that rises up from the back and front edges.

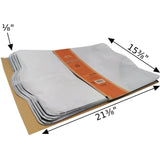
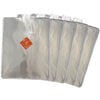
  • Pack includes 5 aluminum liners
  • Provides easy cleanup
  • Designed as a perfect fit for Traeger 22 Series and other popular Traeger Grills See Compatibility Tab
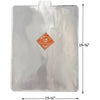
  • For drip trays that measure 20" x 15 1/2"

NOTE: BAC409 was the old SKU for the drip tray liner for all 22 Series Grills which is now obsolete. Traeger now lists BAC507 as the new OEM liner for all of the 22 Series.

Drip Trays and Heat Baffles

Tray liners exist to protect your drip surface and help maintain a flat surface. They also make cleanup a lot easier. Drip trays do not last forever and do need to be replaced from time to time. If your tray is warped or rusting it may prevent the liner from lying flat. Also, heat baffles tend to wear out at about the same rate as the trays and we sell the most popular ones in a set.

ALWAYS VERIFY YOUR CORRECT PART BEFORE ORDERING


Replacement For Part Numbers:

  • BAC507
  • BAC409

View Compatible Models

UPC: 634868923081

Compatible Models

    Traeger

  • Century 22
  • Century
  • Deluxe Elite 300
  • Eastwood 22
  • Executive
  • Lil Tex Elite (Gen 2)
  • Lil Tex Limited Edition
  • Lil Pig
  • Lil Tex Elite 22
  • Longhorn Steer
  • Mesa 22
  • Pro 575
  • Pro Series 22
  • Professional
  • Roll Top
  • Silverton
  • Timberline 850 AC

Technical Specs

Length 19 3/4"
Width 15 1/2"
Height 1"
Material Aluminum

Instructions

Install Instructions For Drip Tray Liner 5 Pack for Treager 22 Series and Pro 575 BAC409-AMP

Cleaning your grill


  1. Spray the grill grate and inside of the chimney with an all-natural degreaser/cleaner.
  2. Remove and clean both sides of the grill grates.
  • We recommend NOT using wire brushes, but rather using a cleaning cloth or heavy-duty paper towels.
  1. Dispose of old foil or drip tray liners.
  2. Remove the drip tray and the heat baffle.
  3. Vacuum the inside of the grill and the fire-pot thoroughly.
  4. Scrub the inside of the chimney.
  5. Again, we recommend not using wire brushes. Instead, use a cleaning cloth or heavy-duty paper towels.
  6. Spray the inside and outside of the grill with the all-natural degreaser/cleaner and allow to soak for several minutes before wiping clean with a paper towel or cleaning cloth.
  7. While we recommend Traeger All Natural Cleaner, you may also use any non-chemical cleaner or a mixture of diluted dish soap, water and vinegar.
  8. Last, reinsert all components, including the heat baffle, drip try, drip tray liners/foil, new bucket liners, and the grill grates, and you are set!


Do NOT clean the Thermocouple or RTD unless there is a visual build-up on it that needs to be removed.

Troubleshooting

Grease Management to Prevent Grease Fires


Cooking grease becomes a flammable liquid when it is heated to a temperature over 360°F. If you have not cleaned grease from the inside of your grill and you run your grill hotter than 360°F, you create the conditions for starting a grease fire. When this happens, you'll see lots of very thick, white smoke until you open the grill lid. When the lid is lifted the hot smoke mixes with an excessive amount of oxygen-rich air and that's when the fire will starts. Closing the lid at this time is advised but this may not extinguish the flames. Opening the lid again at this point to save your food is NOT advised.


If you have mistakenly started a grease fire, close the grill lid and disconnect the power from the grill until the flames and smoke subside. The grill now needs to cool back down to a lower temperature before proceeding. If the grease bucket hanging from the grill has not also ignited, remove it from the grill so that it too does not accidentally ignite.


Here are the best grilling practices to prevent grease fire from ever starting


  • ALWAYS use some kind of drip liner on your grease pan drip tray. Preformed, heavy-duty liners are preferred as they can be washed on a flat surface a few times before discarding. Heavy-duty aluminum foil can also be used but it will need to be thicker than most sold in grocery stores. If a drip dray liner is not used, the drip pan MUST be removed from the grill and washed between uses.
  • ALWAYS trim your fatty meats prior to cooking if your grill temp is going to be higher than 360°F. Fatty meats on the grill need to be cooked at a low temperature for longer periods of time to prevent oil flare-ups.
  • ALWAYS inspect your tray, drain chute, and bucket prior to cooking and remove drippings that will impede the free-flowing design of the system from the tray to the bucket. Ash, chunks of food, charcoal, and metal flakes from a rusting grill all contribute to blocked passages.
  • ALWAYS Use a food-grade degreaser and a wire brush to wash down the areas of your grill that have a layer of cooking grease to prevent flare-ups.
  • ALWAYS run your grill to a temperature above 400°F to burn off any degreaser and cooking residue on the grilling surfaces prior to cooking or smoking.

NOTE: if you mostly smoke on our grill at low temperatures you may not need to clean and degrease the entire grill between every cook but be mindful of going from many low-temperature cooks to a hot grill without an inspection and cleaning.

Warranty

Unfortunately, sometimes products do not work like they are supposed to. We offer a 90 day warranty on manufacturer defects. Some manufacturers make this a very simple and easy process unfortunately others do not. Items must be used in accordance with the manufacturers guidelines to qualify for warranty replacement. Please be advised that warranty claims for these parts may take up to 4 weeks for processing, and customers must cover shipping.

Shipping Information

This Item Qualifies For Free Shipping With Orders Over $49!

HOLIDAY UPDATE
Due to the upcoming Christmas and New Years holidays, shippers will not be picking up on the dates below. Additionally, packages may take longer to arrive than expected. We appreciate your understanding and patience during this time.

  • USPS: No pickup on Dec 24th, Dec 25th, and Jan 1st.
  • UPS: No pickup on Dec 31st and Jan 1st.
CANADA UPDATE

Due to the ongoing Canada Post postal workers' strike, we are forced to suspend all ordering to Canada. Please be advised that any shipments that did not clear U.S. customs by November 15th will be delayed until Canada Post is fully operational. We appreciate your understanding and patience during this time.

When Will My Order Ship?

All orders are typically processed within 24 hours of receiving payment and are shipped from us same day if placed before our shipping cutoff time (Monday - Friday: 12PM, Saturday: 10AM, Sunday: No Shipping), orders placed after our cutoff time are shipped the next morning.

Do You Offer Express Shipping?

Yes! Please note the shipping times are based on business days, weekends and holidays do not count to the delivery date. Please see our expedited ship time schedules here.

How Does Free Shipping Work?

Most orders over $49 qualify for free shipping! Orders which ship for free are shipped with either USPS or UPS based on our discretion. If you are using a PO box, free shipping orders will always go USPS.

Do You Ship To Canada?

We ship to Canada! We estimate USPS to take 4-10 days once receiving your package from us. We do not offer expedited shipping of any kind to Canada. Please allow an extra 2-5 days for all shipments to Canada. Free shipping is not available to Canada.

Do You Ship To Alaska Or Hawaii?

We ship to both Alaska and Hawaii! We do not offer next day or two day shipping to Alaska or Hawaii. Free shipping is not available to Alaska or Hawaii.

Do You Ship Outside The US Or Canada?

Unfortunately, at this time we do not offer international shipping other than to Canada.

Shipping Time Estimations

For information on shipping time estimations, see the Shipping Information & Transit Times on the shipping page.

Learn More About Our Shipping Information
Jump back to product information tab navigation

Description

Make grill maintenance a breeze with our Drip Tray Liners. Made of heat-proof aluminum, they’re lightweight and disposable so you can clean up quickly and Traeger on. Liners should rest flat on the drip tray pan and not obstruct the airflow that rises up from the back and front edges.

  • Pack includes 5 aluminum liners
  • Provides easy cleanup
  • Designed as a perfect fit for Traeger 22 Series and other popular Traeger Grills See Compatibility Tab
  • For drip trays that measure 20" x 15 1/2"

NOTE: BAC409 was the old SKU for the drip tray liner for all 22 Series Grills which is now obsolete. Traeger now lists BAC507 as the new OEM liner for all of the 22 Series.

Drip Trays and Heat Baffles

Tray liners exist to protect your drip surface and help maintain a flat surface. They also make cleanup a lot easier. Drip trays do not last forever and do need to be replaced from time to time. If your tray is warped or rusting it may prevent the liner from lying flat. Also, heat baffles tend to wear out at about the same rate as the trays and we sell the most popular ones in a set.

ALWAYS VERIFY YOUR CORRECT PART BEFORE ORDERING


Replacement For Part Numbers:

  • BAC507
  • BAC409

View Compatible Models

UPC: 634868923081

Compatible Models

    Traeger

  • Century 22
  • Century
  • Deluxe Elite 300
  • Eastwood 22
  • Executive
  • Lil Tex Elite (Gen 2)
  • Lil Tex Limited Edition
  • Lil Pig
  • Lil Tex Elite 22
  • Longhorn Steer
  • Mesa 22
  • Pro 575
  • Pro Series 22
  • Professional
  • Roll Top
  • Silverton
  • Timberline 850 AC

Technical Specs

Length 19 3/4"
Width 15 1/2"
Height 1"
Material Aluminum

Instructions

Install Instructions For Drip Tray Liner 5 Pack for Treager 22 Series and Pro 575 BAC409-AMP

Cleaning your grill


  1. Spray the grill grate and inside of the chimney with an all-natural degreaser/cleaner.
  2. Remove and clean both sides of the grill grates.
  • We recommend NOT using wire brushes, but rather using a cleaning cloth or heavy-duty paper towels.
  1. Dispose of old foil or drip tray liners.
  2. Remove the drip tray and the heat baffle.
  3. Vacuum the inside of the grill and the fire-pot thoroughly.
  4. Scrub the inside of the chimney.
  5. Again, we recommend not using wire brushes. Instead, use a cleaning cloth or heavy-duty paper towels.
  6. Spray the inside and outside of the grill with the all-natural degreaser/cleaner and allow to soak for several minutes before wiping clean with a paper towel or cleaning cloth.
  7. While we recommend Traeger All Natural Cleaner, you may also use any non-chemical cleaner or a mixture of diluted dish soap, water and vinegar.
  8. Last, reinsert all components, including the heat baffle, drip try, drip tray liners/foil, new bucket liners, and the grill grates, and you are set!


Do NOT clean the Thermocouple or RTD unless there is a visual build-up on it that needs to be removed.

Troubleshooting

Grease Management to Prevent Grease Fires


Cooking grease becomes a flammable liquid when it is heated to a temperature over 360°F. If you have not cleaned grease from the inside of your grill and you run your grill hotter than 360°F, you create the conditions for starting a grease fire. When this happens, you'll see lots of very thick, white smoke until you open the grill lid. When the lid is lifted the hot smoke mixes with an excessive amount of oxygen-rich air and that's when the fire will starts. Closing the lid at this time is advised but this may not extinguish the flames. Opening the lid again at this point to save your food is NOT advised.


If you have mistakenly started a grease fire, close the grill lid and disconnect the power from the grill until the flames and smoke subside. The grill now needs to cool back down to a lower temperature before proceeding. If the grease bucket hanging from the grill has not also ignited, remove it from the grill so that it too does not accidentally ignite.


Here are the best grilling practices to prevent grease fire from ever starting


  • ALWAYS use some kind of drip liner on your grease pan drip tray. Preformed, heavy-duty liners are preferred as they can be washed on a flat surface a few times before discarding. Heavy-duty aluminum foil can also be used but it will need to be thicker than most sold in grocery stores. If a drip dray liner is not used, the drip pan MUST be removed from the grill and washed between uses.
  • ALWAYS trim your fatty meats prior to cooking if your grill temp is going to be higher than 360°F. Fatty meats on the grill need to be cooked at a low temperature for longer periods of time to prevent oil flare-ups.
  • ALWAYS inspect your tray, drain chute, and bucket prior to cooking and remove drippings that will impede the free-flowing design of the system from the tray to the bucket. Ash, chunks of food, charcoal, and metal flakes from a rusting grill all contribute to blocked passages.
  • ALWAYS Use a food-grade degreaser and a wire brush to wash down the areas of your grill that have a layer of cooking grease to prevent flare-ups.
  • ALWAYS run your grill to a temperature above 400°F to burn off any degreaser and cooking residue on the grilling surfaces prior to cooking or smoking.

NOTE: if you mostly smoke on our grill at low temperatures you may not need to clean and degrease the entire grill between every cook but be mindful of going from many low-temperature cooks to a hot grill without an inspection and cleaning.

Warranty

Unfortunately, sometimes products do not work like they are supposed to. We offer a 90 day warranty on manufacturer defects. Some manufacturers make this a very simple and easy process unfortunately others do not. Items must be used in accordance with the manufacturers guidelines to qualify for warranty replacement. Please be advised that warranty claims for these parts may take up to 4 weeks for processing, and customers must cover shipping.

Shipping Info

This Item Qualifies For Free Shipping With Orders Over $49!

HOLIDAY UPDATE
Due to the upcoming Christmas and New Years holidays, shippers will not be picking up on the dates below. Additionally, packages may take longer to arrive than expected. We appreciate your understanding and patience during this time.

  • USPS: No pickup on Dec 24th, Dec 25th, and Jan 1st.
  • UPS: No pickup on Dec 31st and Jan 1st.
CANADA UPDATE

Due to the ongoing Canada Post postal workers' strike, we are forced to suspend all ordering to Canada. Please be advised that any shipments that did not clear U.S. customs by November 15th will be delayed until Canada Post is fully operational. We appreciate your understanding and patience during this time.

When Will My Order Ship?

All orders are typically processed within 24 hours of receiving payment and are shipped from us same day if placed before our shipping cutoff time (Monday - Friday: 12PM, Saturday: 10AM, Sunday: No Shipping), orders placed after our cutoff time are shipped the next morning.

Do You Offer Express Shipping?

Yes! Please note the shipping times are based on business days, weekends and holidays do not count to the delivery date. Please see our expedited ship time schedules here.

How Does Free Shipping Work?

Most orders over $49 qualify for free shipping! Orders which ship for free are shipped with either USPS or UPS based on our discretion. If you are using a PO box, free shipping orders will always go USPS.

Do You Ship To Canada?

We ship to Canada! We estimate USPS to take 4-10 days once receiving your package from us. We do not offer expedited shipping of any kind to Canada. Please allow an extra 2-5 days for all shipments to Canada. Free shipping is not available to Canada.

Do You Ship To Alaska Or Hawaii?

We ship to both Alaska and Hawaii! We do not offer next day or two day shipping to Alaska or Hawaii. Free shipping is not available to Alaska or Hawaii.

Do You Ship Outside The US Or Canada?

Unfortunately, at this time we do not offer international shipping other than to Canada.

Shipping Time Estimations

For information on shipping time estimations, see the Shipping Information & Transit Times on the shipping page.

Learn More About Our Shipping Information

Customer Reviews

Based on 6 reviews
83%
(5)
17%
(1)
0%
(0)
0%
(0)
0%
(0)
D
Dale K.

Work excellent

B
Bill A.
Mesa Drip Tray Liners

As advertised.

T
Teresa R.

Drip Tray Disposable Liners For Camp Chef Smoke Pro DLX 24 Drip Tray

J
Joseph K.
camp chef pellet grill drip trays

they make cleanup so easy and are heavy enough not to burn through like plain aluminum foil does

H
HAL P.
The Place to Order fromq

Great service. Great parts selection. Thank you very much for hard to find parts.

QUESTIONS & ANSWERS

If your question does not concern this specific product, use our contact form

Have a Question?

Be the first to ask a question about this.

Ask a Question

Customer Reviews

Based on 6 reviews
83%
(5)
17%
(1)
0%
(0)
0%
(0)
0%
(0)
D
Dale K.

Work excellent

B
Bill A.
Mesa Drip Tray Liners

As advertised.

T
Teresa R.

Drip Tray Disposable Liners For Camp Chef Smoke Pro DLX 24 Drip Tray

J
Joseph K.
camp chef pellet grill drip trays

they make cleanup so easy and are heavy enough not to burn through like plain aluminum foil does

H
HAL P.
The Place to Order fromq

Great service. Great parts selection. Thank you very much for hard to find parts.

Liquid error (layout/theme line 255): Could not find asset snippets/iStock-notify-me.liquid