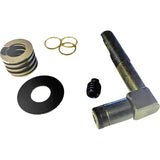
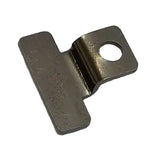
Install Instructions For Hearthstone Manchester 8360 Gasket Kit: 93-58600
Instructional Documents
Instructional Notes
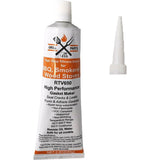
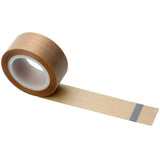
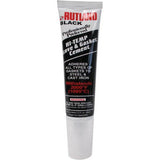
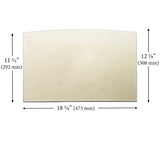
This kit contains replacement gasket material for the Front Door Gasket, Front Door Glass Gasket, Side Door Gasket, and Ash Door Gasket. Please refer to the appropriate procedure section below. Any time a liquid gasket adhesive is used to attach a stove gasket, the material should be allowed to harden on a cool stove overnight to prevent heat degradation of the liquid adhesive.
Front Door Glass Gasket:
(The ceramic glass in the Manchester stove may have an infrared coating on one side. When replacing the Front Door Glass Gasket, mark the glass so you know which side faces out before removing it. This can easily be done by placing a small piece of masking tape on the outside surface before you begin).
1. Prepare a smooth and sturdy work surface large enough to accommodate the front door of your stove. Cover the surface in cardboard or soft fabric to prevent damage to your door finish.
2. Remove the two acorn nuts and washers attaching the top casting to the body of the stove.
3. Place two pieces of 2”x4” board or thick cardboard strips on a diagonal between the top casting and the top of the stove body at the back two corners (This is to prevent chipping on enamel stoves).
4. Gently lift the leading (front) edge of the top casting and prop it up from the firebox with an additional 10” piece of 2”x4”. Be careful to position this prop in the center of the top casting leading edge and on the flat portion of the firebox top (Do not prop on firebox heat fins). The top casting should now be at an angle, front high with the back edge resting on the stove body (Separated by spacing material).
5. Look along the front edge of the now exposed firebox for the two front grill mounting studs. Loosen these two nuts. It is not necessary to remove them entirely.
6. Gently lift the Front Grill from the body of the stove and set it aside being careful not to damage the finish.
7. Open the front door to about 3/4 of full travel.
8. Stand facing the front side of the door with your right hand close to the hinged side. With an underhanded grip on your right hand, firmly grab the door face bottom rail. Grip the door face rail on the latch side with your left hand and gently but firmly raise the door straight up (vertically) until it is free from the hinge pivots. Once the door is free from the hinges it may move suddenly. Take care not to allow the door to contact the stove and potentially damage the finish.
9. Place the door face down on the prepared work surface.
10. With the door in this position, apply penetrating oil to each of the glass retention screws.
11. Using the #2 Phillips screwdriver, remove the 8 screws that hold the retaining clips and fiber pads to the inside of the door.
12. Remove the loose clips and fiber pads and set aside.
13. Carefully remove the glass panel and set aside.
14. Locate the end of the existing Front Door Glass Gasket. This should be situated between the hinge pivots on the hinge side of the door.
15. Grip one end of the existing 1/4” rope gasket and gently pull the entire unit from the door frame. Discard the used gasket material.
16. Thoroughly clean the gasket channel using steel wool or a small wire brush. Wipe the channel clean with damp rag or cloth.
17. Peel the paper backing from a short section of the replacement 1/4” self-adhesive rope gasket. Beginning at a position centered between the two hinge pivot projections, gently press the adhesive side of the rope gasket into the recessed gasket channel until it adheres to the floor of the groove (see Figure 3 for starting position). Continue peeling back the paper backing ©Hearthstone Quality Home Heating Products, Inc. Page 3 of 8 317 Stafford Ave., Morrisville, VT 05661 www.hearthstonestoves.com TDS9358600 Revision: 8/9/2012 and pressing the new gasket adhesive side down into the gasket channel around the entire perimeter of the glass opening. Be careful not to stretch or twist the gasket material during this process. When you have returned to your starting point, cut the rope gasket at such a location that the ends meet with no gap. Discard any extra gasket.
18. Set the ceramic glass panel onto the door with the correct side facing the out. Center the glass on the opening.
19. Position the 8 fiber pads on the glass panel parallel to the glass edge at each retention clip mounting screw location.
20. Position the 8 retention clips over each fiber pad as shown in Figure 2.
21. Insert the 8 new screws through the glass retention clips and lightly snug the screws in a clockwise pattern around the perimeter of the door.
22. Once all screws are in place, fully tighten them again is a clockwise pattern making sure the fiber pads stay centered under the clips.
23. Return the door to the stove and gently slide the door hinges back over the hinge pins
24. Carefully slide the Front Grill studs back into the mounting slots, assure the washers are on the back side of the slot tabs (touching the nuts), and re-snug the retaining nuts.
25. Remove the prop device installed in step 4 above and gently lay the leading edge of the top casting back down on the top of the stove body.
26. Remove the wood or cardboard inserted in step 3 above and gently return the top casting to its original position on the stove body.
27. Reinstall and tighten the washers and acorn nuts removed in step 2 above.