If you have a WiFIRE-enabled (D2) grill that will power on but will not ignite, here are some things to consider to get you back up and grillin'.
GRILL NOT REACHING TEMP
If the grill is heating up, but just isn't reaching the desired temperature, use the following articles instead Running too Cool
GIVE IT TIME
You should start to see smoke within 5-10 minutes. If you do not see smoke after that time, turn off the grill and check to see if pellets are in the firepot.
No pellets? Check to see if you’ve run out.
If you haven’t run out, jump down to Check the Auger.
DEMO MODE
Check to see if your grill is in Demo Mode. If it is, the controller will read “Demo Mode.”
To turn Demo Mode off, go to Menu > Settings > Demo Mode and select “OFF.” The controller will then reboot and wake back up in its normal operating state.
PROPER START-UP
Ensure you are using the proper startup for your grill by checking out our Grill Startup Guide.
CHECK THE FAN
When your grill starts up, you should be able to hear the soft whirl of the fan. If you cannot hear it, let's get a visual to make sure it is working properly.
Turn off the grill before further work.
Access the fan through the bottom of the hopper. Some grills have a hopper protection grate that needs to be unscrewed for fan access. Once you can look into the hopper, you will see two fans. The larger fan connected with the red/black/white wires is the induction fan.
The larger fan will be spinning or not at all. This is normal. Wait until the fan is on to see if it is spinning correctly.
If the fan is not spinning, turn off the grill and clean out any debris and manually spin it with your hand to clear up any build-up.
The fan should either work or not work at this point.
If the fan continues not to spin, contact Customer Service.
CHECK PELLETS
Are there pellets in the firepot? If so, let’s check the quality of the pellet. You can also check the pellets in the hopper, but pellets from the firepot will give a more accurate diagnosis. Quality pellets snap when broken and have a shine. Compromised pellets are dull, break into sawdust, or are damp. If the pellets are compromised, replace them and try igniting your grill again.
Replacing Pellets
Once you have quality pellets in your grill, continue with the troubleshooting steps to ensure the problem is solved.
If your firepot does not have any pellets, let’s check if the auger is feeding them.
Prime the Auger
On your controller, Navigate to Select Auger > Prime Auger.
Once pellets begin to fall into the firepot, select Done to turn off the auger.
If pellets are not being fed into the firepot, jump to Check Auger.
CHECK THE FIREPOT
While the grill is turned off and unplugged, remove all internal components (grill grate, drip tray, heat baffle).
Clean the firepot of ash and any extra pellets.
Examine the firepot. Check for rusted-through areas or any other damage.
If the firepot is beginning to fall apart, rusted through, or has more holes than when you got it, please contact Customer Service.
CHECK THE HOTROD
Remove the internal components of the grill, like the grill grates, drip tray, and heat baffle.
Make sure the firepot is clean of ash and pellets.
Turn the grill on and begin a cook cycle.
Carefully put your hand over the firepot. Do not touch the firepot or the hotrod. Do you feel the heat coming from the firepot? It may take a few minutes for the hotrod to heat up.
If there is no heat, please contact Customer Service.
If the hotrod is giving off heat, shut down and unplug the grill. Ensure the firepot is clean and return the heat baffle, drip tray, and grill grates to their places inside the grill.
Plug in and begin a cook cycle.
CHECK THE AUGER
The auger is the metal corkscrew that transports pellets from the hopper to the firepot.
Remove the internal components of the grill, like the grill grates, drip tray, and heat baffle.
Turn on the grill and prime the auger. This allows the auger to turn on without the danger of the hotrod.
On your controller, Navigate to Select Auger > Prime Auger.
Looking into the firepot, note if the auger is spinning.
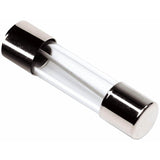
Troubleshooting Igniters:
Igniter failure can be verified on one of three ways. The easiest and most common way to see if the igniter is working is to start your stove or grill and visually look for the orange glow; however, some appliances do not have a visual way to do this, so you may have to physically feel around in the burn pot after the stove has been on for a few minutes to “feel” for heat being generated. If you can see the glow or can feel the heat from the igniter, chances are that the igniter is actually working. If this is the case, retry the startup process. Make sure your burn pot is seated correctly if it is removable. Make sure that your ash pan, door or hopper lid is closed as this will provide an airtight seal on the stove, which most igniters will require for proper ignition. If you still do not have any luck, give the stove a good cleaning, including the vent, and try again. If these attempts fail, further troubleshooting will be required, which leads us to the third method.
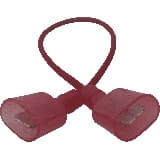
For this method, you will need a DMM (Digital Multi-Meter). Gain access to the igniter and remove it from the stove or insert. While you are taking the igniter out, verify that it is installed correctly with the correct mounting equipment, screws, etc.. With the igniter removed from the stove, you will need to look over the part to find the rated watts, it’s usually stamped on the metal somewhere. If you cannot find it, look on our website for the correct igniter; the information you are looking for will be under “technical specs”
If your Ohms reading is within 10%, more or less than the rating (46Ω +/- 10%), it’s good. If the igniter has a “contained short” or a short within itself and not grounding out, your Ohms reading will be very low...usually in the single digits. Generally, you cannot have a faulty igniter with too high of a resistance reading unless an igniter is installed that is way out of spec. An example of this would be your stove requires a 300W igniter but the stove has a 250W igniter installed. The reading in this scenario would be 52Ω. The reading would be correct to the igniter but would be the wrong value for the specified 300W igniter. That’s why it’s usually good to look at the part itself for the watts rating.