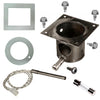
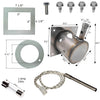
Bring your Traeger pellet grill back to its peak performance with our burn pot and igniter repair kit.
Included In This Kit:
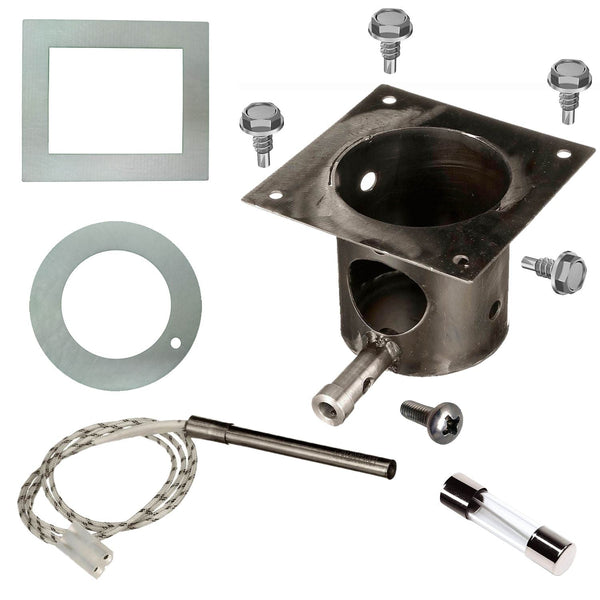
1 x Burn pot (FAB310)
1 x Igniter (BAC199)
1 x 5 Amp Fuse (ELE211)
4 x Stainless Steel Burn Pot Screws (HDW119)
1 x M4 Igniter Screw (HDW477)
1 x Hopper Burner Gasket (INS144)
1 x Chimney Flue Pipe Gasket (INS145)
This kit uses aftermarket parts where applicable to help you save big!
Note: This igniter is for pellet grills with AC components. If your grill requires a DC igniter and DOES NOT use a D2 controller, you require part KIT0223. If your model has a D2 controller, you will require part KIT0255.
Install Instructions For Traeger Pellet Grill Hot Rod Igniter & Burn Pot Kit
The igniter is located and the end of the pellet burner assembly and is fastened into the burnpot/ fire pot using a set screw. Depending upon your specific model, the process to access this part and replace it may vary slightly from model to model.
Unplug the grill from power
Empty any pellets you may have in the hopper
Remove the access panel on the bottom of the hopper if your model has one.
Remove the side screws from the hopper shell and separate the hopper from the burner assembly. You do not need to unplug every wire connection.
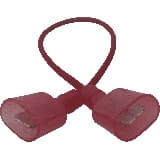
Most, if not all models will have the igniter plugged into a purple wire on the controller's main harness. The igniter wire will be the ONLY braided wires connected to the controller (not a plastic coating). Remove the braided wire connection at the molex disconnect.
Remove all of the cooking grids, drip pan and baffle from the grill.
Remove the 4 burnpot screws and then wiggle the burnpot free from the burner.
Remove the rubber grommet from the burner assembly where the igniter wires enter into the burner from the hopper side and feed the wires into the burner until the molex connection is in the burner. Remove the burnpot. The igniter wires will pull out through the burner. Now you can loosen the igniter set screw and replace the igniter.
When installing the new igniter, 3/8" to 1/2" of the igniter tip should be visible in the burnpot. Now tighten the set screw.
Set the burnpot into the grill and feed the igniter wires into the burner until the molex is seen at the passthrough hole and then pull it through. Slip on the ribber grommet and plug the new igniter into the harness.
Pull the slack from the wires as you fit the burnpot into the burner assembly.
Replace the four burnpot screws.
Take up the slack of the burnpot wires and zip tie if needed.
Fit the grommet into the wire hole.
Reposition the hopper back on the burner and secure with the mounting screws
Replace the hopper bottom access panel if you have one.
If the ignitor/hot rod to your pellet grill has burned out, you can still use your grill to cook on. Click on this page for instructions: Manual Lighting Procedures
Troubleshooting Igniters:
Igniter failure can be verified on one of three ways. The easiest and most common way to see if the igniter is working is to start your stove or grill and visually look for the orange glow; however, some appliances do not have a visual way to do this, so you may have to physically feel around in the burn pot after the stove has been on for a few minutes to “feel” for heat being generated. If you can see the glow or can feel the heat from the igniter, chances are that the igniter is actually working. If this is the case, retry the startup process. Make sure your burn pot is seated correctly if it is removable. Make sure that your ash pan, door or hopper lid is closed as this will provide an airtight seal on the stove, which most igniters will require for proper ignition. If you still do not have any luck, give the stove a good cleaning, including the vent, and try again. If these attempts fail, further troubleshooting will be required, which leads us to the third method.
For this method, you will need a DMM (Digital Multi-Meter). Gain access to the igniter and remove it from the stove or insert. While you are taking the igniter out, verify that it is installed correctly with the correct mounting equipment, screws, etc.. With the igniter removed from the stove, you will need to look over the part to find the rated watts, it’s usually stamped on the metal somewhere. If you cannot find it, look on our website for the correct igniter; the information you are looking for will be under “technical specs”
If your Ohms reading is within 10%, more or less than the rating (46Ω +/- 10%), it’s good. If the igniter has a “contained short” or a short within itself and not grounding out, your Ohms reading will be very low...usually in the single digits. Generally, you cannot have a faulty igniter with too high of a resistance reading unless an igniter is installed that is way out of spec. An example of this would be your stove requires a 300W igniter but the stove has a 250W igniter installed. The reading in this scenario would be 52Ω. The reading would be correct to the igniter but would be the wrong value for the specified 300W igniter. That’s why it’s usually good to look at the part itself for the watts rating.
Warranty
Unfortunately, sometimes products do not work like they are supposed to. We offer a 90 day warranty on manufacturer defects. Some manufacturers
make this a very simple and easy process unfortunately others do not. Items must be used in accordance with the manufacturers guidelines to qualify for warranty replacement. Please
be advised that warranty claims for these parts may take up to 4 weeks for processing, and customers must cover shipping.
Shipping Information
This Item Qualifies For Free Shipping With Orders Over $99!
When Will My Order Ship?
All orders are typically processed within 24 hours of receiving payment and are shipped from us same day if placed before our shipping cutoff time (Monday - Friday: 12PM, Saturday: 10AM, Sunday: No Shipping), orders placed after our cutoff time are shipped the next morning.
Do You Offer Express Shipping?
Yes! Please note the shipping times are based on business days, weekends and holidays do not count to the delivery date. Please see our expedited ship time schedules here.
How Does Free Shipping Work?
Most orders over $99 qualify for free shipping! Orders which ship for free are shipped with either USPS or UPS based on our discretion. If you are using a PO box, free shipping orders will always go USPS.
Do You Ship To Canada?
We ship to Canada! We estimate USPS to take 4-10 days once receiving your package from us. We do not offer expedited shipping of any kind to Canada. Please allow an extra 2-5 days for all shipments to Canada. Free shipping is not available to Canada.
Do You Ship To Alaska Or Hawaii?
We ship to both Alaska and Hawaii! We do not offer next day or two day shipping to Alaska or Hawaii. Free shipping is not available to Alaska or Hawaii.
Do You Ship Outside The US Or Canada?
Unfortunately, at this time we do not offer international shipping other than to Canada.
Shipping Time Estimations
For information on shipping time estimations, see the Shipping Information & Transit Times on the shipping page.
Bring your Traeger pellet grill back to its peak performance with our burn pot and igniter repair kit.
Included In This Kit:
1 x Burn pot (FAB310)
1 x Igniter (BAC199)
1 x 5 Amp Fuse (ELE211)
4 x Stainless Steel Burn Pot Screws (HDW119)
1 x M4 Igniter Screw (HDW477)
1 x Hopper Burner Gasket (INS144)
1 x Chimney Flue Pipe Gasket (INS145)
This kit uses aftermarket parts where applicable to help you save big!
Note: This igniter is for pellet grills with AC components. If your grill requires a DC igniter and DOES NOT use a D2 controller, you require part KIT0223. If your model has a D2 controller, you will require part KIT0255.
Install Instructions For Traeger Pellet Grill Hot Rod Igniter & Burn Pot Kit
The igniter is located and the end of the pellet burner assembly and is fastened into the burnpot/ fire pot using a set screw. Depending upon your specific model, the process to access this part and replace it may vary slightly from model to model.
Unplug the grill from power
Empty any pellets you may have in the hopper
Remove the access panel on the bottom of the hopper if your model has one.
Remove the side screws from the hopper shell and separate the hopper from the burner assembly. You do not need to unplug every wire connection.
Most, if not all models will have the igniter plugged into a purple wire on the controller's main harness. The igniter wire will be the ONLY braided wires connected to the controller (not a plastic coating). Remove the braided wire connection at the molex disconnect.
Remove all of the cooking grids, drip pan and baffle from the grill.
Remove the 4 burnpot screws and then wiggle the burnpot free from the burner.
Remove the rubber grommet from the burner assembly where the igniter wires enter into the burner from the hopper side and feed the wires into the burner until the molex connection is in the burner. Remove the burnpot. The igniter wires will pull out through the burner. Now you can loosen the igniter set screw and replace the igniter.
When installing the new igniter, 3/8" to 1/2" of the igniter tip should be visible in the burnpot. Now tighten the set screw.
Set the burnpot into the grill and feed the igniter wires into the burner until the molex is seen at the passthrough hole and then pull it through. Slip on the ribber grommet and plug the new igniter into the harness.
Pull the slack from the wires as you fit the burnpot into the burner assembly.
Replace the four burnpot screws.
Take up the slack of the burnpot wires and zip tie if needed.
Fit the grommet into the wire hole.
Reposition the hopper back on the burner and secure with the mounting screws
Replace the hopper bottom access panel if you have one.
If the ignitor/hot rod to your pellet grill has burned out, you can still use your grill to cook on. Click on this page for instructions: Manual Lighting Procedures
Troubleshooting Igniters:
Igniter failure can be verified on one of three ways. The easiest and most common way to see if the igniter is working is to start your stove or grill and visually look for the orange glow; however, some appliances do not have a visual way to do this, so you may have to physically feel around in the burn pot after the stove has been on for a few minutes to “feel” for heat being generated. If you can see the glow or can feel the heat from the igniter, chances are that the igniter is actually working. If this is the case, retry the startup process. Make sure your burn pot is seated correctly if it is removable. Make sure that your ash pan, door or hopper lid is closed as this will provide an airtight seal on the stove, which most igniters will require for proper ignition. If you still do not have any luck, give the stove a good cleaning, including the vent, and try again. If these attempts fail, further troubleshooting will be required, which leads us to the third method.
For this method, you will need a DMM (Digital Multi-Meter). Gain access to the igniter and remove it from the stove or insert. While you are taking the igniter out, verify that it is installed correctly with the correct mounting equipment, screws, etc.. With the igniter removed from the stove, you will need to look over the part to find the rated watts, it’s usually stamped on the metal somewhere. If you cannot find it, look on our website for the correct igniter; the information you are looking for will be under “technical specs”
If your Ohms reading is within 10%, more or less than the rating (46Ω +/- 10%), it’s good. If the igniter has a “contained short” or a short within itself and not grounding out, your Ohms reading will be very low...usually in the single digits. Generally, you cannot have a faulty igniter with too high of a resistance reading unless an igniter is installed that is way out of spec. An example of this would be your stove requires a 300W igniter but the stove has a 250W igniter installed. The reading in this scenario would be 52Ω. The reading would be correct to the igniter but would be the wrong value for the specified 300W igniter. That’s why it’s usually good to look at the part itself for the watts rating.
Warranty
Unfortunately, sometimes products do not work like they are supposed to. We offer a 90 day warranty on manufacturer defects. Some manufacturers
make this a very simple and easy process unfortunately others do not. Items must be used in accordance with the manufacturers guidelines to qualify for warranty replacement. Please
be advised that warranty claims for these parts may take up to 4 weeks for processing, and customers must cover shipping.
Shipping Info
This Item Qualifies For Free Shipping With Orders Over $99!
When Will My Order Ship?
All orders are typically processed within 24 hours of receiving payment and are shipped from us same day if placed before our shipping cutoff time (Monday - Friday: 12PM, Saturday: 10AM, Sunday: No Shipping), orders placed after our cutoff time are shipped the next morning.
Do You Offer Express Shipping?
Yes! Please note the shipping times are based on business days, weekends and holidays do not count to the delivery date. Please see our expedited ship time schedules here.
How Does Free Shipping Work?
Most orders over $99 qualify for free shipping! Orders which ship for free are shipped with either USPS or UPS based on our discretion. If you are using a PO box, free shipping orders will always go USPS.
Do You Ship To Canada?
We ship to Canada! We estimate USPS to take 4-10 days once receiving your package from us. We do not offer expedited shipping of any kind to Canada. Please allow an extra 2-5 days for all shipments to Canada. Free shipping is not available to Canada.
Do You Ship To Alaska Or Hawaii?
We ship to both Alaska and Hawaii! We do not offer next day or two day shipping to Alaska or Hawaii. Free shipping is not available to Alaska or Hawaii.
Do You Ship Outside The US Or Canada?
Unfortunately, at this time we do not offer international shipping other than to Canada.
Shipping Time Estimations
For information on shipping time estimations, see the Shipping Information & Transit Times on the shipping page.
A very heartfelt THANKS to Daniel! He guided me to the correct parts for my Traeger smoker, it is now operating like new.
Parts were boxed very well and arrived sooner than expected.
QUESTIONS & ANSWERS
If your question does not concern this specific product, use our contact form
A very heartfelt THANKS to Daniel! He guided me to the correct parts for my Traeger smoker, it is now operating like new.
Parts were boxed very well and arrived sooner than expected.