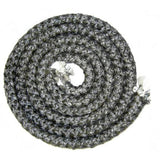
Install Instructions For USSC (Pellet Stove) Burn Pot Housing Gasket: 88168
Instructional Notes
1.) Before you begin, allow the stove to go through the shutdown process. Once the unit has cooled and all components have turned off, unplug the stove.
2.) Open the front door of the stove.
3.) Remove the burn pot from the burn pot housing and set it aside.
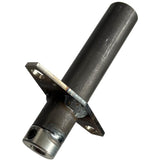
4.) Remove the bolt that holds the burn pot housing in place using a ratchet and 3/8 inch socket. (The bolt is located inside the burn pot housing next to the igniter opening. On some models, you will need to loosen the bolts that hold the igniter tube weldment in place. This can be accessed through the rear of the stove. In this situation, the igniter tube weldment may need to be recessed slightly for the burn pot housing to have the clearance needed for removal. If this is the case, you will need to complete this before moving on).
5.) Lift the burn pot housing out to expose the gasket behind it.
6.) Carefully pull the old gasket off the back of the firebox and wipe away any debris that may be behind it.
7.) Position the new gasket so that the openings for the air intake and igniter line up with the openings in the gasket.
8.) Place the new burn pot housing inside the firebox and position it against the gasket. Confirm everything is lining up as it should.
9.) Reinsert the bolt into the back of the burn pot housing and tighten it using a ratchet and 3/8 inch socket.
10.) Reinsert the burn pot into the burn pot housing (At this point, the igniter tube weldment will need to be reinstalled if you removed it before step 5).
11.) Close the front door of the stove, plug the unit back in, and check for proper operation.
Click here to view a brief video going over burn pot housing replacement!