Product title:
Z-Grills Wi-Fi Controller For Pellet Grills
Product price:
Sold out
$99.99
Product SKU ! ZG-WIFI-CONTROLLER-AMP
Bullet point features
- Aftermarket Part Learn more about the difference between OEM and AMP parts
- Ships FREE with orders over $99
- 30-Day Hassle Free Returns
- 90 Day Warranty Included
- Same Day Shipping On Most Items!*
- See Complete Description
Product Out Of Stock
We are expecting inventory to arrive on or around 7-30-2026
Sign up for a one-time notification below!
You may also want to consider...
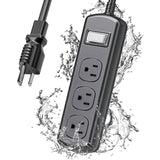
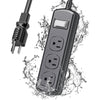
Waterproof 3-Outlet Surge Protector With 6 Ft Power Extension