Skip to main content
Product title:

Englander Blower: AC-17-AMP

Product rating:
Product price:
$179.99

A $150.00 Savings over the OEM

Product SKU ! AC-17-AMP
Product MPN ! AC-17
Product availability: In Stock
Bullet point features

Frequently Bought Together

Total Price: $199.98

Description

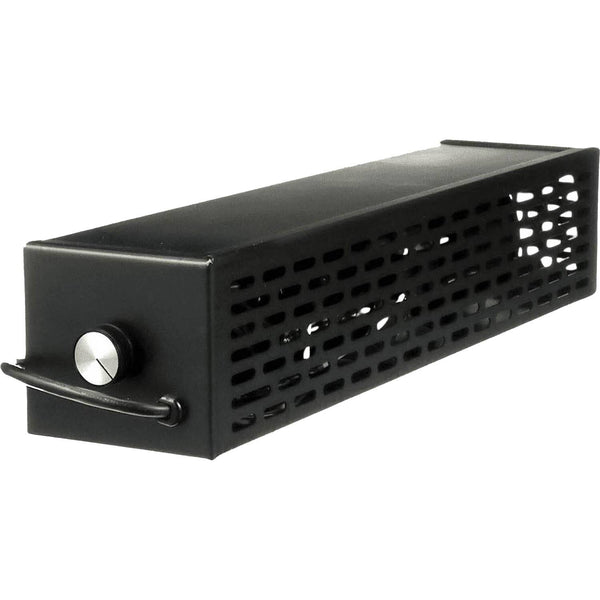
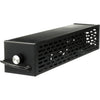
Blower (complete). 4" x 4" x 23", cord on left side (looking from front of blower and stove). With rheostat (to control fan speed).
Englander Wood Stoves: 24-JC, 50-SHW20, 50-TRW20.

Replacement For Part Numbers:

  • AC-17
  • 44267

View Compatible Models

UPC: 794909701808

Compatible Models

    Englander

  • 24-JC, 50-SHW20, 50-TRW20

Technical Specs

Videos

Instructions

Install Instructions For Englander Blower: AC-17-AMP

AC-17 Blower Wiring Instructions

  1. Remove the rheostat package and power cord which are loose inside the blower and set these aside.
  2. Remove the 4, 8mm bolts that secure the blower to the housing. Set these aside along with the hex nuts. If any of the plastic spacers come out, place those back through the center of the rubber grommets which are attached to the blower’s mounting frame.
  3. Remove 1 of the Phillips sheet metal screws that secure the right side motor mounting bracket.
  4. Pass the power cord through the larger of the two holes on the right side of the blower housing.
  5. Attach the green wire grounding loop from the power cord to the right-side mounting bracket using the Phillips screw you just removed.
  6. Connect the white wire from the power cord to the white wire on the blower.
  7. Crimp 1 male spade terminal to the black wire on the rheostat.
  8. Crimp 1 female spade terminal to the white wire of the rheostat.
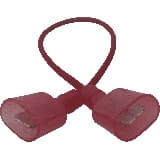
  9. Connect the wire with two male spade terminals to the black rheostat wire and the black power cord wire.
  10. Connect the wire with two female spade terminals to the rheostat white wire and the other end to the blower black wire.
  11. Pass the rheostat knob post through the smaller hole on the right side of the blower housing and spin the fast nut onto the post to secure the rheostat.
  12. Place the rheostat knob on the post.
  13. Reinstall the blower back into the blower housing using the bolts and nuts you removed in step 2.
  14. Connect the strain relief cord stopper by wrapping it around the cord and depressing the two halves with pliers. While depressing, push it into the cord hole pass-through and release.

RHEOSTAT CALIBRATION

There is a small calibration screw on the side of the rheostat. With the blower plugged in, turn the knob 1-click so that the blower is ‘ON’. This is the full power setting. As the rheostat knob is turned clockwise, the blower decrease in speed. At the lowest setting the blower should remain ‘ON’ at a very slow spin and should move a low volume of air. If the the blower hums, or stops or is not moving much air at the lowest setting, the calibration screw can be turned slightly to allow the blower to spin faster at the lowest setting. Adjust the calibration to the desired ‘lowest spring setting’ if needed. Remember, the blower should spin at a moderate pace to move enough air to be effective. After calibration, this will be your low setting. Return the blower speed to ‘FULL POWER’ and then turn it down again and verify that the blower slows down to the desired level. Your blower is now calibrated and can be inserted into the stove.


Troubleshooting

Warranty

Unfortunately, sometimes products do not work like they are supposed to. We offer a 90 day warranty on manufacturer defects. Some manufacturers make this a very simple and easy process unfortunately others do not. Items must be used in accordance with the manufacturers guidelines to qualify for warranty replacement. Please be advised that warranty claims for these parts may take up to 4 weeks for processing, and customers must cover shipping.

Shipping Information

This Item Qualifies For Free Shipping With Orders Over $199!

When Will My Order Ship?

All orders are typically processed within 24 hours of receiving payment and are shipped from us same day if placed before our shipping cutoff time (Monday - Friday: 12PM, Saturday: 10AM, Sunday: No Shipping), orders placed after our cutoff time are shipped the next morning.

Do You Offer Express Shipping?

Yes! Please note the shipping times are based on business days, weekends and holidays do not count to the delivery date. Please see our expedited ship time schedules here.

How Does Free Shipping Work?

Most orders over $199 qualify for free shipping! Orders which ship for free are shipped with either USPS or UPS based on our discretion. If you are using a PO box, free shipping orders will always go USPS.

Do You Ship To Canada?

We ship to Canada! We estimate USPS to take 4-10 days once receiving your package from us. We do not offer expedited shipping of any kind to Canada. Please allow an extra 2-5 days for all shipments to Canada. Free shipping is not available to Canada.

Do You Ship To Alaska Or Hawaii?

We ship to both Alaska and Hawaii! We do not offer next day or two day shipping to Alaska or Hawaii. Free shipping is not available to Alaska or Hawaii.

Do You Ship Outside The US Or Canada?

Unfortunately, at this time we do not offer international shipping other than to Canada.

Shipping Time Estimations

For information on shipping time estimations, see the Shipping Information & Transit Times on the shipping page.

Learn More About Our Shipping Information
Jump back to product information tab navigation

Description

Blower (complete). 4" x 4" x 23", cord on left side (looking from front of blower and stove). With rheostat (to control fan speed).
Englander Wood Stoves: 24-JC, 50-SHW20, 50-TRW20.

Replacement For Part Numbers:

  • AC-17
  • 44267

View Compatible Models

UPC: 794909701808

Instructions

Assembly Instructions For Englander Blower: AC-17-AMP

AC-17 Blower Wiring Instructions

  1. Remove the rheostat package and power cord which are loose inside the blower and set these aside.
  2. Remove the 4, 8mm bolts that secure the blower to the housing. Set these aside along with the hex nuts. If any of the plastic spacers come out, place those back through the center of the rubber grommets which are attached to the blower’s mounting frame.
  3. Remove 1 of the Phillips sheet metal screws that secure the right side motor mounting bracket.
  4. Pass the power cord through the larger of the two holes on the right side of the blower housing.
  5. Attach the green wire grounding loop from the power cord to the right-side mounting bracket using the Phillips screw you just removed.
  6. Connect the white wire from the power cord to the white wire on the blower.
  7. Crimp 1 male spade terminal to the black wire on the rheostat.
  8. Crimp 1 female spade terminal to the white wire of the rheostat.
  9. Connect the wire with two male spade terminals to the black rheostat wire and the black power cord wire.
  10. Connect the wire with two female spade terminals to the rheostat white wire and the other end to the blower black wire.
  11. Pass the rheostat knob post through the smaller hole on the right side of the blower housing and spin the fast nut onto the post to secure the rheostat.
  12. Place the rheostat knob on the post.
  13. Reinstall the blower back into the blower housing using the bolts and nuts you removed in step 2.
  14. Connect the strain relief cord stopper by wrapping it around the cord and depressing the two halves with pliers. While depressing, push it into the cord hole pass-through and release.

RHEOSTAT CALIBRATION

There is a small calibration screw on the side of the rheostat. With the blower plugged in, turn the knob 1-click so that the blower is ‘ON’. This is the full power setting. As the rheostat knob is turned clockwise, the blower decrease in speed. At the lowest setting the blower should remain ‘ON’ at a very slow spin and should move a low volume of air. If the the blower hums, or stops or is not moving much air at the lowest setting, the calibration screw can be turned slightly to allow the blower to spin faster at the lowest setting. Adjust the calibration to the desired ‘lowest spring setting’ if needed. Remember, the blower should spin at a moderate pace to move enough air to be effective. After calibration, this will be your low setting. Return the blower speed to ‘FULL POWER’ and then turn it down again and verify that the blower slows down to the desired level. Your blower is now calibrated and can be inserted into the stove.


Warranty

Unfortunately, sometimes products do not work like they are supposed to. We offer a 90 day warranty on manufacturer defects. Some manufacturers make this a very simple and easy process unfortunately others do not. Items must be used in accordance with the manufacturers guidelines to qualify for warranty replacement. Please be advised that warranty claims for these parts may take up to 4 weeks for processing, and customers must cover shipping.

Shipping Info

This Item Qualifies For Free Shipping With Orders Over $199!

When Will My Order Ship?

All orders are typically processed within 24 hours of receiving payment and are shipped from us same day if placed before our shipping cutoff time (Monday - Friday: 12PM, Saturday: 10AM, Sunday: No Shipping), orders placed after our cutoff time are shipped the next morning.

Do You Offer Express Shipping?

Yes! Please note the shipping times are based on business days, weekends and holidays do not count to the delivery date. Please see our expedited ship time schedules here.

How Does Free Shipping Work?

Most orders over $199 qualify for free shipping! Orders which ship for free are shipped with either USPS or UPS based on our discretion. If you are using a PO box, free shipping orders will always go USPS.

Do You Ship To Canada?

We ship to Canada! We estimate USPS to take 4-10 days once receiving your package from us. We do not offer expedited shipping of any kind to Canada. Please allow an extra 2-5 days for all shipments to Canada. Free shipping is not available to Canada.

Do You Ship To Alaska Or Hawaii?

We ship to both Alaska and Hawaii! We do not offer next day or two day shipping to Alaska or Hawaii. Free shipping is not available to Alaska or Hawaii.

Do You Ship Outside The US Or Canada?

Unfortunately, at this time we do not offer international shipping other than to Canada.

Shipping Time Estimations

For information on shipping time estimations, see the Shipping Information & Transit Times on the shipping page.

Learn More About Our Shipping Information
Customer Reviews

Be the first to write a review
0%
(0)
0%
(0)
0%
(0)
0%
(0)
0%
(0)

QUESTIONS & ANSWERS

If your question does not concern this specific product, use our contact form

Have a Question?

Be the first to ask a question about this.

Ask a Question

Customer Reviews

Be the first to write a review
0%
(0)
0%
(0)
0%
(0)
0%
(0)
0%
(0)