Flash Sale Live [ UP TO 35% OFF SITE WIDE! ] No Discount Code Necessary Free shipping on orders over $99* 90-Day Warranty Included Flash Sale Live [ UP TO 35% OFF SITE WIDE! ] No Discount Code Necessary 90-Day Warranty Included
Product title:

Harman Allure 50 & 50-CE Burn Pot Weldment: 1-10-888194W

Product rating:
Product price:
Save 15%
Original Price $349.99
Current Price $297.49
Product SKU ! 1-10-888194W
Product MPN ! 1-10-888194W
Only 4 Left In Stock
Bullet point features

Pay over time with Affirm.

Frequently Bought Together

Parts other customers added to their cart along with this one. Untick any you do not need, then add the rest together.

Total for 5 items $425.20

Description

Harman Pellet Stove Burn Pot Weldment (Allure 50 & 50-CE).  The Burn Pot is an integral part of your pellet stove's feed system.  It is important to periodically inspect the pot to make sure it is not damaged.  If you notice any holes, warpage or cracks forming in the pot, it should be replaced!   

Note: *Anytime the burn pot is removed or replaced a new gasket (1-00-07381) should be installed (Burn Pot gasket, igniter & igniter cradle sold separately).*

UPC: 652174759842

Replacement For Part Number:

  • 1-10-888194W

Compatible Models

These are all of the confirmed compatible units for this product. Where To Find Your Make & Model

Technical Specs

Check these against the part you are replacing before ordering. If a dimension does not match, contact us and we will confirm the fit.

Material Steel

Instructions

Install Instructions For Harman Allure 50 & 50-CE Burn Pot Weldment: 1-10-888194W

Instructional Notes

Important:

Before removing the old burn pot you will need to uninstall the ignitor cradle and disconnect the ignitor leads from the blue and yellow wires inside the neck of the burn pot. The removed ignitor and cradle can be reinstalled into the new burn pot once it is attached to the stove.


1.) The igniter cradle/holder is located in the burn pot. (To access the cradle you must loosen the two wing nuts securing the burn pot clean-out cover to the bottom of the pot. Once both wing nuts are loosened the cover plate can be removed).

2.) From the front of the stove, remove the two 5/16" or 8mm screws that hold the igniter cradle inside the burn pot. This will allow the cradle to drop down (Do not discard these screws).

3.) From the rear of the unit, locate the yellow and light blue wires for the igniter at the point where they pass through the neck of the burn pot into the rear of the stove, it is directly under the auger (On freestanding stoves this will require that the rear / side shields are removed. On inserts, the unit will need to be slid forward and pulled out of the firebox. On some units, there may be a small rubber grommet or a dab of high temp silicone where the ignitor wires transition to the back of the unit.)

4.) In this area you should notice extra wire looped together (Likely, this excess wire will be secured in position with a zip tie). This extra wire needs to be freed up so that the disconnects can be pulled forward and disconnected from the neck of the burn pot. This can be done by carefully cutting the zip tie and gently pushing about 12" of the yellow and light blue wire into the cavity of the stove where the ignitor is located.

5.) Once you confirm the extra blue and yellow wire is fed forward into the neck of the burn pot, the leads coming from the ignitor can be disconnected (In the neck of the burn pot) and the igniter and bracket can be removed.

6.) Spray the 4 nuts around the neck of the burn pot with penetrating oil and let it set.

7.) Remove the 4 nuts holding the burn pot to the rear of the stove (Take care not to lose the washers during this step).

8.) Remove the old gasket and install a replacement (It is recommended that a new gasket be used anytime the burn pot is replaced).

9.) Position the new burn pot in place, slide the four washers previously removed back into position and hand tighten each nut.

10.) Once all four nuts are snug by hand, begin to evenly tighten each with a wrench or socket (Tightening in a crisscross pattern works well and will help prevent overtightening on one particular corner of the burn pot).

11.) After the burn pot is fastened in place the ignitor can be repositioned into the cradlethe cradle can be reattached to the pot, the ignitor leads can be reattached to the blue/yellow wires in the neck of the burn pot and the burn pot clean out cover can be reinstalled. (Remember to pull the excess wire back in the rear of the unit and zip-tie it in a safe spot).

12.) Reattach any previously removed panels, reposition the unit if previously moved, and test the stove.

Troubleshooting

Troubleshooting Notes

Before replacing the burn pot to correct delayed ignitions, try each of the following:

  1. If you have excessive amounts of carbon building up around the base of the burn pot, tighten the four 1/2" nuts that secure the burn pot. If this doesn't solve the problem, replace the burn pot gasket
  2. Replace your door gasket and the ash pan gasket if you have separate doors
  3. Look at your door handle to make sure the latch mechanism on the stove is in working order allowing the door to fully close
  4. Make sure the hopper lid is making a tight seal

Customers Also Bought

Parts that customers who bought this one also ordered, the most popular first.

  • SKU
    1-00-777907-AMP
    $49.99
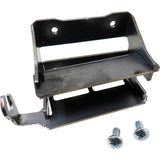
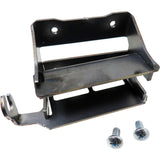
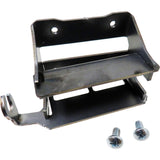
    Harman Igniter Cradle (Updated): 1-00-777907-AMP

    Harman Igniter Cradle (Updated): 1-00-777907-AMP

    Newest Version 3 ½" L
  • SKU
    1-00-07381-Burn Pot Gasket
    $7.99
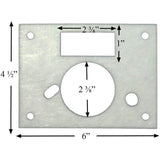
    Harman Burn Pot Gasket: 1-00-07381

    Harman Burn Pot Gasket: 1-00-07381

    6" x 4 1/2"
  • SKU
    3-20-677200-AMP
    $39.99
    Harman Igniter (306W): 3-20-677200-AMP

    Harman Igniter (306W): 3-20-677200-AMP

    Igniter Cradle Sold Separately 120V / 306W
  • SKU
    1-00-777907
    $67.99
    $79.99
    Harman Adjustable Igniter Cradle (Updated): 1-00-777907

    Harman Adjustable Igniter Cradle (Updated): 1-00-777907

    Update Version 2019

Warranty

Unfortunately, sometimes products do not work like they are supposed to. We offer a 90 day warranty on manufacturer defects. Some manufacturers make this a very simple and easy process unfortunately others do not. Items must be used in accordance with the manufacturers guidelines to qualify for warranty replacement. Please be advised that warranty claims for special parts may take up to 4 weeks for processing, and customers are responsible for return shipping charges.

Shipping Information

This Item Qualifies For Free Shipping!

When Will My Order Ship?
All orders are typically processed within 24 hours of receiving payment and are shipped from us same day if placed before our shipping cutoff time (Monday - Friday: 12PM, Saturday: 10AM, Sunday: No Shipping), orders placed after our cutoff time are shipped the next morning.
Do You Offer Express Shipping?
Yes! Please note the shipping times are based on business days, weekends and holidays do not count to the delivery date. Please see our expedited ship time schedules here.
How Does Free Shipping Work?
Most orders over $99 qualify for free shipping! Orders which ship for free are shipped with either USPS or UPS based on our discretion. If you are using a PO box, free shipping orders will always go USPS.
Do You Ship To Canada?
We ship to Canada! We estimate USPS to take 4-10 days once receiving your package. Please note, we are unable to track US Postal packages once they cross the US border and cannot guarantee shipping times. All customs fees incurred are the responsibility of the customer and are not included in the total price. Please allow an extra 2-5 days for all shipments to Canada. Free shipping is not available to Canada.
Do You Ship To Alaska Or Hawaii?
We ship to both Alaska and Hawaii! We do not offer next day or two day shipping to Alaska or Hawaii. Free shipping is not available to Alaska or Hawaii.
Do You Ship Outside The US Or Canada?
Unfortunately, at this time we do not offer international shipping other than to Canada.
Shipping Time Estimations
For information on shipping time estimations, see the Shipping Information & Transit Times on the shipping page.
Learn More About Our Shipping Information

Questions & Answers

If your question does not concern this part, contact us directly or read our FAQs.

No one has asked about this part yet. Ask us anything specific to it - the wattage, which style or model year it suits, what part numbers it replaces - and we will answer it ourselves.

Every question is read by our team before it appears here, so it will not show up right away - we will email you the answer.

Customer Reviews

Be the first to write a review
0%
(0)
0%
(0)
0%
(0)
0%
(0)
0%
(0)

Still have a question?

Call or email us and we will help you find the right part.

Mon–Sat 9AM–5PM · Sun 10AM–3PM ESTShipping policy · Return policy · FAQs

Customer Reviews

Be the first to write a review
0%
(0)
0%
(0)
0%
(0)
0%
(0)
0%
(0)