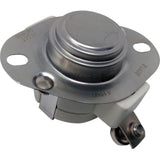
Install Instructions For Whitfield Low Limit Ceramic Switch (140F): 12057601-AMP
Instructions for Installing Low-Limit Switch Part # XP3004-1, 12057601-AMP (140°F-20 low-limit switch):
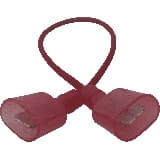
This switch uses 1/4" spade connectors at the switch, previous OEM versions of this switch use fork terminals. The wires from your stove will need to be cut and fitted with 1/4" spade disconnects to use this switch which are not included.
Lennox: Elite Montage/ IHP IronStrike 32FS
Whitfield: Advantage, Cascade, Legend, Quest, Renaissance or Prodigy II:
- To replace this switch, locate the side of the stove where the combustion blower is mounted. The switch is located on the exhaust blower housing.
- Make sure that your stove is unplugged.
- Using a flat head screw driver, loosen the two contact points for the wires and remove the two fork connectors. using a 1/4" socket wrench, remove the two hex screws that hold the switch to the housing.
- If your new switch does not have screws for connecting the wires, use the screws from the old switch.
- Install the new switch to the housing. Reconnect your wires. It does not matter which wire goes on which terminal.
**Note: Not all Whitfield pellet stoves used a low-limit switch for detecting proof of fire: Profile 20, Profile 30, and Optima units made by Lennox used a "photo-eye", part # 14750404


