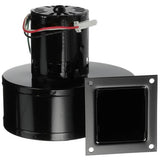
Install Instructions For Whitfield Pressure Switch Kit: 13640014
Instructional Documents
Instructional Notes
1. Remove pellet from hopper to expose rivets.
Suggestion: Place a towel over auger to prevent any metal debris falling into auger.
2. Open the left side stove panel.
3. Remove rear stove panel.
4. Disconnect the hose and wires from the original pressure switch.
5. Remove the original pressure switch by drilling out the two rivets from inside the hopper as follows:
- Center punch the 2 rivet heads inside the hopper to leave dimples for centering drill bit.
- Using a 11/64" drill bit, drill into each rivet head until the head comes free from the shank.
- Tap out the rivet shanks using a 1/8" center punch. Remove old pressure switch and discard. With the rivets removed continue drilling the holes all the way through.
6. Install new pressure switch as follows.
Note: Switch must be mounted vertically.
- Secure the pressure switch mounting bracket to the underside of the hopper by pressing in the new rivets with back-up rivet washers (using a rivet gun).
Note: The rivet head is inside of hopper and the washers are on the outside of the pressure switch bracket.
- Connect the hose to the pressure switch using the plastic tie.
- Connect wires to the terminals on pressure switch.
- Reinstall rear panel and close side panel.
- Inspect hopper - Ensure that no metal debris fell into the auger.