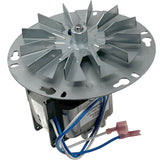
Install Instructions For Vogelzang Pellet Stove Auger Shaft: 891141
Instructional Notes
Stove Auger Replacement — Step-by-Step Instructions (May Vary Depending On Model)
Tools and Materials
- Ratchet
- 5/16-inch socket
- 3/8-inch socket
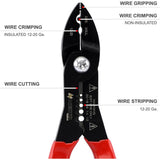
- Needle-nose pliers
- Silicone sealant
- Replacement auger
Important Safety Step
1. Disconnect power from the stove.
Before beginning any work, make sure the stove is completely disconnected from its electrical power source.
Part 1: (Remove the Back Panel)
2. Remove the screws from the back panel.
- Using the appropriate socket and ratchet, loosen and remove the screws securing the back panel.
- Set the screws aside so they can be reused.
3. Remove the side-panel screws.
- Locate the screws closest to the back panel on both the left and right sides of the stove.
- Loosen and remove these screws.
4. Move the side panels outward.
- Carefully pull each side panel slightly away from the stove.
- Do not force or excessively bend the panels.
5. Remove the back panel.
- Lift the back panel up and away from the stove.
- Set it aside in a safe location away from your work area.
Part 2: (Remove the Auger Motor)
6. Disconnect the two motor wires.
- Locate the two wires connected to the terminals on the back of the auger motor.
- Disconnect both wires from the motor terminals.
7. Remove the hairpin.
- Using needle-nose pliers, remove the hairpin connecting the auger motor to the auger.
- Set the hairpin aside for reuse.
8. Remove the auger motor.
- Once the hairpin has been removed, the auger motor is free from the auger.
- Move the motor out of the way.
Part 3: (Remove the Old Auger)
9. Open the hopper lid.
- Open the stove’s hopper lid to access the auger and its cover.
10. Remove the stainless-steel auger cover.
- The auger is protected by a stainless-steel cover.
- The cover is secured with four nuts and silicone sealant.
- Using the ratchet and appropriate socket, loosen and remove all four nuts.
- Set the nuts aside for reuse.
11. Remove the auger cover.
- Lift the stainless-steel cover away from the auger.
- Set it aside.
12. Remove the top bushing plate nuts.
- Locate the nuts securing the top bushing plate to the auger housing weldment.
- Use the ratchet and socket to loosen and remove these nuts.
13. Remove the old auger.
- Push the bushing plate downward.
- Slide the auger and bushing plate upward.
- Pull the assembly toward the back of the stove, then downward.
- Remove the auger from the stove.
14. Remove the bushing plate from the old auger.
- Slide the bushing plate off the auger.
- Keep the plate for installation on the replacement auger.
Part 4: (Install the New Auger)
15. Install the bushing plate onto the new auger.
- Slide the bushing plate onto the longest end of the replacement auger.
16. Orient the bushing plate.
- Turn the plate so that its holes align with the bolts on the auger housing weldment.
17. Position the new auger.
- Push the top of the auger into the top of the housing.
- Slide the auger downward into position.
18. Secure the bushing plate.
- Slide the bushing plate upward.
- Align the holes in the plate with the bolts on the auger housing weldment.
19. Reinstall the bushing plate nuts.
- Place the nuts back onto the bolts.
- Tighten them securely using the ratchet and socket.
Part 5: (Reinstall and Seal the Auger Cover)
20. Remove the old silicone.
- Remove any remaining silicone sealant from the areas that will be resealed.
21. Reinstall the auger cover.
- Position the stainless-steel cover back over the auger.
- Align the mounting holes.
22. Reinstall the four cover nuts.
- Install the four nuts that were previously removed.
- Tighten them securely with the ratchet and socket.
23. Apply silicone sealant.
- Inspect the gap between the auger cover and the auger housing weldment.
- Apply silicone sealant to all open spaces in the gap.
- Ensure the gap is adequately sealed to prevent dust or debris from entering and potentially clogging the auger.
24. Close the hopper lid.
Part 6: (Reconnect the Auger Motor)
25. Return to the back of the stove.
26. Position the auger motor.
- Hold the auger motor in position.
- Align the holes in the auger and auger motor.
27. Reinstall the hairpin.
- Slide the hairpin through the aligned holes.
- Make sure it is fully seated and securely connects the motor to the auger.
28. Reconnect the two motor wires.
- Reconnect the two wires to the appropriate terminals on the back of the auger motor.
Part 7: (Reassemble the Stove)
29. Reinstall the back panel.
- Position the back panel back onto the stove.
- Make sure the side panels are correctly positioned.
30. Reinstall the screws.
- Reinstall the screws securing the back panel.
- Reinstall the screws on the left and right sides near the back panel.
- Tighten all screws securely using the ratchet and appropriate socket.
Part 8: (Final Inspection and Testing)
31. Perform a final inspection.
Before restoring power, verify that:
- The auger is properly seated.
- The bushing plate and its nuts are secure.
- The auger cover and four nuts are secure.
- The silicone sealant has been applied around the required gap.
- The auger motor is properly connected with the hairpin.
- Both motor wires are reconnected.
- All panels and screws are properly installed.
- No tools or loose parts have been left inside the stove.
32. Allow the silicone sealant to cure according to the sealant manufacturer’s instructions before operating the stove.
33. Restore power to the stove.
34. Check for proper operation.
- Operate the stove according to its normal operating procedure.
- Verify that the auger and motor operate correctly.
- Stop operation and disconnect power if you notice abnormal noise, binding, electrical problems, or other unexpected behavior.
Final Checklist
☐ Power disconnected before work
☐ Back panel removed
☐ Auger motor disconnected
☐ Hairpin removed
☐ Old auger removed
☐ Bushing plate transferred to new auger
☐ New auger installed
☐ Bushing plate secured
☐ Auger cover installed
☐ Four cover nuts tightened
☐ Silicone sealant applied
☐ Auger motor reconnected
☐ Motor wires reconnected
☐ Back and side panels secured
☐ Final inspection completed
☐ Silicone cured as required
☐ Power restored
☐ Proper operation
Click here to watch a brief video on auger replacement!