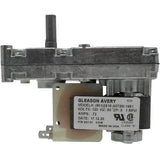
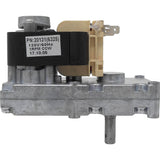
There are two of these motors in each Englander stove, an upper motor and a lower motor, they are the same. For safety, when replacing only ONE of these motors, the newer motor should always be on the bottom to prevent failure and "burn back". If only replacing 1 motor, the oldest motor can be moved to the top. For the best performance of your stove it is suggested that both motors be replaced every 5-8 years, dependent on use.
Units built from 2004 to present have a diagnostic test mode built into the circuit board. This can be used to test the individual electrical components of the unit.
WARNING: This mode can not be used to operate the stove! Attempting to burn this unit in this mode can cause damage to the unit.
Note: The stove should be completely empty of fuel and cold when using the diagnostic mode for testing the unit.
1) Unplug the stove. Locate the low burn air and air on temp buttons at the bottom of the touch pad. To start diagnostic, plug in the stove and then quickly push these buttons at the same time, then release. A number code will appear in the digital readout, this is the reading for the heat sensor. The blower speed number may change some while displayed. This is normal.
2) At this point press the low burn air button located at the bottom center of the touchpad. After pushing, a dash appears in the blower speed window.
3) Press the blower speed up arrow , and release, the exhaust blower will come on and you should see a circle in the blower speed and a dash then appears in the heat range.
4) Next, press the blower speed down arrow , this will turn on the room air blower and you will see in the display an 8 in the blower speed and the dash in the heat range
5) Press the heat range down arrow this will turn on the lower auger motor, you will see a circle in the heat range and an 8 in the blower speed.
6) Press the heat range up arrow next, this will start the auger motor, you will see an 8 in both displays at this time.
7) The low burn air button at the bottom center of the control board will turn on the auto igniter element, and the red light above the button will light up when pressed, look through the glass in the front door and watch for 2 to 3 minutes for the igniter to start to glow.
8) To turn off any of these components simply push again the same button that turned it on . To take the unit out of diagnostic mode, unplug the unit and plug it back in, this will reset the control board back into its "run mode".


