Skip to main content
Product title:

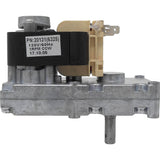
Englander Auger Motor 1 RPM Counter Clockwise (OEM): PU-047040

Product rating:
Product price:
$159.99
Product SKU ! PU-047040
Product MPN ! PU-047040
Product availability: In Stock
Bullet point features

Frequently Bought Together

Total Price: $179.98

Description

Englander 1RPM Counter Clockwise (CCW) Auger Motor

Install Note: There are two of these motors in each Englander stove, an upper motor, and a lower motor, they are the same. For safety, when replacing only ONE of these motors, the newer motor should always be on the bottom to prevent failure and "burn back". If only replacing 1 motor, the oldest motor can be moved to the top. For the best performance of your stove, it is suggested that both motors be replaced every 5-8 years, dependent on use. 


Replacement For Part Numbers:

  • PU-047040
  • 44269
  • B4415UI

View Compatible Models

UPC: 794909901109

Compatible Models

    Englander

  • 10-CPM
  • 25-CAB80
  • 25-PAF
  • 25-PDV
  • 25-PDVC
  • 25-PDVE, 55-SHP22E
  • 25-PDVP
  • 25-PFS
  • 25-PI

Technical Specs

RPM 1
Direction Counter Clockwise
Volts 120
Amps .72
Shaft Diameter 5/16"
Connector Male Spades

Instructions

Install Instructions For Englander Auger Motor 1 RPM Counter Clockwise (OEM): PU-047040

Unplug stove and remove the rear service panel. Locate the auger motors and remove the wire terminals from each motor. Stoves that were made prior to 2004 will have wires permanently attached to the motor and will need to be unplugged at the control panel. Each auger motor is held in place by a 5/16" (8mm) square set screw. Simply loosen this screw and the auger motor will slide out. Align the new motor so that the set screw is on the flat side of the auger motor shaft and tighten the motor in place.

Troubleshooting

There are two of these motors in each Englander stove, an upper motor and a lower motor, they are the same. For safety, when replacing only ONE of these motors, the newer motor should always be on the bottom to prevent failure and "burn back". If only replacing 1 motor, the oldest motor can be moved to the top. For the best performance of your stove it is suggested that both motors be replaced every 5-8 years, dependent on use.


Units built from 2004 to present have a diagnostic test mode built into the circuit board. This can be used to test the individual electrical components of the unit.

WARNING: This mode can not be used to operate the stove! Attempting to burn this unit in this mode can cause damage to the unit.

Note: The stove should be completely empty of fuel and cold when using the diagnostic mode for testing the unit.


1) Unplug the stove. Locate the low burn air and air on temp buttons at the bottom of the touch pad. To start diagnostic, plug in the stove and then quickly push these buttons at the same time, then release. A number code will appear in the digital readout, this is the reading for the heat sensor. The blower speed number may change some while displayed. This is normal.

2) At this point press the low burn air button  located at the bottom center of the touchpad. After pushing, a dash appears in the blower speed window.

3) Press the blower speed up arrow , and release, the exhaust blower will come on and you should see a circle in the blower speed and a dash then appears in the heat range.

4) Next, press the blower speed down arrow , this will turn on the room air blower and you will see in the display an 8 in the blower speed and the dash in the heat range

5) Press the heat range down arrow this will turn on the lower auger motor, you will see a circle in the heat range and an 8 in the blower speed.


6) Press the heat range up arrow next, this will start the auger motor, you will see an 8 in both displays at this time.

7) The low burn air button at the bottom center of the control board will turn on the auto igniter element, and the red light above the button will light up when pressed, look through the glass in the front door and watch for 2 to 3 minutes for the igniter to start to glow.


8) To turn off any of these components simply push again the same button that turned it on . To take the unit out of diagnostic mode, unplug the unit and plug it back in, this will reset the control board back into its "run mode".


Warranty

Unfortunately, sometimes products do not work like they are supposed to. We offer a 90 day warranty on manufacturer defects. Some manufacturers make this a very simple and easy process unfortunately others do not. Items must be used in accordance with the manufacturers guidelines to qualify for warranty replacement. Please be advised that warranty claims for these parts may take up to 4 weeks for processing, and customers must cover shipping.

Shipping Information

This Item Qualifies For Free Shipping With Orders Over $99!

When Will My Order Ship?

All orders are typically processed within 24 hours of receiving payment and are shipped from us same day if placed before our shipping cutoff time (Monday - Friday: 12PM, Saturday: 10AM, Sunday: No Shipping), orders placed after our cutoff time are shipped the next morning.

Do You Offer Express Shipping?

Yes! Please note the shipping times are based on business days, weekends and holidays do not count to the delivery date. Please see our expedited ship time schedules here.

How Does Free Shipping Work?

Most orders over $99 qualify for free shipping! Orders which ship for free are shipped with either USPS or UPS based on our discretion. If you are using a PO box, free shipping orders will always go USPS.

Do You Ship To Canada?

We ship to Canada! We estimate USPS to take 4-10 days once receiving your package from us. We do not offer expedited shipping of any kind to Canada. Please allow an extra 2-5 days for all shipments to Canada. Free shipping is not available to Canada.

Do You Ship To Alaska Or Hawaii?

We ship to both Alaska and Hawaii! We do not offer next day or two day shipping to Alaska or Hawaii. Free shipping is not available to Alaska or Hawaii.

Do You Ship Outside The US Or Canada?

Unfortunately, at this time we do not offer international shipping other than to Canada.

Shipping Time Estimations

For information on shipping time estimations, see the Shipping Information & Transit Times on the shipping page.

Learn More About Our Shipping Information
Jump back to product information tab navigation

Description

Englander 1RPM Counter Clockwise (CCW) Auger Motor

Install Note: There are two of these motors in each Englander stove, an upper motor, and a lower motor, they are the same. For safety, when replacing only ONE of these motors, the newer motor should always be on the bottom to prevent failure and "burn back". If only replacing 1 motor, the oldest motor can be moved to the top. For the best performance of your stove, it is suggested that both motors be replaced every 5-8 years, dependent on use. 


Replacement For Part Numbers:

  • PU-047040
  • 44269
  • B4415UI

View Compatible Models

UPC: 794909901109

Technical Specs

RPM 1
Direction Counter Clockwise
Volts 120
Amps .72
Shaft Diameter 5/16"
Connector Male Spades

Instructions

Install Instructions For Englander Auger Motor 1 RPM Counter Clockwise (OEM): PU-047040

Unplug stove and remove the rear service panel. Locate the auger motors and remove the wire terminals from each motor. Stoves that were made prior to 2004 will have wires permanently attached to the motor and will need to be unplugged at the control panel. Each auger motor is held in place by a 5/16" (8mm) square set screw. Simply loosen this screw and the auger motor will slide out. Align the new motor so that the set screw is on the flat side of the auger motor shaft and tighten the motor in place.

Troubleshooting

There are two of these motors in each Englander stove, an upper motor and a lower motor, they are the same. For safety, when replacing only ONE of these motors, the newer motor should always be on the bottom to prevent failure and "burn back". If only replacing 1 motor, the oldest motor can be moved to the top. For the best performance of your stove it is suggested that both motors be replaced every 5-8 years, dependent on use.


Units built from 2004 to present have a diagnostic test mode built into the circuit board. This can be used to test the individual electrical components of the unit.

WARNING: This mode can not be used to operate the stove! Attempting to burn this unit in this mode can cause damage to the unit.

Note: The stove should be completely empty of fuel and cold when using the diagnostic mode for testing the unit.


1) Unplug the stove. Locate the low burn air and air on temp buttons at the bottom of the touch pad. To start diagnostic, plug in the stove and then quickly push these buttons at the same time, then release. A number code will appear in the digital readout, this is the reading for the heat sensor. The blower speed number may change some while displayed. This is normal.

2) At this point press the low burn air button  located at the bottom center of the touchpad. After pushing, a dash appears in the blower speed window.

3) Press the blower speed up arrow , and release, the exhaust blower will come on and you should see a circle in the blower speed and a dash then appears in the heat range.

4) Next, press the blower speed down arrow , this will turn on the room air blower and you will see in the display an 8 in the blower speed and the dash in the heat range

5) Press the heat range down arrow this will turn on the lower auger motor, you will see a circle in the heat range and an 8 in the blower speed.


6) Press the heat range up arrow next, this will start the auger motor, you will see an 8 in both displays at this time.

7) The low burn air button at the bottom center of the control board will turn on the auto igniter element, and the red light above the button will light up when pressed, look through the glass in the front door and watch for 2 to 3 minutes for the igniter to start to glow.


8) To turn off any of these components simply push again the same button that turned it on . To take the unit out of diagnostic mode, unplug the unit and plug it back in, this will reset the control board back into its "run mode".


Warranty

Unfortunately, sometimes products do not work like they are supposed to. We offer a 90 day warranty on manufacturer defects. Some manufacturers make this a very simple and easy process unfortunately others do not. Items must be used in accordance with the manufacturers guidelines to qualify for warranty replacement. Please be advised that warranty claims for these parts may take up to 4 weeks for processing, and customers must cover shipping.

Shipping Info

This Item Qualifies For Free Shipping With Orders Over $99!

When Will My Order Ship?

All orders are typically processed within 24 hours of receiving payment and are shipped from us same day if placed before our shipping cutoff time (Monday - Friday: 12PM, Saturday: 10AM, Sunday: No Shipping), orders placed after our cutoff time are shipped the next morning.

Do You Offer Express Shipping?

Yes! Please note the shipping times are based on business days, weekends and holidays do not count to the delivery date. Please see our expedited ship time schedules here.

How Does Free Shipping Work?

Most orders over $99 qualify for free shipping! Orders which ship for free are shipped with either USPS or UPS based on our discretion. If you are using a PO box, free shipping orders will always go USPS.

Do You Ship To Canada?

We ship to Canada! We estimate USPS to take 4-10 days once receiving your package from us. We do not offer expedited shipping of any kind to Canada. Please allow an extra 2-5 days for all shipments to Canada. Free shipping is not available to Canada.

Do You Ship To Alaska Or Hawaii?

We ship to both Alaska and Hawaii! We do not offer next day or two day shipping to Alaska or Hawaii. Free shipping is not available to Alaska or Hawaii.

Do You Ship Outside The US Or Canada?

Unfortunately, at this time we do not offer international shipping other than to Canada.

Shipping Time Estimations

For information on shipping time estimations, see the Shipping Information & Transit Times on the shipping page.

Learn More About Our Shipping Information

Customer Reviews

Based on 20 reviews
100%
(20)
0%
(0)
0%
(0)
0%
(0)
0%
(0)
B
Brian F.
Auger motor

Great motor

g
gerald h.
good

everything was good and really fast

P
Phillip B.
Awesome Results!

Last spring I replaced both auger motors with non-OEM motors. Immediate problems with over feeding pellets after installing. The fire was so hot even on lowest settings that a 40 lbs bag would shoot through in six hours. Once, the pellets in the hopper actually started on fire despite installing a restrictor plate. With the new OEM auger in place we are bag to one bag of pellets per day with no restrictor or out-of-control fires. Thank you!

L
Lee J.
back in service in no time

easy to negotiate web site and super fast shipping and delivery.

C
Christine K.
Great prodict

We received the product very quickly. Great customer service!

QUESTIONS & ANSWERS

If your question does not concern this specific product, use our contact form

Have a Question?

Be the first to ask a question about this.

Ask a Question

Customer Reviews

Based on 20 reviews
100%
(20)
0%
(0)
0%
(0)
0%
(0)
0%
(0)
B
Brian F.
Auger motor

Great motor

g
gerald h.
good

everything was good and really fast

P
Phillip B.
Awesome Results!

Last spring I replaced both auger motors with non-OEM motors. Immediate problems with over feeding pellets after installing. The fire was so hot even on lowest settings that a 40 lbs bag would shoot through in six hours. Once, the pellets in the hopper actually started on fire despite installing a restrictor plate. With the new OEM auger in place we are bag to one bag of pellets per day with no restrictor or out-of-control fires. Thank you!

L
Lee J.
back in service in no time

easy to negotiate web site and super fast shipping and delivery.

C
Christine K.
Great prodict

We received the product very quickly. Great customer service!

Liquid error (layout/theme line 255): Could not find asset snippets/iStock-notify-me.liquid