Skip to main content
Product title:

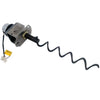
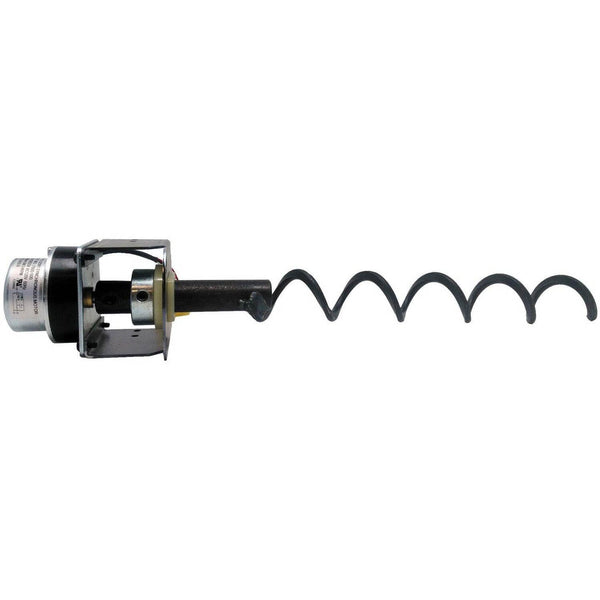
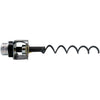
Quadra-Fire Trekker & Mt Vernon E2 and E2-C Feed Motor Assembly: SRV7080-010-AMP

Product rating:
Product price:
$229.99

A $20.00 Savings over the OEM

Product SKU ! SRV7080-010-AMP
Product MPN ! SRV7080-010
Product availability: In Stock
Bullet point features

Frequently Bought Together

Description

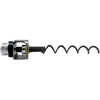
This is the entire feed assembly used for the freestanding and insert versions of the Quadra-Fire Mt Vernon E2, MtVernon E2-C and the Trekker. The same feed system is used for both freestanding and insert model versions.

This assembly includes the following parts:

  • 4 x 8-32 x 3/8'' Black Oxide Screws 
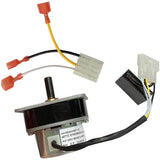
  • 1 x 2.4 RPM Auger Feed Motor (812-4421)
  • 1 x 7/8'' Auger Collar with Set Screw (229-0520)
  • 1 x  Nylon Auger Bearing (SRV7000-598)
  • 1 x  Feed Motor Bracket (7034-143)
  • 1 x  Feed Motor Gasket (SRV7034-144)
  • 1 x Feed Spring / Auger Shaft 14.5'' (SRV7001-046) 

This kit uses aftermarket parts where applicable to help you save big!


This assembly includes the following parts:


**NOTES**


  • Final bearing height adjustment may be required by the installer, instructions included. Download PDF
  • This assembly is used on the Mt Vernon E2/ Trekker Models.
  • The Mt Vernon Stove (original model 2002-06) uses feed assembly part, 812-4760
  • The Mt Vernon AE Stove and Insert Models use feed assembly part, SRV7034-004


Replacement For Part Number:

  • SRV7080-010

UPC: 652174716388

Compatible Models

    Quadra-Fire

  • Mt Vernon E2 FS
  • Mt Vernon E2i
  • Trekker Insert
  • Trekker

Technical Specs

RPM 2.4
Direction CW
Amps 1
Volts 115/120
Connector 3-PIN Molex

Instructions

Install Instructions For Quadra-Fire Trekker & Mt Vernon E2 and E2-C Feed Motor Assembly: SRV7080-010-AMP

The feed system is accessed on the right side of the unit. There are two hooks the assembly hangs from at the top and there is a single phillips screw that holds the assembly in place located at the bottom of the motor mount. The hollow feed spring (auger) pulls pellets up the feed tube from the hopper area and drops them down the feed chute into the fire pot.

  • The whole assembly can be removed by disconnecting the power at the molex connection, loosening the phillips head screw under the motor on the motor bracket and, pulling the feed assembly out of the feed tube.
  • The power can be reconnected for testing once the assembly is out of the machine.
  • NOTE*- To test the assembly out of the feed tube, stuff a rag into the top of the feed tube where the assembly was mounted to simulate a closed off top which will allow the pressure/ vacuum switch to close once the stove is powered on.

Troubleshooting

Mt Vernon E2/ Trekker Troubleshooting

Download the Mt Vernon E2 Owner's Manual .PDF

Review a List of Error Codes

Before you begin troubleshooting the feed system

  • Make sure the Thermostat (TSAT) has good batteries.
  • Make sure the receiver in the stove has fresh batteries.
  • Make sure that the stove control dial is set to 'OFF'.
  • Make sure that the TSTAT is calling for heat.
  • Make sure there are pellets in the hopper.

Test at Priming Sequence

To engage the system without going through the entire ignition cycle you can simply perform a 'PRIME" cycle. Turn the dial control to OFF and then up to HIGH 2 times to prime.

  • The "GREEN' light should come on solid.
  • The combustion/ exhaust blower will come on
  • Once the blower has climbed to full speed, the vacuum switch will close.
  • Provided there is a closed circuit to the feed motor, through both safety snap discs, the vacuum switch and, the hopper lid switch, the feed motor will run continuously for 2 minutes.

If your unit is not feeding pellets...

  1. If the feed system was recently removed or a new one was installed prior to feeding problems
  2. Make sure the feed system is mounted correctly.
  3. The top of the motor bracket must be hanging on both of two upper hooks.
  4. The bottom of the feed system needs to be secured with the phillips screw.
  5. The gasket for the feed system must be under the motor mount and between the top of the feed tube.
  6. The depth of the auger spring must be set to a depth of 13" from the bottom of the motor mount when secured to the feed motor.
  7. If the GREEN light comes on solid and there is no feed...
  8. Empty the hopper to look for an obstruction.
  9. Remove the feed assembly to check for obstructions.
  10. If no obstructions are found...
  11. Place a magnet directly on the hopper lid switch and try again, if this solves the problem, the switch is loose on the mount.
  12. Remove the pressure hose from the feed drop tube and look for an obstruction, clear it if anything was found, try again.
  13. Bypass the hopper lid switch (remove from circuit), if this solves the problem, replace the switch, SRV7000-375
  14. Verify the vent is not blocked, measure the draft reading at the vacuum switch, it should be about .22 WC. Bypass the vacuum switch, if the unit feeds, replace the vacuum switch, SRV7000-531
  15. If no problems are found...
  16. Remove the Feeder assembly and make sure...
  17. the set screws are tight
  18. the depth is correct, the spring isn't warped
  19. the motor is turning, if the motor is not turning, replace the motor, 812-4421 or entire feed system

To Test Start Up Sequence

The unit will go into the ignition start up sequence (the green LED will flash rapidly). The ignition sequence involves the exhaust blower and igniter turning on, and the feed motor running in two stages. The first stage involves the feed motor running continuously for about a minute to start loading pellets into the fire pot. In the second stage, the feed motor will begin cycling on and off.

Due to safety precautions

  1. If the dial control is turned to OFF and back on (even if by mistake) the unit will go through the shutdown sequence before restarting.
  2. If the thermostat is turned to “OFF” during operation the appliance will go through a shutdown sequence before restarting.
  3. Each of these scenarios will ad approximately 10 minutes of delayed runtime as the stove needs to cycle through this safety protocol prior to starting.

Warranty

Unfortunately, sometimes products do not work like they are supposed to. We offer a 90 day warranty on manufacturer defects. Some manufacturers make this a very simple and easy process unfortunately others do not. Items must be used in accordance with the manufacturers guidelines to qualify for warranty replacement. Please be advised that warranty claims for these parts may take up to 4 weeks for processing, and customers must cover shipping.

Shipping Information

This Item Qualifies For Free Shipping!

When Will My Order Ship?

All orders are typically processed within 24 hours of receiving payment and are shipped from us same day if placed before our shipping cutoff time (Monday - Friday: 12PM, Saturday: 10AM, Sunday: No Shipping), orders placed after our cutoff time are shipped the next morning.

Do You Offer Express Shipping?

Yes! Please note the shipping times are based on business days, weekends and holidays do not count to the delivery date. Please see our expedited ship time schedules here.

How Does Free Shipping Work?

Most orders over $99 qualify for free shipping! Orders which ship for free are shipped with either USPS or UPS based on our discretion. If you are using a PO box, free shipping orders will always go USPS.

Do You Ship To Canada?

We ship to Canada! We estimate USPS to take 4-10 days once receiving your package from us. We do not offer expedited shipping of any kind to Canada. Please allow an extra 2-5 days for all shipments to Canada. Free shipping is not available to Canada.

Do You Ship To Alaska Or Hawaii?

We ship to both Alaska and Hawaii! We do not offer next day or two day shipping to Alaska or Hawaii. Free shipping is not available to Alaska or Hawaii.

Do You Ship Outside The US Or Canada?

Unfortunately, at this time we do not offer international shipping other than to Canada.

Shipping Time Estimations

For information on shipping time estimations, see the Shipping Information & Transit Times on the shipping page.

Learn More About Our Shipping Information
Jump back to product information tab navigation

Description

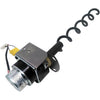
This is the entire feed assembly used for the freestanding and insert versions of the Quadra-Fire Mt Vernon E2, MtVernon E2-C and the Trekker. The same feed system is used for both freestanding and insert model versions.

This assembly includes the following parts:

  • 4 x 8-32 x 3/8'' Black Oxide Screws 
  • 1 x 2.4 RPM Auger Feed Motor (812-4421)
  • 1 x 7/8'' Auger Collar with Set Screw (229-0520)
  • 1 x  Nylon Auger Bearing (SRV7000-598)
  • 1 x  Feed Motor Bracket (7034-143)
  • 1 x  Feed Motor Gasket (SRV7034-144)
  • 1 x Feed Spring / Auger Shaft 14.5'' (SRV7001-046) 

This kit uses aftermarket parts where applicable to help you save big!


This assembly includes the following parts:


**NOTES**


  • Final bearing height adjustment may be required by the installer, instructions included. Download PDF
  • This assembly is used on the Mt Vernon E2/ Trekker Models.
  • The Mt Vernon Stove (original model 2002-06) uses feed assembly part, 812-4760
  • The Mt Vernon AE Stove and Insert Models use feed assembly part, SRV7034-004


Replacement For Part Number:

  • SRV7080-010

UPC: 652174716388

Technical Specs

RPM 2.4
Direction CW
Amps 1
Volts 115/120
Connector 3-PIN Molex

Instructions

Install Instructions For Quadra-Fire Trekker & Mt Vernon E2 and E2-C Feed Motor Assembly: SRV7080-010-AMP

The feed system is accessed on the right side of the unit. There are two hooks the assembly hangs from at the top and there is a single phillips screw that holds the assembly in place located at the bottom of the motor mount. The hollow feed spring (auger) pulls pellets up the feed tube from the hopper area and drops them down the feed chute into the fire pot.

  • The whole assembly can be removed by disconnecting the power at the molex connection, loosening the phillips head screw under the motor on the motor bracket and, pulling the feed assembly out of the feed tube.
  • The power can be reconnected for testing once the assembly is out of the machine.
  • NOTE*- To test the assembly out of the feed tube, stuff a rag into the top of the feed tube where the assembly was mounted to simulate a closed off top which will allow the pressure/ vacuum switch to close once the stove is powered on.

Troubleshooting

Mt Vernon E2/ Trekker Troubleshooting

Download the Mt Vernon E2 Owner's Manual .PDF

Review a List of Error Codes

Before you begin troubleshooting the feed system

  • Make sure the Thermostat (TSAT) has good batteries.
  • Make sure the receiver in the stove has fresh batteries.
  • Make sure that the stove control dial is set to 'OFF'.
  • Make sure that the TSTAT is calling for heat.
  • Make sure there are pellets in the hopper.

Test at Priming Sequence

To engage the system without going through the entire ignition cycle you can simply perform a 'PRIME" cycle. Turn the dial control to OFF and then up to HIGH 2 times to prime.

  • The "GREEN' light should come on solid.
  • The combustion/ exhaust blower will come on
  • Once the blower has climbed to full speed, the vacuum switch will close.
  • Provided there is a closed circuit to the feed motor, through both safety snap discs, the vacuum switch and, the hopper lid switch, the feed motor will run continuously for 2 minutes.

If your unit is not feeding pellets...

  1. If the feed system was recently removed or a new one was installed prior to feeding problems
  2. Make sure the feed system is mounted correctly.
  3. The top of the motor bracket must be hanging on both of two upper hooks.
  4. The bottom of the feed system needs to be secured with the phillips screw.
  5. The gasket for the feed system must be under the motor mount and between the top of the feed tube.
  6. The depth of the auger spring must be set to a depth of 13" from the bottom of the motor mount when secured to the feed motor.
  7. If the GREEN light comes on solid and there is no feed...
  8. Empty the hopper to look for an obstruction.
  9. Remove the feed assembly to check for obstructions.
  10. If no obstructions are found...
  11. Place a magnet directly on the hopper lid switch and try again, if this solves the problem, the switch is loose on the mount.
  12. Remove the pressure hose from the feed drop tube and look for an obstruction, clear it if anything was found, try again.
  13. Bypass the hopper lid switch (remove from circuit), if this solves the problem, replace the switch, SRV7000-375
  14. Verify the vent is not blocked, measure the draft reading at the vacuum switch, it should be about .22 WC. Bypass the vacuum switch, if the unit feeds, replace the vacuum switch, SRV7000-531
  15. If no problems are found...
  16. Remove the Feeder assembly and make sure...
  17. the set screws are tight
  18. the depth is correct, the spring isn't warped
  19. the motor is turning, if the motor is not turning, replace the motor, 812-4421 or entire feed system

To Test Start Up Sequence

The unit will go into the ignition start up sequence (the green LED will flash rapidly). The ignition sequence involves the exhaust blower and igniter turning on, and the feed motor running in two stages. The first stage involves the feed motor running continuously for about a minute to start loading pellets into the fire pot. In the second stage, the feed motor will begin cycling on and off.

Due to safety precautions

  1. If the dial control is turned to OFF and back on (even if by mistake) the unit will go through the shutdown sequence before restarting.
  2. If the thermostat is turned to “OFF” during operation the appliance will go through a shutdown sequence before restarting.
  3. Each of these scenarios will ad approximately 10 minutes of delayed runtime as the stove needs to cycle through this safety protocol prior to starting.
Warranty

Unfortunately, sometimes products do not work like they are supposed to. We offer a 90 day warranty on manufacturer defects. Some manufacturers make this a very simple and easy process unfortunately others do not. Items must be used in accordance with the manufacturers guidelines to qualify for warranty replacement. Please be advised that warranty claims for these parts may take up to 4 weeks for processing, and customers must cover shipping.

Shipping Info

This Item Qualifies For Free Shipping!

When Will My Order Ship?

All orders are typically processed within 24 hours of receiving payment and are shipped from us same day if placed before our shipping cutoff time (Monday - Friday: 12PM, Saturday: 10AM, Sunday: No Shipping), orders placed after our cutoff time are shipped the next morning.

Do You Offer Express Shipping?

Yes! Please note the shipping times are based on business days, weekends and holidays do not count to the delivery date. Please see our expedited ship time schedules here.

How Does Free Shipping Work?

Most orders over $99 qualify for free shipping! Orders which ship for free are shipped with either USPS or UPS based on our discretion. If you are using a PO box, free shipping orders will always go USPS.

Do You Ship To Canada?

We ship to Canada! We estimate USPS to take 4-10 days once receiving your package from us. We do not offer expedited shipping of any kind to Canada. Please allow an extra 2-5 days for all shipments to Canada. Free shipping is not available to Canada.

Do You Ship To Alaska Or Hawaii?

We ship to both Alaska and Hawaii! We do not offer next day or two day shipping to Alaska or Hawaii. Free shipping is not available to Alaska or Hawaii.

Do You Ship Outside The US Or Canada?

Unfortunately, at this time we do not offer international shipping other than to Canada.

Shipping Time Estimations

For information on shipping time estimations, see the Shipping Information & Transit Times on the shipping page.

Learn More About Our Shipping Information

Customer Reviews

Be the first to write a review
0%
(0)
0%
(0)
0%
(0)
0%
(0)
0%
(0)

QUESTIONS & ANSWERS

If your question does not concern this specific product, use our contact form

Have a Question?

Be the first to ask a question about this.

Ask a Question

Customer Reviews

Be the first to write a review
0%
(0)
0%
(0)
0%
(0)
0%
(0)
0%
(0)
Liquid error (layout/theme line 255): Could not find asset snippets/iStock-notify-me.liquid