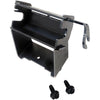
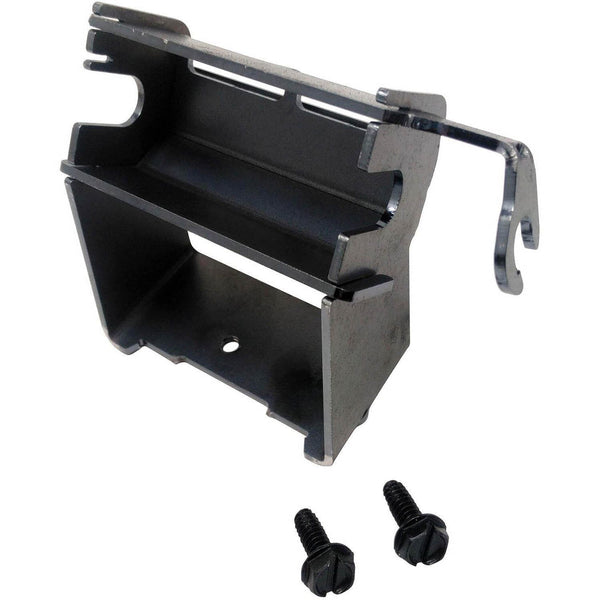
Install Instructions For Harman Absolute 43 Igniter Bracket: 1-00-777906
Igniter Cradle/Holder Installation Instructions:
1.) The igniter cradle/holder is located in the burn pot. (To access the cradle you must loosen the two wing nuts securing the burn pot clean-out cover to the bottom of the pot. Once both wing nuts are loosened the cover plate can be removed).
2.) From the front of the stove, remove the two 5/16" or 8mm screws that hold the igniter cradle inside the burn pot. This will allow the cradle to drop out (Do not discard these screws).
3.) To remove the igniter from the old-style cradle/holder, twist the two tabs that secure the flat plate to the ignitor. Your old igniter can now be removed (Pay special attention to how the ignitor is positioned in the cradle).
4.) Position your ignitor into the new cradle (If you are replacing the igniter at this time follow the instructions below on igniter replacement).
5.) Position the new cradle/holder in the same orientation as the previous holder and install the cradle using the two 5/16" or 8mm mounting screws (Updated cradles do not have a retainer plate).
6.) The new cradle/holder will have 2 holes for additional screws under the ignitor. Gently tighten these screws. This will push the igniter against the bottom of the burn pot (Do not over-tighten these screws).
Igniter Installation Instructions:
1.) The igniter is located in the burn pot. (To access the ignitor you must first loosen the two wing nuts securing the burn pot clean-out cover to the bottom of the pot. Once both wing nuts are loosened the cover plate can be removed).
2.) The igniter is accessed and changed through the front of the stove, but you will also need to access the rear of the stove to free the wiring.
3.) From the rear of the unit, locate the yellow and light blue wires for the igniter at the point where they pass through the neck of the burn pot into the rear of the stove, it is directly under the auger (On freestanding stoves this will require that the rear / side shields are removed. When replacing the ignitor on an insert the unit will need to be slid forward and pulled out of the firebox. On some units, there may be a small rubber grommet or a dab of high temp silicone where the ignitor wires transition to the back of the unit.)
4.) In this area you should notice extra wire looped together (Likely, this excess wire will be secured in position with a zip tie). This extra wire needs to be freed up so that the disconnects can be pulled forward and disconnected from the neck of the burn pot. This can be done by carefully cutting the zip tie and gently pushing about 12" of the yellow and light blue wire into the cavity of the stove where the ignitor is located.
5.) From the front of the stove, remove the two 5/16" or 8mm screws that hold the igniter cradle inside the burn pot (Do not discard these screws).
6.) Drop the igniter assembly down and pull it forward until you can see the wire disconnects, then disconnect the wires from the harness and remove the whole assembly.
7.) To remove the igniter from the (old style) cradle, twist the two tabs that secure the flat plate to the ignitor. Your old igniter can now be removed (Pay special attention to how the ignitor is positioned in the cradle. The replacement will be positioned in the same way).
8.) Position your new ignitor in the cradle and reinstall the cradle using the two 5/16" or 8mm mounting screws (The updated cradle does not have a retainer plate).
9.) From the rear of the unit, gently pull the excess wire you previously feed forward to remove the slack, coil the extra wire length, and secure it with a zip tie.
10.) Reinstall the cover plate and test your ignitor to ensure it is operating correctly.


