Skip to main content
Product title:

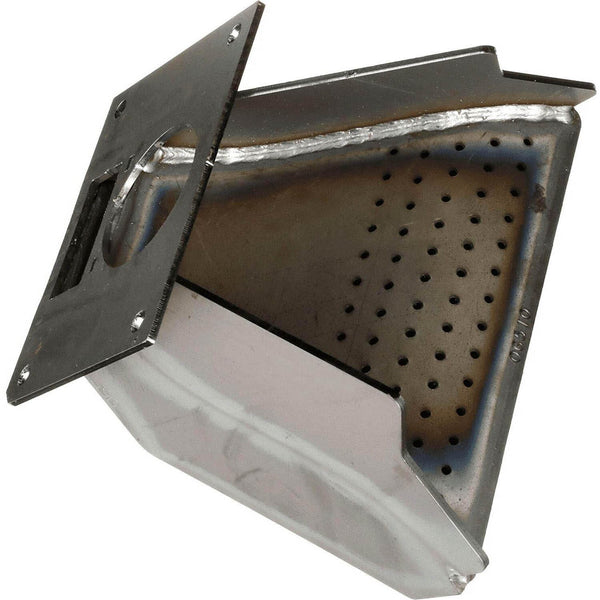
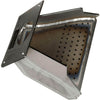
Harman Burn Pot Weldment: 1-10-05802

Product rating:
Product price:
$279.99
Product SKU ! 1-10-05802
Product MPN ! 1-10-05802
Product availability: In Stock
Bullet point features

Frequently Bought Together

Total Price: $327.97

Description

Harman Pellet Stove Burn Pot Weldment: 1-10-05802.  The original version of this burnpot did not allow for automatic ignition.  This burnpot can be used on compatible models with or without auto ignition.  It is important to periodically inspect your burn pot to make sure it is not warped and that there are no cracks forming.  If your burn pot shows signs of warpage or cracks beginning to form it should be replaced. 

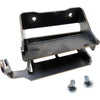
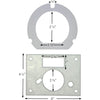
Fig.1.1 - 1-10-5802 Burnpot Weldment

Fig.1.2 - 3-20-677200 Igniter

Fig.1.3 - 1-00-777907 Adjustable Igniter Cradle

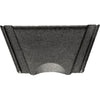
Fig.1.4/ 1.5 - 1-00-06623 Burnpot Cover with Wingscrews (included)


Replacement For Part Number:

  • 1-10-05802

View Compatible Models

UPC: 652174547906

Compatible Models

    Harman

  • Invincible Insert
  • Invincible RS
  • Invincible T
  • P61-A
  • P61-C
  • P61A
  • Pellet Pro II

Technical Specs

Instructions

Install Instructions For Harman Burn Pot Weldment: 1-10-05802


  1. Unplug your stove and make sure that the unit is cool to the touch.
  2. The igniter is located inside if the burnpot. From the rear of the stove, find the yellow and light blue colored wires that are coiled up and secured to the wiring harness. Cut the zip ties that hold this collection of wire together (When the burn pot is removed, this extra wire is what will be fed back into the neck of the burn pot).
  3. Locate and remove the (4) 1/2" nuts that secure the burnpot to the feeder weldment's threaded rods (You may need a universal joint at the end of your socket wrench to make the connection at the top nuts).
  4. Pull the burnpot assembly forward until the yellow and light blue wires are visible, then disconnect the igniter wires. Now the burn pot is free to come out of the stove
  5. Remove the two 5/16" screws that attach the igniter cradle in to the burnpot and remove the igniter assembly.
  6. If you are replacing your igniter, do this now while the burnpot is free from the stove.
  7. Make sure to run the wires for the igniter through the right-side opening at the rear of the burn pot
  8. Replace your burnpot gasket, make sure your yellow and light blue wires are passing through the hole and through the center of the gasket.
  9. Connect your igniter wires and pull the yellow and light blue wires from the back of the stove so that the disconnects pass backward through the opening (Try to take out as much slack in the igniter wires as possible so that they aren't pinch by the burnpot when it is fit into place).
  10. Replace your new burn pot over the threaded rods and tighten down all 4 1/2" hex nuts. You will feel the new gasket compress as you tighten the burnpot down, this is normal (It is best to tighten the nuts by hand at the start. Then proceed by tightening in a crisscross pattern. This will ensure that the burn pot seats evenly against the back of the unit).
  11. Replace the clean out cover and secure your wires in the rear of the stove.

Troubleshooting

-The burnpot is a central part of the Harman Pro Pellet Feed System. Often, your burn pot will last for the life of the unit. It is important to periodically inspect the pot to make sure it is not warping and there are no cracks forming. If you notice any of these issues the burn pot should be replaced.


If you are having delayed ignitions and can verify that the igniter is getting hot:


  1. Tighten the four 1/2" nuts that secure the burnpot.
  2. Replace your door gasket and the ash pan gasket if you have separate doors
  3. Look at your door handle to make sure the components of the handle and the catch on the stove are in working order
  4. Make sure the hopper lid is making a tight seal.

Warranty

Unfortunately, sometimes products do not work like they are supposed to. We offer a 90 day warranty on manufacturer defects. Some manufacturers make this a very simple and easy process unfortunately others do not. Items must be used in accordance with the manufacturers guidelines to qualify for warranty replacement. Please be advised that warranty claims for these parts may take up to 4 weeks for processing, and customers must cover shipping.

Shipping Information

This Item Qualifies For Free Shipping!

HOLIDAY UPDATE
Due to the upcoming Christmas and New Years holidays, shippers will not be picking up on the dates below. Additionally, packages may take longer to arrive than expected. We appreciate your understanding and patience during this time.

  • USPS: No pickup on Dec 24th, Dec 25th, and Jan 1st.
  • UPS: No pickup on Dec 24th (except NDA and 2nd Day), Dec 25th, Dec 31st (except NDA and 2nd Day), and Jan 1st.
CANADA UPDATE

Due to the ongoing Canada Post postal workers' strike, we are forced to suspend all ordering to Canada. Please be advised that any shipments that did not clear U.S. customs by November 15th will be delayed until Canada Post is fully operational. We appreciate your understanding and patience during this time.

When Will My Order Ship?

All orders are typically processed within 24 hours of receiving payment and are shipped from us same day if placed before our shipping cutoff time (Monday - Friday: 12PM, Saturday: 10AM, Sunday: No Shipping), orders placed after our cutoff time are shipped the next morning.

Do You Offer Express Shipping?

Yes! Please note the shipping times are based on business days, weekends and holidays do not count to the delivery date. Please see our expedited ship time schedules here.

How Does Free Shipping Work?

Most orders over $49 qualify for free shipping! Orders which ship for free are shipped with either USPS or UPS based on our discretion. If you are using a PO box, free shipping orders will always go USPS.

Do You Ship To Canada?

We ship to Canada! We estimate USPS to take 4-10 days once receiving your package from us. We do not offer expedited shipping of any kind to Canada. Please allow an extra 2-5 days for all shipments to Canada. Free shipping is not available to Canada.

Do You Ship To Alaska Or Hawaii?

We ship to both Alaska and Hawaii! We do not offer next day or two day shipping to Alaska or Hawaii. Free shipping is not available to Alaska or Hawaii.

Do You Ship Outside The US Or Canada?

Unfortunately, at this time we do not offer international shipping other than to Canada.

Shipping Time Estimations

For information on shipping time estimations, see the Shipping Information & Transit Times on the shipping page.

Learn More About Our Shipping Information
Jump back to product information tab navigation

Description

Harman Pellet Stove Burn Pot Weldment: 1-10-05802.  The original version of this burnpot did not allow for automatic ignition.  This burnpot can be used on compatible models with or without auto ignition.  It is important to periodically inspect your burn pot to make sure it is not warped and that there are no cracks forming.  If your burn pot shows signs of warpage or cracks beginning to form it should be replaced. 

Fig.1.1 - 1-10-5802 Burnpot Weldment

Fig.1.2 - 3-20-677200 Igniter

Fig.1.3 - 1-00-777907 Adjustable Igniter Cradle

Fig.1.4/ 1.5 - 1-00-06623 Burnpot Cover with Wingscrews (included)


Replacement For Part Number:

  • 1-10-05802

View Compatible Models

UPC: 652174547906

Instructions

Install Instructions For Harman Burn Pot Weldment: 1-10-05802


  1. Unplug your stove and make sure that the unit is cool to the touch.
  2. The igniter is located inside if the burnpot. From the rear of the stove, find the yellow and light blue colored wires that are coiled up and secured to the wiring harness. Cut the zip ties that hold this collection of wire together (When the burn pot is removed, this extra wire is what will be fed back into the neck of the burn pot).
  3. Locate and remove the (4) 1/2" nuts that secure the burnpot to the feeder weldment's threaded rods (You may need a universal joint at the end of your socket wrench to make the connection at the top nuts).
  4. Pull the burnpot assembly forward until the yellow and light blue wires are visible, then disconnect the igniter wires. Now the burn pot is free to come out of the stove
  5. Remove the two 5/16" screws that attach the igniter cradle in to the burnpot and remove the igniter assembly.
  6. If you are replacing your igniter, do this now while the burnpot is free from the stove.
  7. Make sure to run the wires for the igniter through the right-side opening at the rear of the burn pot
  8. Replace your burnpot gasket, make sure your yellow and light blue wires are passing through the hole and through the center of the gasket.
  9. Connect your igniter wires and pull the yellow and light blue wires from the back of the stove so that the disconnects pass backward through the opening (Try to take out as much slack in the igniter wires as possible so that they aren't pinch by the burnpot when it is fit into place).
  10. Replace your new burn pot over the threaded rods and tighten down all 4 1/2" hex nuts. You will feel the new gasket compress as you tighten the burnpot down, this is normal (It is best to tighten the nuts by hand at the start. Then proceed by tightening in a crisscross pattern. This will ensure that the burn pot seats evenly against the back of the unit).
  11. Replace the clean out cover and secure your wires in the rear of the stove.

Troubleshooting

-The burnpot is a central part of the Harman Pro Pellet Feed System. Often, your burn pot will last for the life of the unit. It is important to periodically inspect the pot to make sure it is not warping and there are no cracks forming. If you notice any of these issues the burn pot should be replaced.


If you are having delayed ignitions and can verify that the igniter is getting hot:


  1. Tighten the four 1/2" nuts that secure the burnpot.
  2. Replace your door gasket and the ash pan gasket if you have separate doors
  3. Look at your door handle to make sure the components of the handle and the catch on the stove are in working order
  4. Make sure the hopper lid is making a tight seal.

Warranty

Unfortunately, sometimes products do not work like they are supposed to. We offer a 90 day warranty on manufacturer defects. Some manufacturers make this a very simple and easy process unfortunately others do not. Items must be used in accordance with the manufacturers guidelines to qualify for warranty replacement. Please be advised that warranty claims for these parts may take up to 4 weeks for processing, and customers must cover shipping.

Shipping Info

This Item Qualifies For Free Shipping!

HOLIDAY UPDATE
Due to the upcoming Christmas and New Years holidays, shippers will not be picking up on the dates below. Additionally, packages may take longer to arrive than expected. We appreciate your understanding and patience during this time.

  • USPS: No pickup on Dec 24th, Dec 25th, and Jan 1st.
  • UPS: No pickup on Dec 24th (except NDA and 2nd Day), Dec 25th, Dec 31st (except NDA and 2nd Day), and Jan 1st.
CANADA UPDATE

Due to the ongoing Canada Post postal workers' strike, we are forced to suspend all ordering to Canada. Please be advised that any shipments that did not clear U.S. customs by November 15th will be delayed until Canada Post is fully operational. We appreciate your understanding and patience during this time.

When Will My Order Ship?

All orders are typically processed within 24 hours of receiving payment and are shipped from us same day if placed before our shipping cutoff time (Monday - Friday: 12PM, Saturday: 10AM, Sunday: No Shipping), orders placed after our cutoff time are shipped the next morning.

Do You Offer Express Shipping?

Yes! Please note the shipping times are based on business days, weekends and holidays do not count to the delivery date. Please see our expedited ship time schedules here.

How Does Free Shipping Work?

Most orders over $49 qualify for free shipping! Orders which ship for free are shipped with either USPS or UPS based on our discretion. If you are using a PO box, free shipping orders will always go USPS.

Do You Ship To Canada?

We ship to Canada! We estimate USPS to take 4-10 days once receiving your package from us. We do not offer expedited shipping of any kind to Canada. Please allow an extra 2-5 days for all shipments to Canada. Free shipping is not available to Canada.

Do You Ship To Alaska Or Hawaii?

We ship to both Alaska and Hawaii! We do not offer next day or two day shipping to Alaska or Hawaii. Free shipping is not available to Alaska or Hawaii.

Do You Ship Outside The US Or Canada?

Unfortunately, at this time we do not offer international shipping other than to Canada.

Shipping Time Estimations

For information on shipping time estimations, see the Shipping Information & Transit Times on the shipping page.

Learn More About Our Shipping Information
Customer Reviews

Based on 1 review
100%
(1)
0%
(0)
0%
(0)
0%
(0)
0%
(0)
J
Jose G.
All parts

Got all my parts on time that I ordered to convert my p61 to P61a

QUESTIONS & ANSWERS

If your question does not concern this specific product, use our contact form

Have a Question?

Be the first to ask a question about this.

Ask a Question

Customer Reviews

Based on 1 review
100%
(1)
0%
(0)
0%
(0)
0%
(0)
0%
(0)
J
Jose G.
All parts

Got all my parts on time that I ordered to convert my p61 to P61a

Liquid error (layout/theme line 255): Could not find asset snippets/iStock-notify-me.liquid