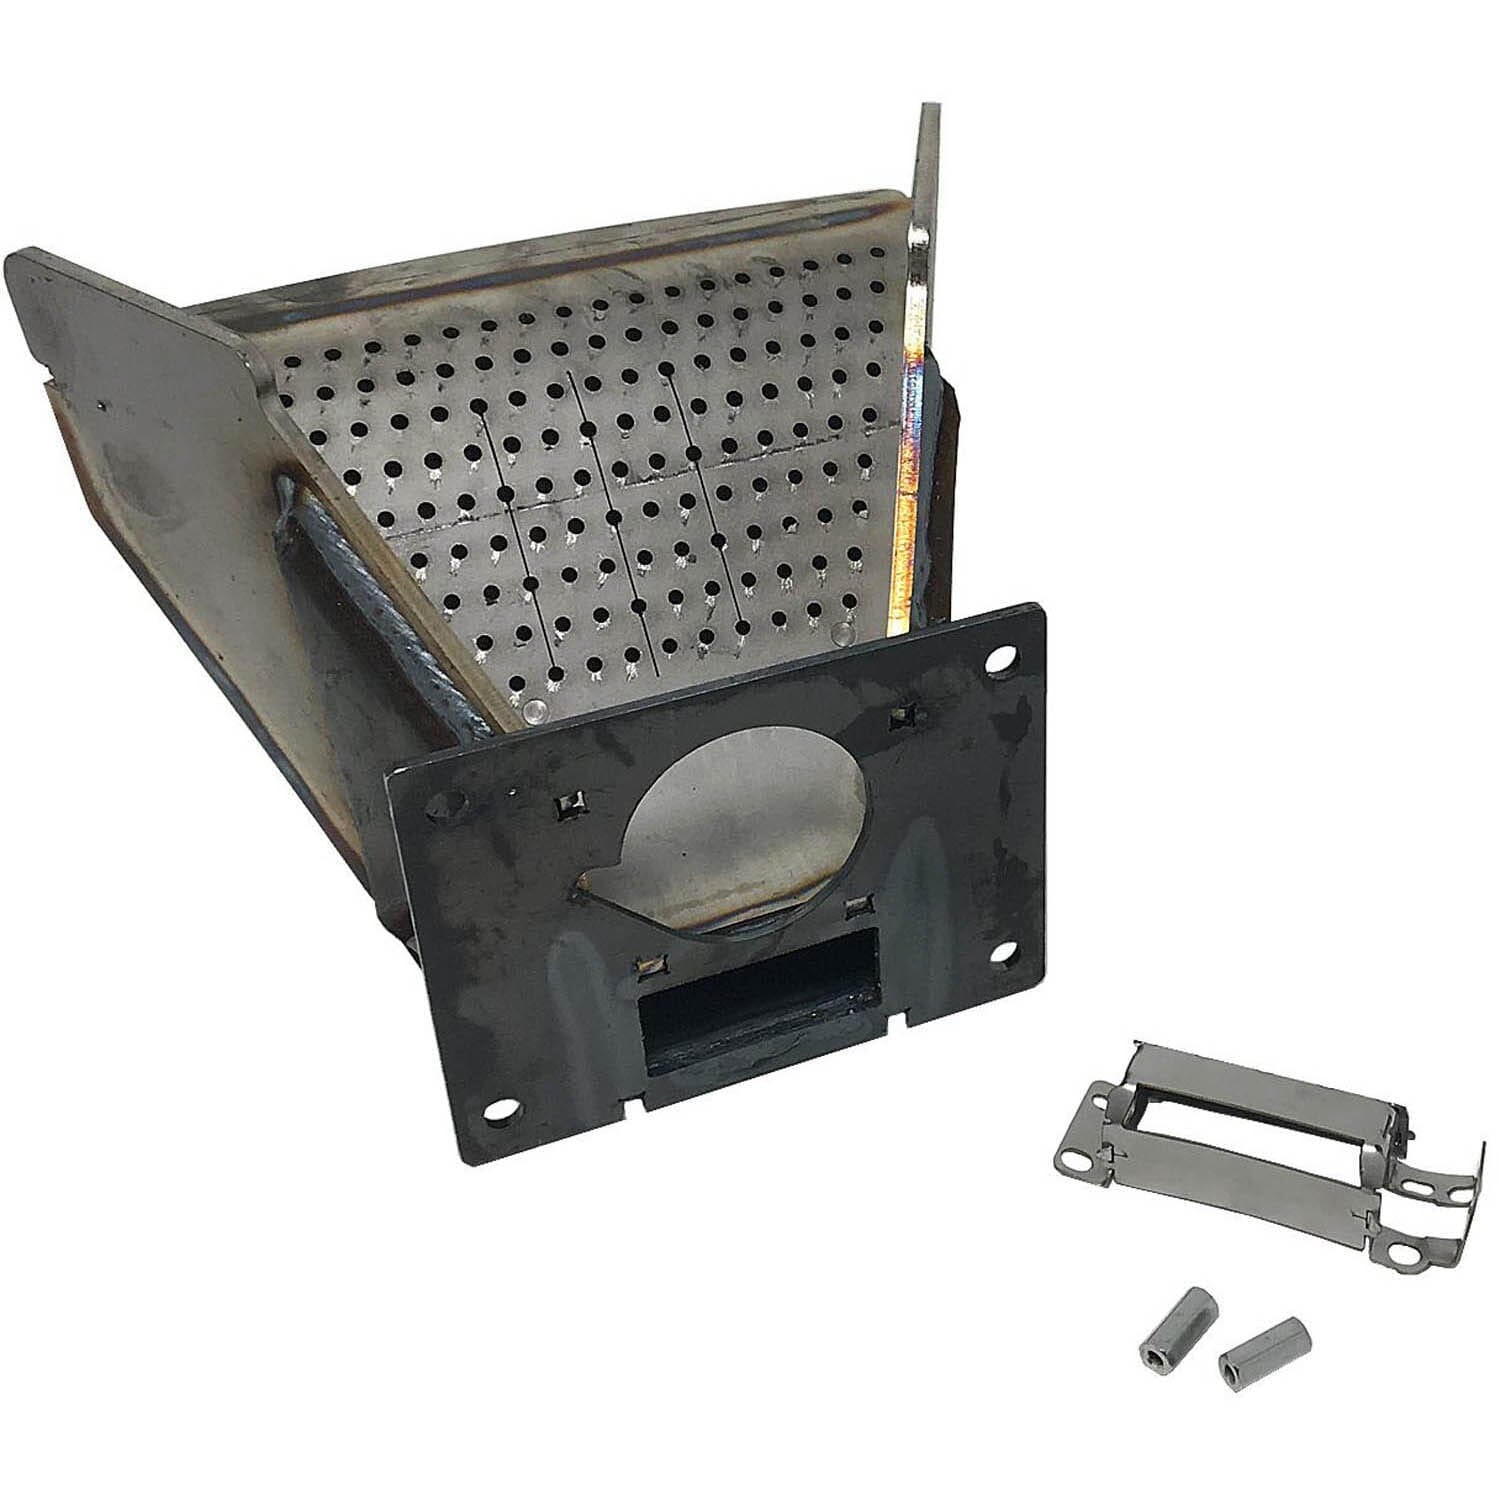
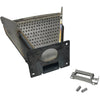
This updated burnpot weldment kit for the PF100 and PB105 pellet furnaces and boilers has been redesigned with stronger metal and expansion lines in the steel to allow for proper heat expansion. Earlier models will have burnpots that can "bubble" on the fire surface just above the igniter.
When using on units with pressure ignition, an igniter bracket is not necessary.
When removing the old burnpot take special care not to break the ceramic insert.
Included in this kit:
- 1 x Burn Pot Assy (1-10-7356)
- 1 x Igniter Bracket (2-00-24778)
- 1 x Ceramic Insert (3-20-05238)
- 1 x Ceramic Gasket (3-44-72411)
- 2 x Rod Couplings (3-31-08741)
NOTE: PF100 & PB105 early models with cartridge igniter will need a new stainless steel bracket. Due to the igniter holes in this new burnpot being in a slightly different location than the older burnpots the unit starts the charge cycle (the length of time the feeder pushes pellets into the burnpot each time the unit tries to light) will need to be changed. See Dipswitch Chart Below (dipswitch 1, 2, 3). Note: When using cartridge ignition; understand this, more pellets over the igniter holes are NOT BETTER than fewer pellets over the igniter holes. The proper amount will only cover the second row of holes from the bottom. Too much fuel during an ignition cycle takes longer to light, makes more smoke, and has a greater chance of having a post ignition violent ignition (this is when you hear a loud pop or thud when the first flame becomes visible). Due to the fact that there were different auger motors and pusher arms used over the years, we cannot give you exact dipswitch settings and will require some observation and adjustments to be set by the installer.
The PF100 and PB105 are being manufactured with an upgraded burn pot able to withstand higher temperatures. This improvement started with serial #008353238 for the PF100 and serial #008341569 for the PB105. You can upgrade older units by ordering part #1-00-73560, The Burn Pot Kit that includes Burn pot, igniter bracket & ceramic insert. Note: early models of the PF100 & PB105 with cartridge igniter will also need a new stainless steel bracket (Part #1-00-247787)
HARMAN PF100 AND PB105 BURNPOT UPGRADE KIT Effective 9/30/13, the PF100 and PB105 are being manufactured with an upgraded burn pot able to withstand higher temperatures. This improvement started with serial #008353238 for the PF100 and serial #008341569 for the PB105. You can upgrade older units by ordering service part #1-00-73560.
Kit Contents
- 1 x Burnpot Assy (1-10-7356)
- 1 x Igniter Bracket (2-00-24778)
- 1 x Ceramic Insert (3-20-0523)
- 2 x Rod Couplings (3-31-08741)
Note: Does NOT include gasket 3-44-72411
Replacement For Part Numbers:
- 1-00-73560
- 1-10-7340
- 1-10-73403
- 1-10-73546A
UPC: 652174712656